Written by Painless360
Introduction
In the last article, we looked at one of the versions of Cleanflight/Betaflight that had focused on the GPS code and also spending time on supporting us fixed wing pilots too.
That software is called iNavflight and allows us to add some pretty cool features and flight modes to our fixed-wing models without spending hundreds and hundreds of dollars/pounds on technology.
iNavflight runs on lots of the common flight controller used by quadcopter pilots as well as industry-standard GPS modules too. So for less than £40, you can have all the technology you need to get cracking on, adding launch assisted, advanced stabilization/self-righting and GPS hold/return to home and extra failsafe’s to your favorite ‘planes'.
iNavflight isn’t just for fixed-wing models though, it was originally designed as a version of Cleanflight where the GPS flight modes worked with modern GPS units and systems. The sensors you need on the model are slightly different for iNavflight with installation on a fixed-wing model being the easiest in terms of board and GPS selection and setup.
Installation isn’t too difficult and for any multirotor builders setup is super simple, we will be looking at this technology and assuming a low level of knowledge so that any fixed-wing pilot with a basic understanding of the technology on their radio and model should be able to install and setup this technology quickly and successfully.
What a flight controller and GPS to do for a fixed-wing model...

In the first article, we looked at how adding extra technology like a flight controller and GPS could do for many pilots with different experiences flying fixed-wing.
Multirotor pilots have relied on this technology to be able to fly since the very early days and are used to understand the advantages of having a little electronic ‘brain’ doing hundreds of corrections a second and making sure the model is doing exactly what you need it to.
The benefit of this modern version of the technology is that you can decide how much, or how little, help and support you want when flying the model. Useful in case of emergency to give you more chance of the model making it back home safely. If you are a newer fixed-wing pilot you may want the same ‘auto-level’ features you used when learning with a drone to help you get into the air.
I use it for a handful of reasons most flying days and now consider installing iNav into most planes due to the following reasons...
GPS Return to home in the event of a problem
This is one of the nicest features of adding a GPS capable flight controller to the model.
If there is a problem then I can initiate the return to home mode and the fixed-wing model will climb to the pre-set altitude and doggedly make its way back to where it was launched. Once there it will circle that point, work is underway to improve the auto-landing feature on fixed-wing models too.
The iNav software also includes an excellent failsafe system so in the event of a problem the craft flew back to you.
This gives an extra level of protection for pilots with expensive models, equipment or flying in places where a fly away would cause additional problems for everyone.
Support for safer FPV flying
When flying the model using FPV, it’s easy to become engrossed in the experience. Having the ability to turn on an auto-level mode that limits the pitch and roll can be handy if you are looking for a relaxing bird’s eye view of the countryside. It can help with those models that have more aggressive tendencies, making the model easier to fly and combatting the effects of buffeting and wind in all airframes and styles of the model. Makes for a clearer view of the sky.
That GPS mode is even more useful here too, with FPV equipment adding an extra set of things that can go wrong to the flight, having the safety of hitting the ‘return to home’ switch on your radio will ensure you get the model back and don’t cause any more problems. I had a problem with a set of FPV goggles the other day that went black (battery problem) and I had no choice but to drop the model into the dirt and hope for the best. With iNav I’d have hit the ‘oh dear’ switch and watched the model fly back to me safely.
The last big boon for FPV pilots is that using a flight controller and GPS also allows you easily add an OSD to the FPV experience. You can see the amount of battery you have left, altitude, heading, location, distance, and things like direction to home too. iNav has all of these features and more built-in.
Ability to add auto-level for newer pilots learning to fly
You don’t have to be an experience scale modeler or FPV pilot to get benefits from adding a flight controller to the model. The last use case for iNav on a flight controller has been to make models easier to fly and harder to crash for newer pilots (and some not-so-new pilots too!)
While I agree that learning to fly a model without aids is a vital skill for any pilot, learning to fly and ending up every day with a broken model and a heavy heart can make the experience a little tougher. While not being something to use all the time, having it there is an excellent teaching aid.
Using things like ‘auto-level’ mode on models like wings can help a pilot get the feel of flying and remove some of the risks of going out of control.
It’s also handy for more experienced pilots when you have that ‘senior moment’ and loose orientation too!
How Does It Work

The flight controller sits between the radio receiver and the control surfaces and ESCs in the model. The software on the flight controller then flies the model using the ‘flight mode’ you have selected using one of the spare channels on the radio. Those ‘flight modes’ can be set to do nothing and simply pass the controls from the radio through to the control surfaces and motor without doing nothing or it can be set to fly the entire craft autonomously, with just about every setting in-between.
What the flight controller is actually doing is using its sensors (gyroscopes to detect rotation in all axis, accelerometers to detect movement, barometers to detect air pressure, magnetometers to detect the direction, and GPS sensor to work out location) along with the control inputs from you via the radio receiver to make sure the model is doing what you want it to, and not doing anything you don’t.
Adding the flight controller and GPS to a model that you already have and fly regularly is actually not as tricky as you think and in the next few articles, we will explore how to do that, step by step.
One of the more confusing things when looking at the documentation for iNav is that there are slightly different ‘sensors’ needed when looking at fixed-wing versus multirotor models. It’s worth us covering that now before we get are deeper into the series.
Why don’t we need a compass for the GPS flight modes on a fixed-wing?

One of the nice things with iNavflight is that the online manual and ‘wiki’ are in very good shape so taking a stroll through that documentation (alongside this ‘how-to’ of course!) is very useful.
One thing that you may notice is that the setup of the compass is critical to the GPS flight modes on a Multirotor and there isn’t a need for a compass at all on a fixed-wing model. How come?
For a model to calculate a course it needs to know three things – where it is, where is needs to get to, and what direction it’s pointing in. Once it knows these three basic things it can turn in the right direction and set forth for the next location/home.
The reason that a compass/magnetometer is needed on a multirotor is the fact that it can fly in any direction; forwards, backward, left, or right and still face the same direction. iNav needs to know the direction the model is in.
In a plane you can get away with a basic flight controller and GPS sensor, the compass and extra sensors like a barometer are not needed as a fixed-wing model is always flying with its nose forward (usually) so you can infer the direction but looking at how the GPS co-ordinates change from moment to moment and virtually drawing a line between them.
This is great news for us fixed-wing pilot as mounting a magnetometer on a model far enough from all of the magnetic fields that are caused by all the high power and other electronics can be a challenge.
Now we know why we just need a flight controller and GPS, let’s look at how we can choose both for our build...
Choosing a flight controller to use in the project

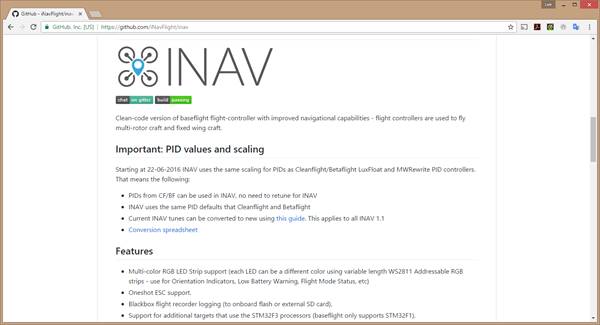
Here the choice isn’t too tricky, you can choose any of the boards that are supported by iNavflight. This is a list you can find on the Wiki pages we mentioned before (see part of the list in the image above).
I like using the all-in-one boards (sometimes called AIO) that make adding things later like an OSD very simple. Ideally, you want a flight controller that has enough PWM outputs for all of the controls you want on a fixed-wing (normally 6-8 PWM outputs) and has the basic 3 axis gyroscope and 3 axis accelerometer. You don’t need a barometer or on-board compass.
Choosing a GPS module for the project
This is even easier, just so with the recommendation from the Wiki for iNav.
We use M8N modules in all of the iNav builds and they are fast, accurate, and inexpensive. Always check the iNav documentation for the latest advice and features before you make a purchase.
Other considerations for your model
One thing you will need to consider is that there will be a slight increase in the amount of amperage needed for the 5v system on the ‘plane. This normally only powers the servos and radio receiver but the flight controller and GPS module will pull a little power too. Having 350-500mA of capacity spare in the UBEC in the model will be enough. Personally, I’d consider adding a separate switched 5v UBEC to power everything with something like a 3A rating. That way even in the event of a servo stalling the extra amperage shouldn’t cause a problem for anything else.
That extra power needed for the electronics will affect the flight time – very slightly. Most pilots would not see the difference but be aware of it.
Do consider the space inside the model too. Once everything is installed you shouldn’t need to access the flight controller at all, however, updates and changes will need access to the USB port so make sure you can get to it. You will need space internally for the flight controller to fit in level (ideally) and a place on the outside of the model for the GPS antenna. We mounted ours in a depression in the foam we cut to aid with airflow. It just needs a view of the sky.
Finally, as with adding anything to the model, it will affect the CG slightly, be prepared to move the battery slightly to compensate. Taking time to think about the position of these pieces can save a lot of time later on.
Summary
In the next article, we’ll look at how you download the software you need and start looking at how we can wire up the flight controller, GPS, and other pieces into your model.
So Stay tuned!
Hear it First: Join our Mailing List
Sign up to receive new product updates, exclusive discounts, news, and more!