Last Christmas, my family was kind enough to gift me an Anet A8 3D printer.
The Anet A8 comes flat packed in a large box and has to be assembled at home by yourself. It comes with all the tools and instruction CD, but you need lots of patience as the build can be tricky. (The hardest part though is understanding the instructions).
Once I had got it all assembled and working, I started the challenging task of learning how to use it correctly. Once I mastered that, I started looking for things to print, that I could use in my models. This presented a problem because I just could not find already designed items that would suit the aircraft that I was building. So I then had to sit down and learn how to design my own items for printing out with the printer.
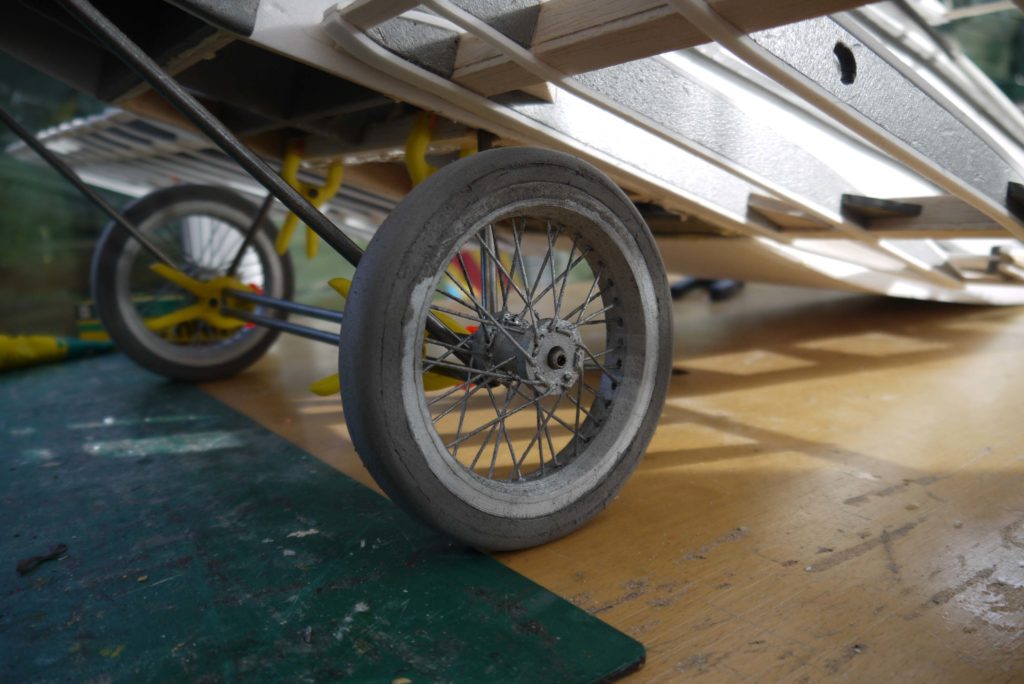
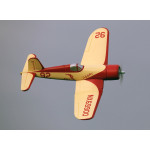
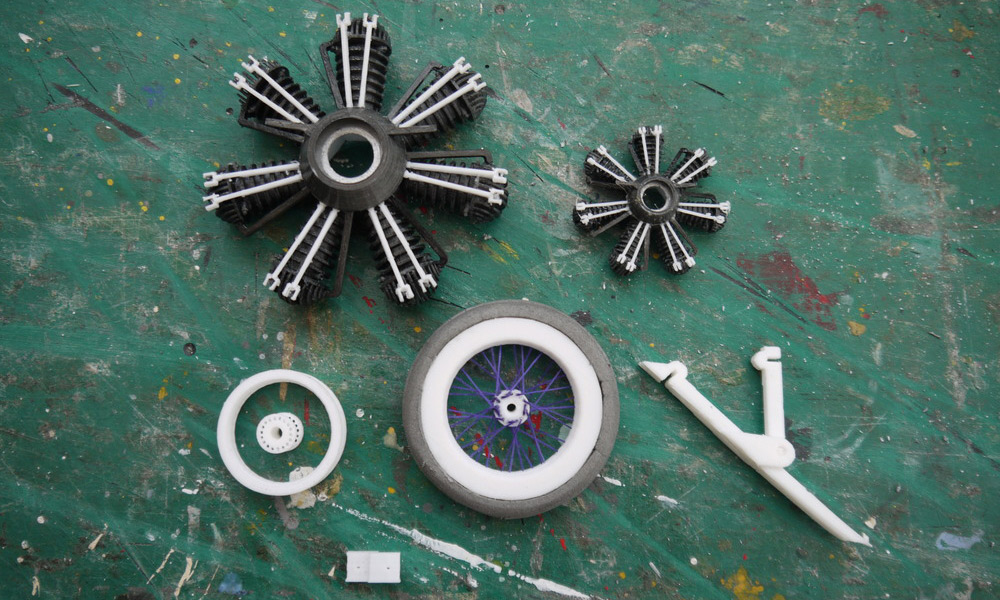
Over the last 4 months, I have managed to design and print out lots of simple little things like dashboards, control horns, sprung tail skids, and servo trays. I then decided to tackle the dummy engine for the ¼ scale Biplane that I am building at the moment. The engine was a great success and feeling pleased with my progress, I decided to tackle the large spoked wheels needed to finish off the undercarriage.
I first tried to print wheels with built-in spokes but found that it was almost impossible to do at my current level of designing skills. So then I tried solid wheels, but they just did not look or feel right. Then settled on making the rims and hubs separately for lacing together later in a jig.
My first problem was in how to design a rim with spoke holes that I could print off on my little basic printer without encountering too many problems. Being new to 3D design I have probably gone about it in totally the wrong way, but I have to say that it has worked out OK. I first draw up a 2D design of the rim and hub in CAD at the size I needed and then I transferred the 2D design into the 3D design program ( I am using Blender for my 3D design work). You actually upload a picture of the CAD drawing and use that as a background to work over.
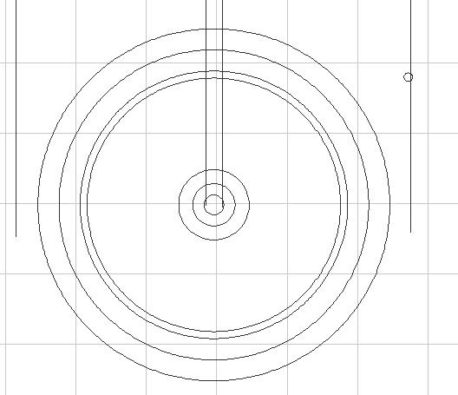
Cad drawing of wheel
For the rim, I used a circle with 36 edges (this made it easier to mark out the spoke holes), and then using the extrude function I traced over the 2D drawing to create a complete rim from one basic circle. Extrude enables you to move the edges to any position you need and in any direction, so you can follow the 2D drawing to make a 3D wheel.
Each spoke hole has to be individually added to the center section of the rim, by using flats it was easy to find the center of each section to enable the spoke hole to be positioned centrally. Having to do this 36 times was a pain and I am sure there I an easier way of doing it but it only has to be done once as I can now produce a rim any size I want now from the same design.
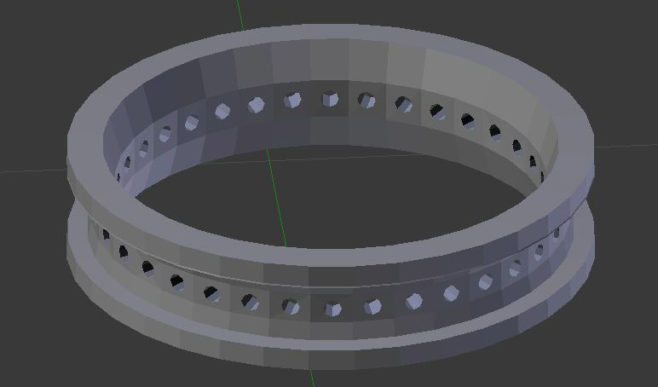
The hub was drawn up, in the same way, using a 36 flat circle and the extrude function (it is easier to do than to write how to do it). Again I had to add the spoke holes one at a time, 18 in each hub flange to make the 36 total needed.
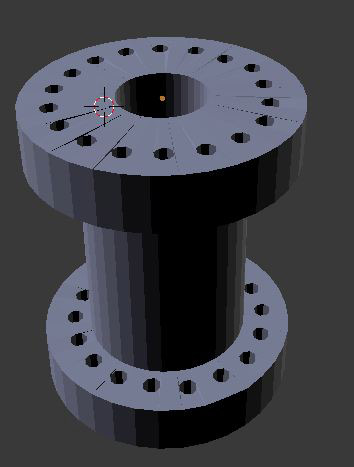
Then it was just a case of transferring the 3D drawing into the slicing program (I use Cura as it is free and seems to work fine) and then saving the cutting file to the memory card for the printer to run off.
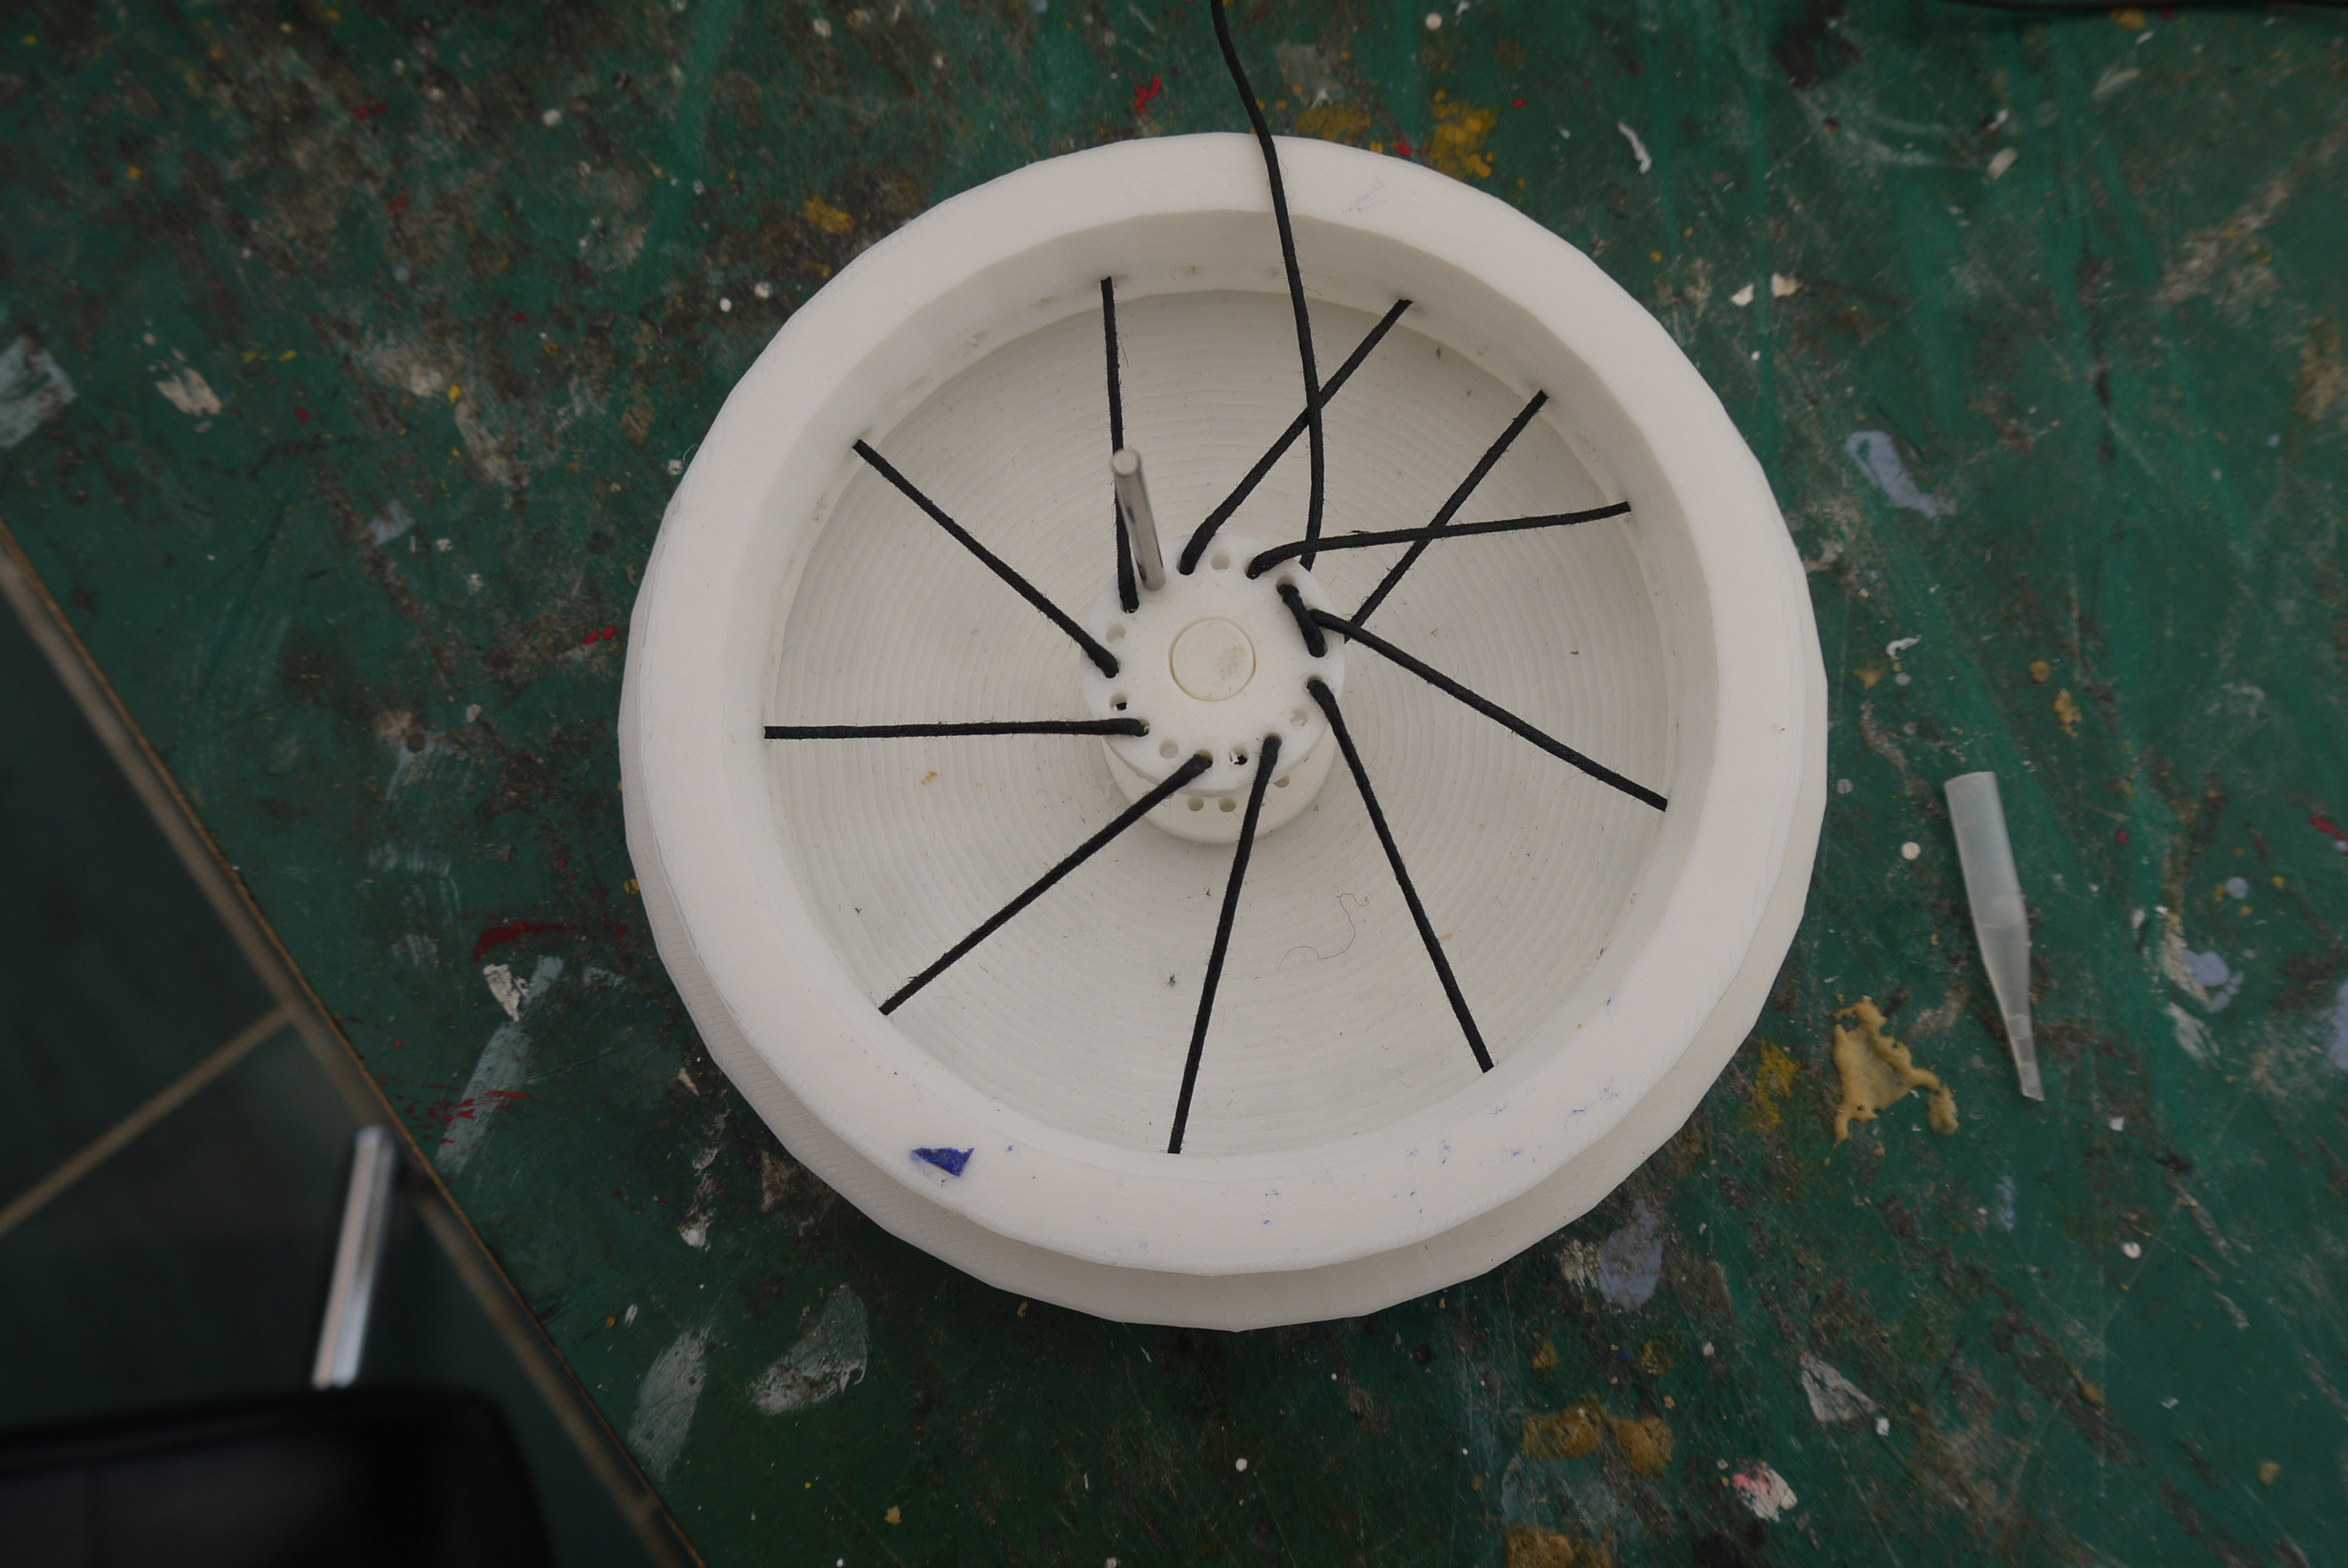
Of course to assemble the wheel and to keep it true, I would need a building jig. So one was designed and printed off as well. I then had to make sure that the wheel parts were a good fit in the jig so that they would not move and create an out of true wheel once laced up. Once I was happy that all the parts were correct and would fit the jig OK, I could set about adding the spokes and building the wheels.
To do this I clipped the rim into the jig and then I slid the hub over the center pin making sure it was pushed down firmly to set the offset correctly.
The spokes for each wheel are made from 2 lengths of 1mm black thong bought from Hobby craft for 49p a meter, I needed 2m per wheel in the end.
If you soak one end of the thong in CA glue and trim the end at an angle when it has set, you will have a handy “needle” to aid with the lacing. Now tie a knot in the other end of the thong and start lacing. Pick a hole in the top face of the hub and feed the thong in from underneath, pull uptight, and then feed it through the 4th rim hole back from the hole you used in the hub.
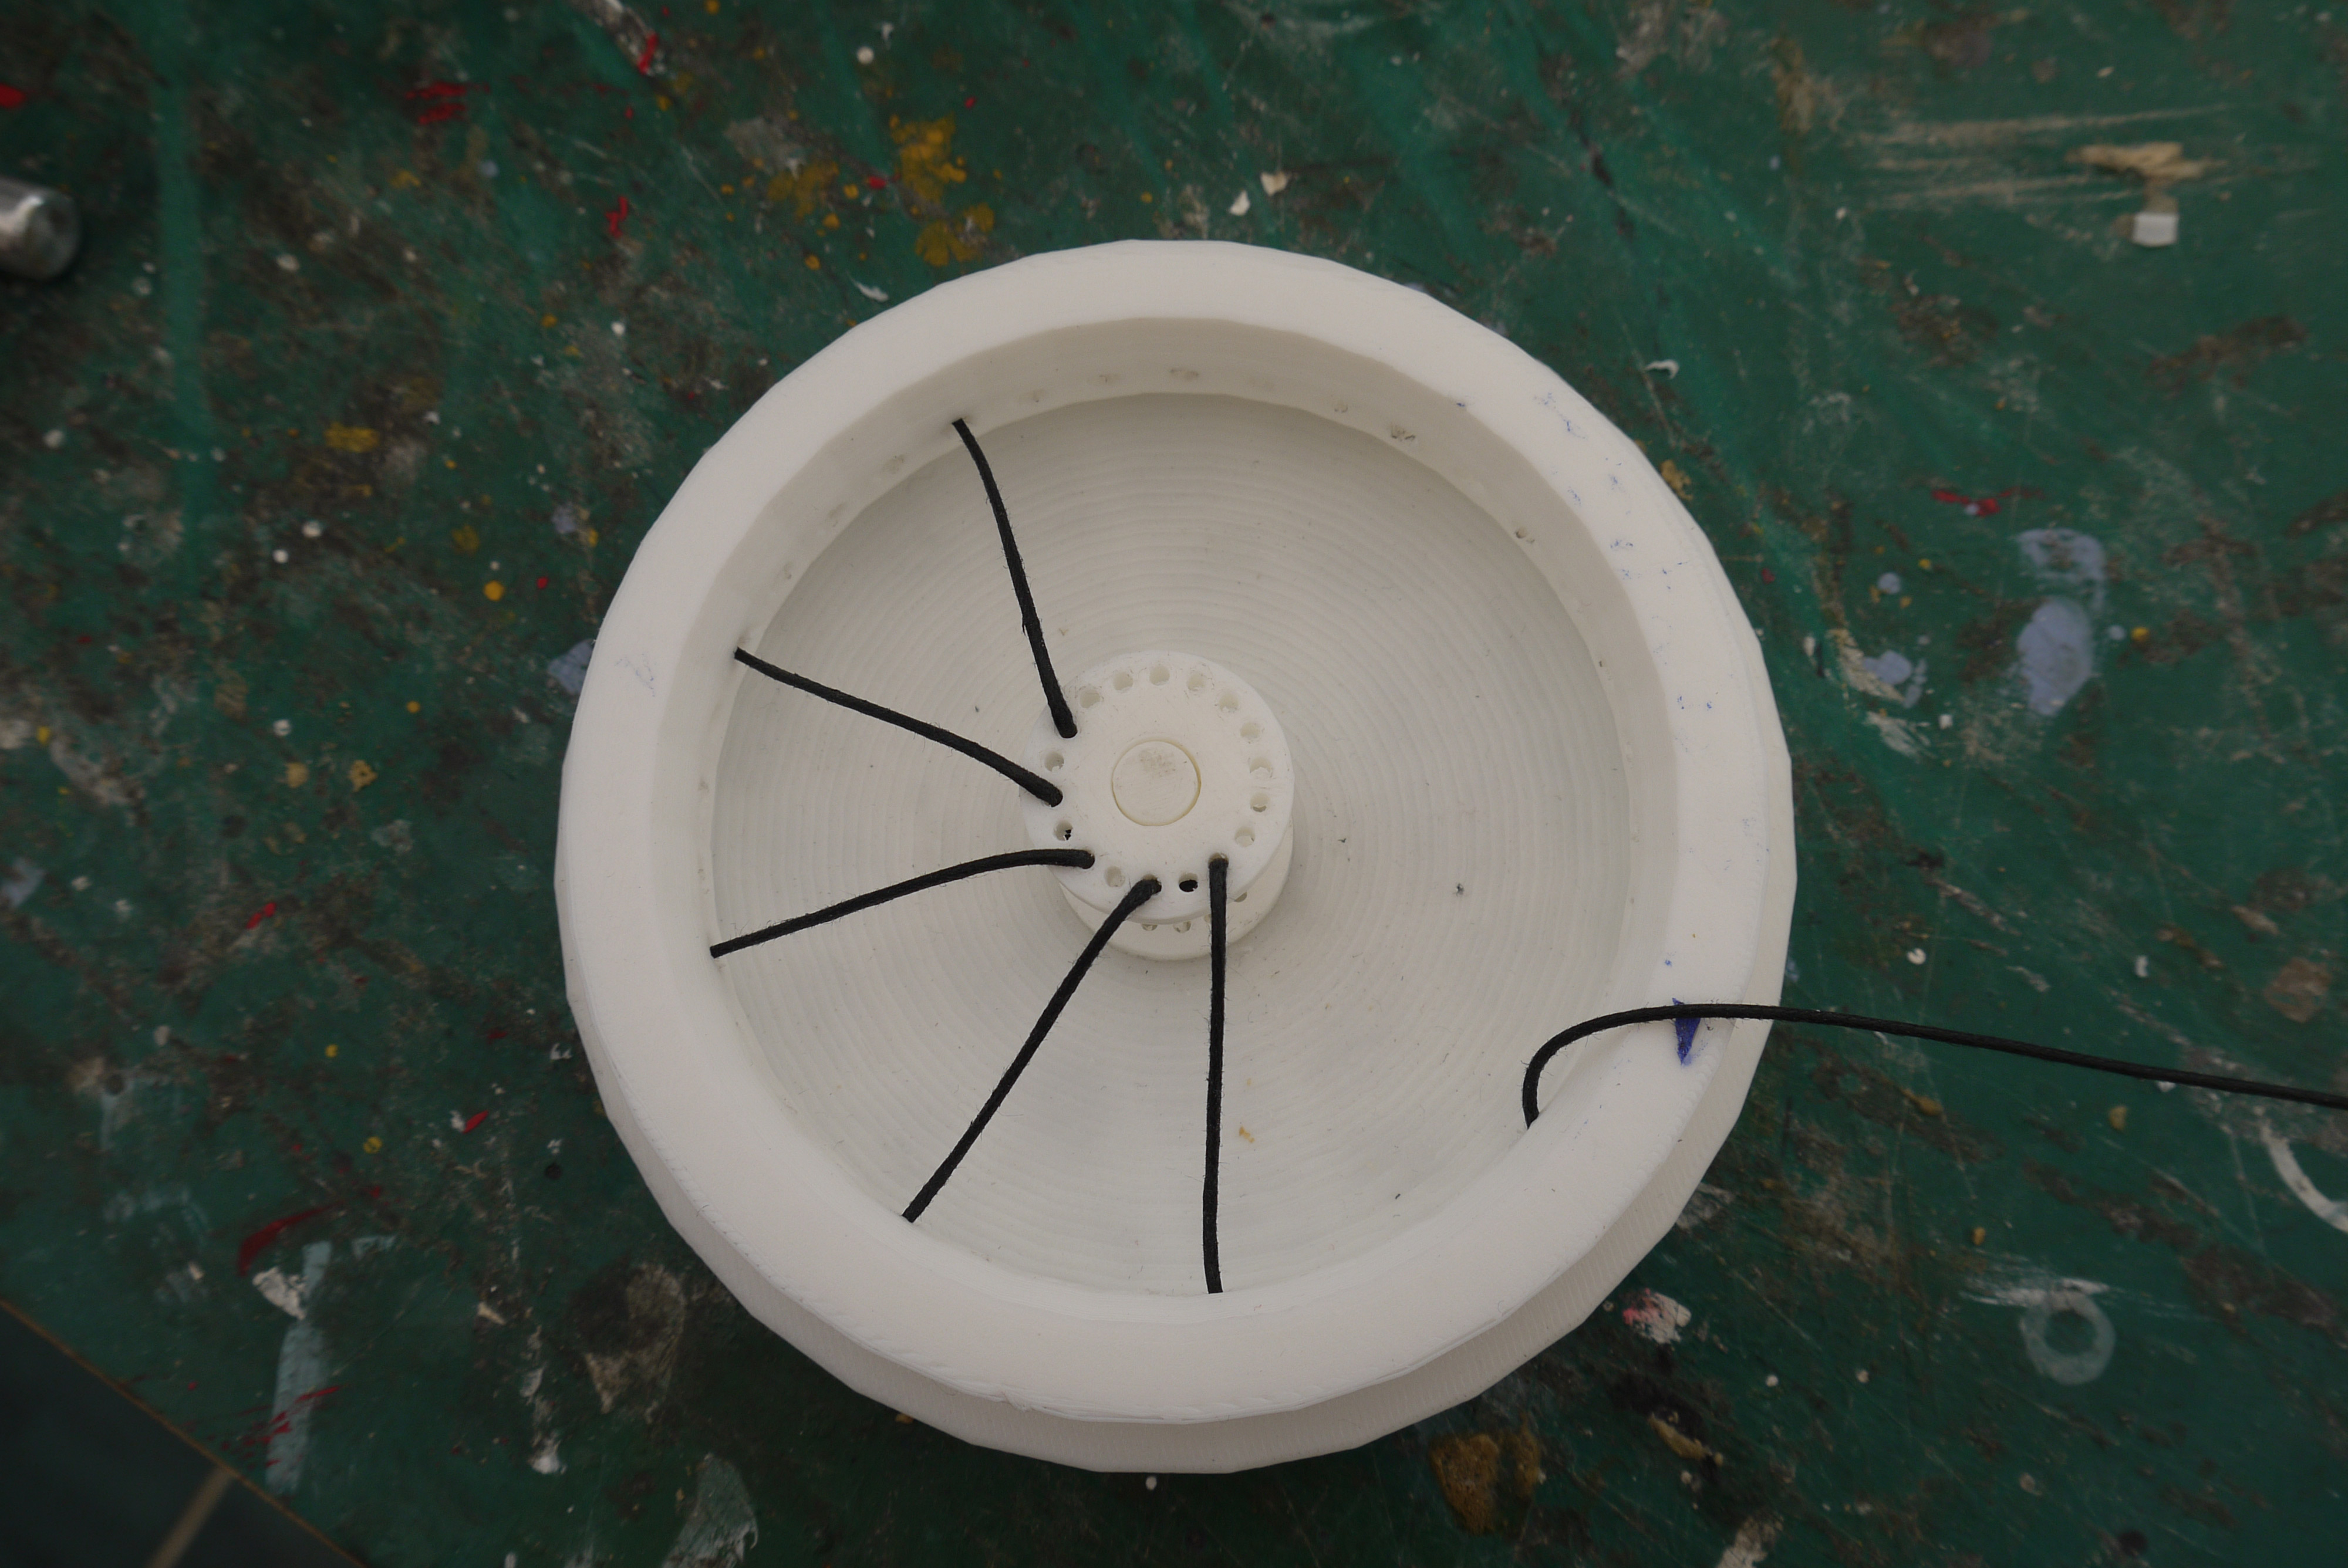
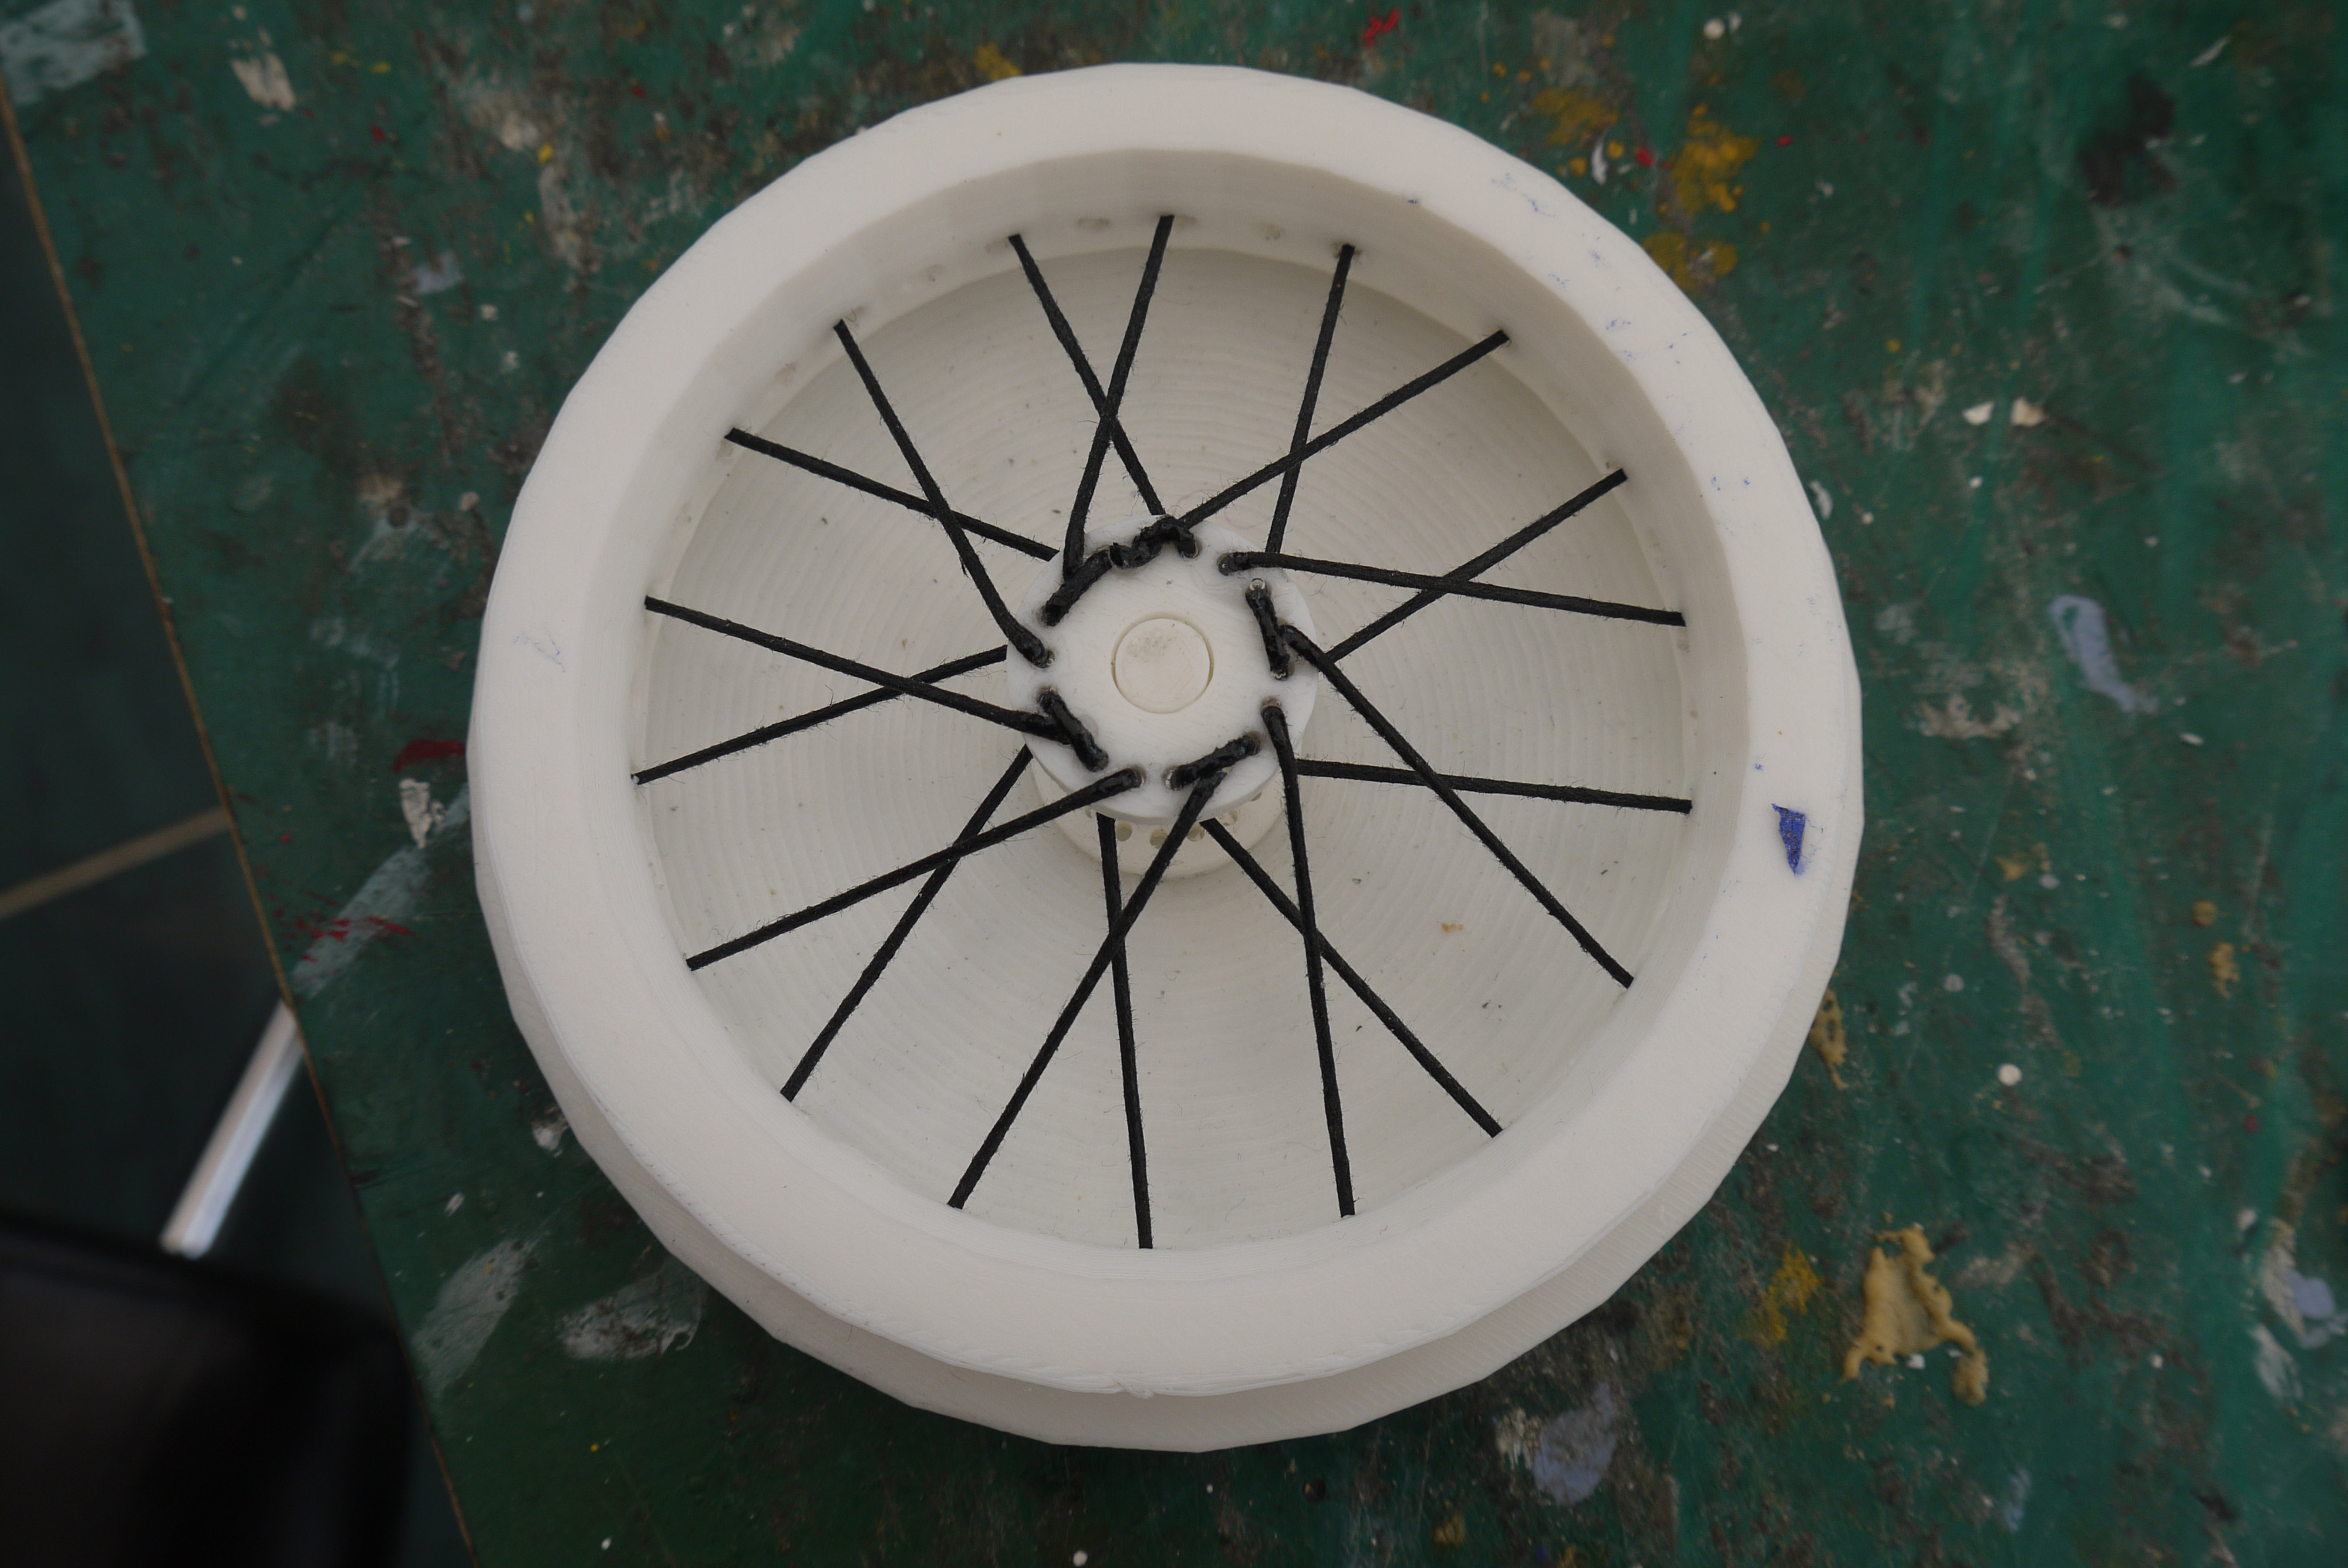
Now you need to feed the thong back through the rim 4 holes along from where it was fed in and then take it back to the hub. Feed the thong down through the hub at the 2nd hole along from where you started. (there should be an empty hole between the thongs in the hub. Now you need to feed the “spoke” up through the next but one hole along in the hub so it comes out of the top. This then matches the other spokes for the pattern. Keep doing this until you have gone around the whole top side of the wheel. When you have got back to where you started we need to pull the hub slightly against the spokes to make sure they are all tight.
Now dribble some thin CA glue into the laced hub holes to lock the thing in place. We can now lace the inner spokes on the same side. Using the same length of thong feed the end through the rim 6 holes along from where you just finished. Then feed it up through the hub from the underside roughly 2 spokes along from the last spoke.
Feed the thong down through the hub at the next free hole and back through the rim 4 holes along from the last spoke. ( this sounds complicated but it isn't) when you pull the spoke tight it will tighten the rest of the spokes and start to give the wheel some rigidity. Continue lacing the wheel until you have filled all the holes in the top face of the hub and then tie off the last spoke, add more CA glue to seal all the hub spokes, and leave to dry for a few mins.
Now, it's time to relax and go have a coffee, because by this point you have certainly earned it by now.
Once you are happy that the CA glue has set we can take the half laced wheel out of the jig and turn it over. Push the rim and the hub down firmly into the jig making sure that the spokes are tight and we are ready to lace the other side.
We have to start again at the hub, by feeding the thong up through one of the spoke holes, this time you have to pick the hole opposite an inside spoke and take the thong back in the opposite direction 6 holes. Then lace the outer spokes in exactly the same way as you did the first side.
Then again do the inside spokes in the same way as before. Tie the thong off once you have finished the last spoke and run more CA glue over the thong at the hub end and leave to dry.
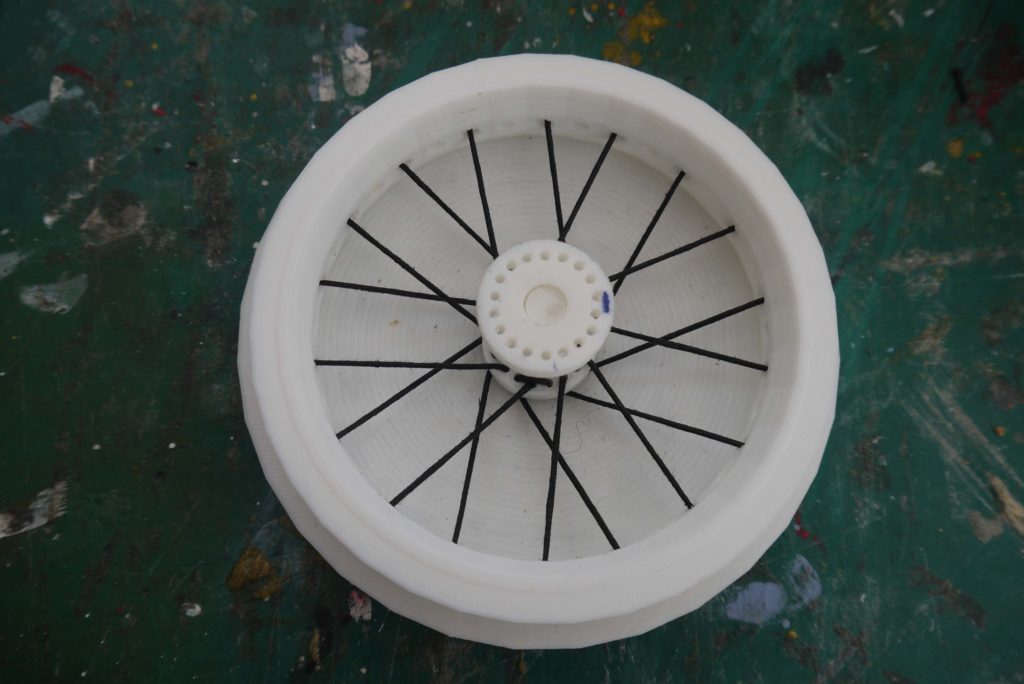
You can now pull the wheel out of the jig and run some more CA glue around the inside of the rim and the inner sides of the hub. Voila, one spoked wheel.

If you have kept everything tight while you were building the wheel. It will be nice and true with no wobble. I then sprayed my spokes and rim with some silver paint and made up a tire. You can use a rubber tube, plastic tube, or Depron for the tire. I used Depron as it was what I had to hand, I just cut some strips of 6mm grey Depron and gently curved them around the hub and then sanded them to shape. Now repeat it all for the second wheel. There you are two WW1 spoked wheels for a biplane, now just sit back and admire your work with a nice cup of coffee and a biscuit.
If you need any more information or help please comment in the comment box below.
Written by Tony Bennett