Written by Painless360
Introduction
In recent years, as with many parts of the hobby, there has been a huge increase in the availability and affordability of what was once expensive technology. 3D printing is one of those parts of the hobby.
Only three years ago I helped a local school set up a 3D printing lab and we struggled to get good quality, cost-effective printers that worked well and required little to no setup and maintenance.
Even 18 months ago the market was broken into two types of 3D printer buyers – those who were happy to pay a lower price and build their printer from a kit, and those that were not confident enough to attempt a build and paid a higher price for a machine.
Last year, HobbyKing introduced their first ‘Mini’ 3D printer for the hobbyist – the Fabrikator Mini, recently HobbyKing released the updated version – the Fabrikator II Mini’ that doesn’t seem to know it costs only about £170 and (once dialed in) prints better here than other printers costing a lot more.
So why should I be interested in 3D printing then?
The question should probably be ‘Why are you not?!’
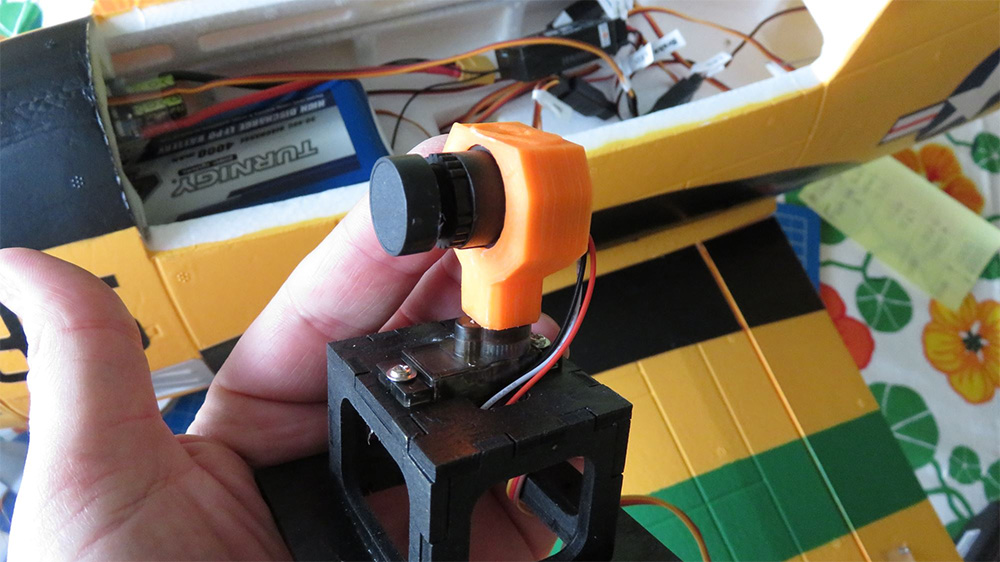
If you are a builder as well as a pilot you will have no doubt found yourself in that position where you are holding two parts, one in each hand, and thinking to yourself ‘How the hell can I get these things together securely?’ Sound familiar?
This used to be the point that I looked at shaping a block of balsa, considered using cable ties and foam-board or even something like thermoplastic or Sugru to make a mount or connector.
Once you’ve got a 3D printer to hand you’ll rarely resort to this type of building again...
3D designs for the parts we use in the hobby, as well as modifications and extra parts we need, are all available free to download and print from places like Thingiverse.com.
Some manufacturers have also started sharing their files for spares too so rather than having to buy another one when you’ve damaged a piece of your favorite model, you simply download the file for it and print it on your 3D printer and you have your spare part in a few hours.

In addition to all of the predesigned parts, it’s not too tricky to make you own, If you’ve ever used a pen and paper to sketch something out then with a bit of practice you can design that part to the exact specifications you need.
Free design programs like SketchUp from Google and 123D are excellent and many good tutorial resources are available for free on places like YouTube and the forums to get you started.
Many times a week I find myself opening SketchUp to quickly design a part I need for a model.
A little bit about the plastic...
Before we look at more detail at the printer, it’s worth us talking about the different types of plastic you can print within the hobby. There are literally hundreds of types and variants of each but the main two are PLA and ABS. Let me quickly cover the benefits and drawbacks of these two most commonly printed plastics.
PLA
Hard, shiny brittle plastic that is a little easier to print. It smells slightly of burnt sugar/waffles when printed and doesn’t need the higher temperatures to print. The benefit is that almost all printers will print PLA happily. The downside is that it breaks easily once printed so isn’t always a good choice for R/C models parts.
ABS
This plastic needs higher temperatures to print and also needs a heated bed too. The reason for this is that the plastic ‘shrinks’ slightly as it cools and the contracting layers in the print can pull the edges from the print bed. The ABS while printing can emit a smell of burning plastic too so printing in a well-ventilated area is a good idea.
The benefits are that this is perfect plastic for the hobby – strong and lightweight and very resistant to problems. ABS is what a lot of the commonly used propellers are made from.
So now we know that we can appreciate a few of the features of this little beastie...
Let’s look at some of the key features of the new printer
This printer has a print volume of 100mm x 100mm x 100mm. That’s not huge but easily large enough for the majority of the printing I do almost every day. The larger printers I use here rarely print anything bigger (the only exception being all-in-one brushed micro-quad frames).
The nozzle size is a good choice too – 0.4mm. We use the same size on all of our other printers. For me, it’s a great choice for excellent detail and decent printing speed for these smaller models.
In addition to these basic specs (you can see more on the website pages for the product), let’s look at what’s different on the Fabrikator II.
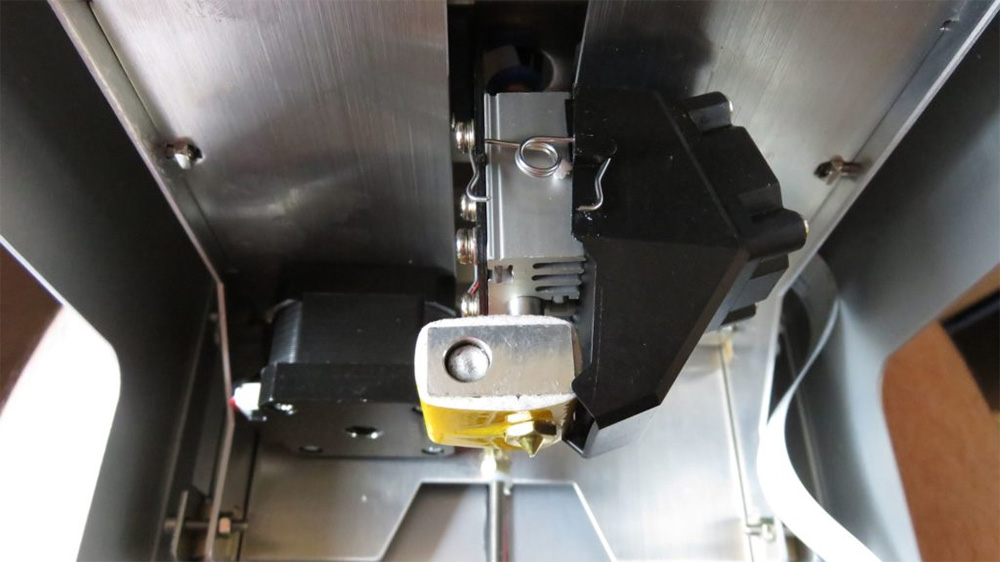
Heated bed and 250-degree head, Fan cooled extruder/hot-end
The only downside I’ve found so far on this printer is the limited heat settings for the heated bed. The hot-end (the part that melts the plastic filament and extrudes it to create the part) can be heated up to 250 degrees Celsius, easily enough for the tasks of printing all but the most exotic filaments.
The heated bed can be heated up to a maximum of 60 degrees Celsius. This is very handy but is at the low end of what ABS is happy printing with. With a few tips (more on that later) this is a very capable ABS printer and produces some very detailed, accurate prints.
Aluminum enclosure
The enclosure is now aluminum and very solid. This helps with vibration and movement as the head moves and helps increase the quality of the prints. Access to all the parts you need is easy and the finish on the body is good. Do check for the inside surfaces of some of the parts as they may have the odd sharp edge that can catch your fingers as you remove parts from the machine.
Extra features like a screen and controls are all missing so if you want to lift the head or reposition anything in the printer then you need to connect the printer to a PC using the USB or WiFi connection.
SD, USB, and WiFi printing
Connection options are excellent on this little printer. You can print using a USB cable, no surprise there.
You can print using the SD card too. As there isn’t a way to navigate the files on the SD card then you need to rename the file you want to print as auto00.g and then press the button by the side of the SD card slot to start the printer automatically printing. This is the way we run our printer all of the time now.
In addition to these standard ways of printing, you can also configure the PC to connect to the WiFi in your home or office and use some of the supplied software to connect to it wirelessly. Very cool stuff indeed.
What is the software for the SD card?
The SD card supplied with the printer, as well as being very handy to use to print from once you’ve got it all set up, contains all the software you need so there isn’t any need to download software or files.
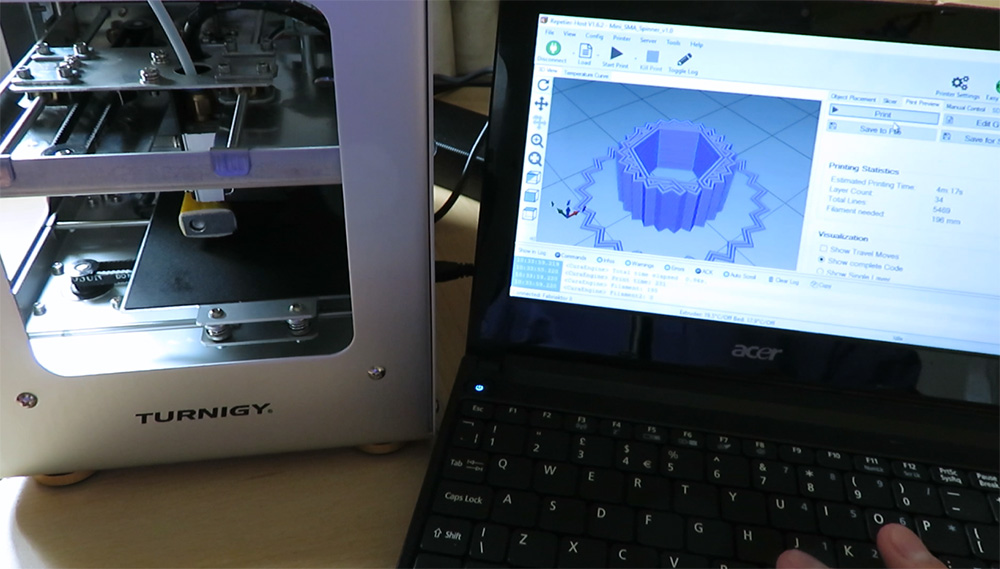
Repetier Host
This is the software that you can use to control and monitor the printer from your PC. It’s what you use to calibrate the printer when you first get it and then ‘slice’ and send the files to the printer too.
The settings need to be configured in Repetier Host so that the software knows how to talk to and run the printer. This is all covered in the manual and if you follow the steps it takes only a few minutes.
Once you’ve got to grips with Cura, you’ll probably end up doing what I do and just use that directly to slice the prints you want and save the resulting file straight onto the SD card ready to print.
Cura
This is really clever software; it takes the model you’ve made (or downloaded from the internet) and cuts it into very thin slices. It then calculated the moves for each of the motors and extruder on the printer to create each slice, in turn, using the melted plastic and creates a file in something called ‘G-code’ that the printer ‘reads’ to print the part you want.
The setting for the printer also needs to be configured in Cura (all in the manual too) for it to work well.
Both pieces of software are on the SD card and are installed with the Repetier installation making that part very easy.
Setting up the printer the first time...
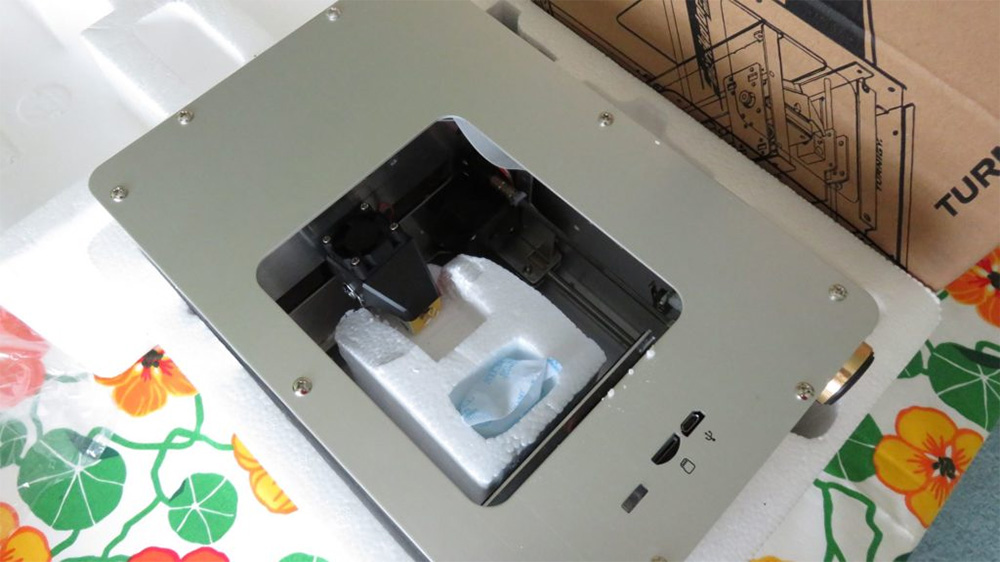
Our printer came with the remains of a print viable on the print bed. I was very pleased to see this as it shows that the printer was tested at the factory and it worked well enough to be shipped, plus I know that the calibration of the printer should be close enough to get perfect with a little effort.
Why do you need to calibrate the printer? Some printers come with ‘auto-leveling’ routines that detect the print badly and take into account any issues if that print surface isn’t completely level. As this printer doesn’t feature anything like that we need to manually make sure that the print bed is perfectly flat and the print head stops just above the surface ready for printing at all points across its surface.
To calibrate, connect the printer to the PC using a USB cable and start Repetier host, connect to the printer and select the ‘Manual control’ tab in the setting on the right. Using this you can move the print head in all three axes. On this printer the x-axis (side to side) is handled by the stepper motor at the bottom, the y-axis (front to back) is handled by the stepper motor on the movable carriage and the final z-axis (up and down) is controlled by a crew-thread at the rear of the case.
Home each of the axis, in turn, using the little home icons around the main controls. As each axis comes to the end of its travel it should touch a small switch and that tells the printer that the axis is at one limit of travel. Keep your finger on the power button while you test each of the homing functions and turn the printer off if you start to hear a grinding noise. Ours worked great here.
Once you are happy that the home functions for all three axis works then you can calibrate.
Using the buttons in the ‘Manual Control’ tab move the print head to a few millimeters above the print bed on one corner, and place a single piece of paper underneath. Home the Z-axis so it comes to rest naturally above the print bed. Check that the gap between the print head and the print bed is just enough to allow you to move the paper but have a degree of friction holding it in place. If it is too loose rotate the screen closest to the corner a half turn counterclockwise and try again. If it is too tight try half a turn clockwise. Fine-tune until you can move the paper between with a little force. I find a post-it note works perfectly.
Raise the head up a few millimeters and move to all the other corners in turn. Repeating the entire thing (all four corners) at least one more time to confirm all corners are perfect.
Tips and Tricks for setting up your printer when you get one
The main problem with any 3D printer is poor calibration. If in doubt – run through the process outlined above another few times. The print head is too high will result in prints not sticking to the bed well and too low will cause printing problems.
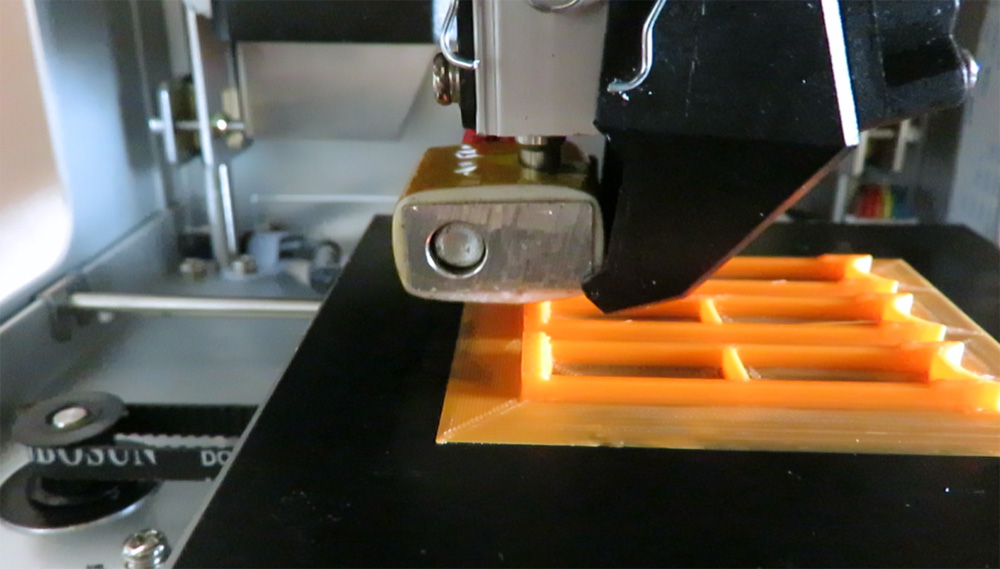
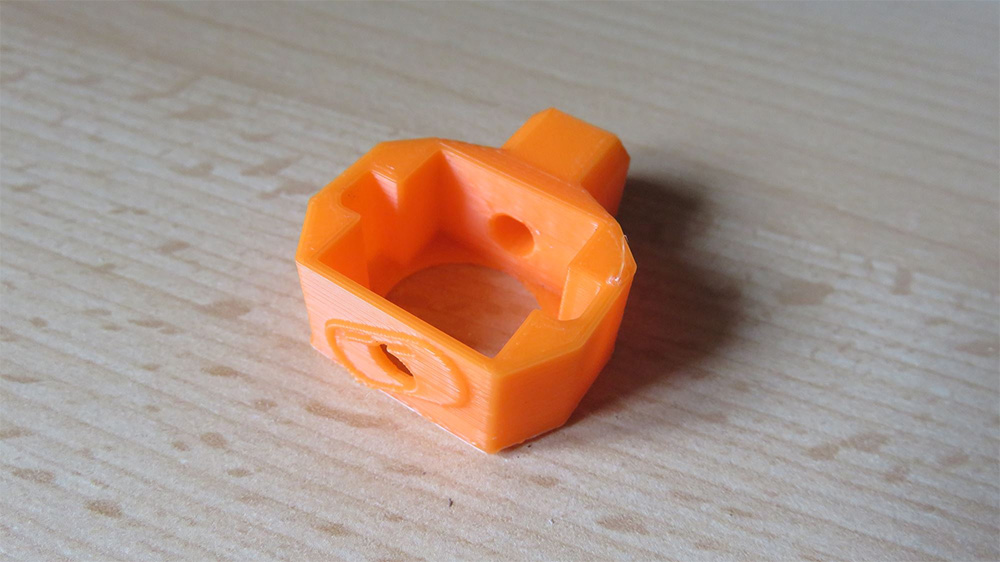
Don’t expect perfect prints from day one; it takes time to find the perfect settings for the printer and the filament you are using. Here it took the best part of a week, changing the temperature, flow rates, bed adhesion methods, etc. until I got the perfect setup for the orange ABS I’m using with it here. If you’re not happy with a print, try something different and be logical.
There are guide temperatures for the heated end and print bed settings for PLA and ABS. The default settings in the manual are on the cool side for PLA, never mind ABS! I’d recommend looking at 195-200 degrees Celsius for printing PLA and look at warming the print bed too. I used 45-50 degrees Celsius and it helped with adhesion. Let’s talk a little more about how we are printing ABS with it.
Tips for printing ABS
ABS can be tricky to print. The problems come down to two things (mainly!).
The first is that ABS needs those higher temperatures of around 230 degrees Celsius for the hot end and ideally 70+ degrees Celsius for the print bed.
The other issue is that ABS shrinks slightly as it cools; this has the effect of the print crying to curl up away from the print bed and pulling itself away from the surface. This printers’ heated bed only goes to 60 degrees so you do need to use a few tricks to get good ABS prints.
- Select around 230 degrees for the hot end and turn up the heat on the print bed to maximum (60 degrees) and let it sit for a few mins for the heat to permeate through the entire bed.
- Coat the print bed in something that will help the ABS stick. Everyone has their favorite – glue stick, ABS slurry but we’ve used hairspray here. Choose one with plastic in it (yep some use plastic to hold your hairstyle!). We used Elnet Satin Superior Hold here and it works a treat.
- Print ABS with a brim. A brim is part of the print you remove when it’s finished but creates a much larger surface for the print to stick to the bed. If any curling happens then it’s the brim that moves, not the printed part. You can turn this on and off in Cura.
Summary
This is a really useful printer for the money. Hobbyists and places that need lots of cheap, fast, and accurate printers will like Fabrikator II. I can see this as a great printer for schools, colleges, and shops as well as for those in the hobby.
The prints I’ve had from it so far have exceeded a few of the other printers here that have cost a lot more. It’s quickly become the one I go to when I need a part printed quickly with a good finish.
There are a few limitations, there isn’t any display when printing from the SD card so you have no idea of how long is left or the status of the printer during the print (no doubt the community will be working on how to add one) and the smaller print area needs consideration if you want to print larger parts.
One last word of caution: Don’t lift the printer by holding the vertically moving tray. If the tray is below the windows at the side you can accidentally try and lift it this way and hold the weight of the printer on this vertically moving tray. This can cause problems.
The vertical indexing is done by a screwed thread and that screw-thread connects to the z-axis plate using a couple of brass nuts held inside a plastic sleeve. If you pull up too hard on the z-axis then you can pop those nuts out of the sleeve and then it’s a devil of the job to get it all back together and slop free (been there done that!)
Hear it First: Join our Mailing List
Sign up to receive new product updates, exclusive discounts, news, and more!