
An unbalanced fan sounds terrible and yet many modelers don’t realize just how easy it is to get a fan to sound like a turbine.
Most model aviation clubs are close to residential dwellings and so noise must be reduced. Many clubs have adopted strict noise policies in order to keep the surrounding neighborhood happy. The reason we balance an EDF is similar to the reason we balancing a propeller, sound, efficiency, and to minimize the wear and tear on the sensitive components in your model aircraft. No doubt you’ve heard the sound of a well-balanced fan and you’ll agree with me that it’s just a beautiful thing. There are many ways to balance an EDF fan and in this article, I’ll cover two reasonably easy, yet, effective methods.
Safety First
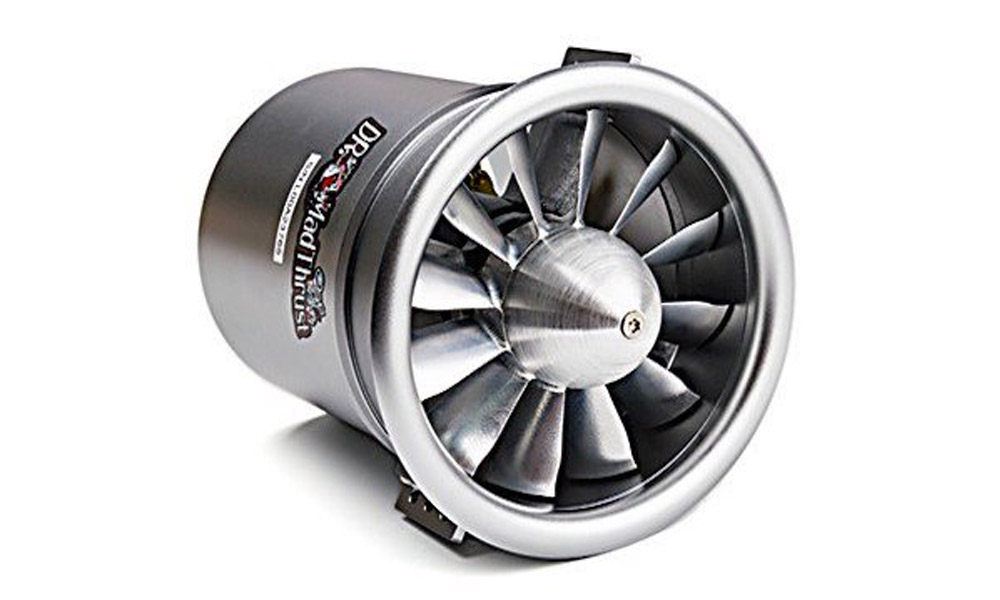
EDF fans spin and very high RPM and can cause serious damage to persons or property if the fan blades were to explode. If we take appropriate safety steps our chances of injury are almost nonexistent.
- Always use a test stand or fuselage
- Always use safety glasses
- Never hold a spinning EDF for any reason
- Never stand beside or in front of an EDF
- Always ensure that the area is free of free clutter and loose items. Paper can easily be drawn into an EDF with devastating results.
- Never attempt to repair an EDF fan
- Never use a chipped or cracked fan
- Never remove material from a fan
Basic Balancing
 You need the following bits and pieces to complete the task.
- Complete EDF unit with motor
- EDF test cradle or plane fuselage
- Spare collets
- Good quality ESC
- Screwdrivers
- Sharp Hobby Knife
- 400 Grit Sandpaper
- Fiberglass reinforced tape
- Isopropanol (rubbing alcohol)
Below are the steps you must follow, in order to get a basic balance.
- Start by disassembling the fan and collet assembly from the motor shaft. Place those parts to one side and grab a small square of sandpaper.
- Hold the motor and shroud so that the motor is at the top and is in an upwards position. This ensures that grit will not fall into the motor and damage the bearings.
- Start by rubbing the motor shaft in all directions so that the smooth surface is gone and you can clearly see the abrasive marks. This will provide a better grip for the collet at a later stage. You may spool the motor up with the sandpaper to make the scoring process faster.
- Next, we check that the motor shaft is running true. Using the ESC, rotate the motor slowly and check the shaft is running true before proceeding. You are just going to sight the shaft. You might be surprised at just how good you're eyes are at detecting the eccentricity
- It is impossible to balance your fan unless the motor shaft is running true. Place the collet back onto the motor and rotate the motor slowly again checking for imbalance. You don’t require any special tools, just your eyes, as you’ll be able to see if it's running true without any eccentricity (orbit). If you detect an orbit, rotate the collet 15deg and try again until you find a sweet spot where there is no orbit. Change the collet if required and repeat.
- Place the fan on the collet and tighten the nut to bring the assembly back together again. Install the EDF into your fuselage or test platform and ensure that everything is ready for testing.
- Mark the collet and fan so that you know the starting point as this will make your testing so much easier. Spooling up the fan and listen to the sound produced. Loosen the nut and move the fan 15deg and repeat. You are looking for the best sound with the least vibration.
- Once you’ve found the spot with the least vibration add the nose cone, mark with a white marker or sharpie and begin moving in 15 deg steps. You will eventually find the spot with the least vibration.
Advanced Balancing
 Same parts as the basic method with the exception of the dial indicator and vibration app.
- Complete EDF unit with motor
- EDF test cradle or plane fuselage
- Dial indicator
- Vibration app (e.g Vibration analysis)
- Spare collets
- Good quality ESC
- Screwdrivers
- Sharp Hobby Knife
- 400 Grit Sandpaper
- Fiberglass reinforced tape
- Isopropanol (rubbing alcohol)
Follow the steps below in order to get an advanced balancing.
- Start by disassembling the fan and collet assembly from the motor shaft. Place those parts to one side and grab a small square of sandpaper.
- Hold the shroud so that the motor is in an upwards position. This ensures that grit will not fall into the motor and damage the bearings.
- Start by rubbing the motor shaft in all directions so that the smooth surface is gone and you can clearly see the abrasive marks. This will provide a better grip for the collet at a later stage. You may spool the motor up with the sandpaper to make the scoring process faster.
- Next, check that the motor shaft is running true. Using a dial indicator, rotate the motor shaft slowly and check that the shaft is running true. Whilst thou is ok, anything beyond this should be discarded as it will not be possible to get the fan to run true.
- Place the collet back onto the motor and rotate the motor slowly again checking with the dial indicator. If you detect eccentricity on the collet you should rotate 15deg and try again. If after moving through 360deg you find you don’t have a true running collet, swap it out and repeat the process. Place the fan onto the collet and tighten the nut to bring the assembly back together again. Install the EDF into your fuselage or test platform and ensure that everything is ready for testing. Mark the collet and fan so that you can identify the starting point.
- You will need to install the vibration analysis tool using the app store or google play. This will be used to monitor vibration during the testing phase and determine the position with the least amount of vibration. Grab a scrap piece of paper and draw a circle dividing it into 8 sections. This will represent the testing and you can record the vibration result into each 1/8th section.
- Mark the fan and collet so that you can identify the starting point as this will make your testing so much easier. Attach your phone to the aircraft or testing rig as close as possible to the fan. You can then start the vibration app, spool up the fan slowly, and record the results. Once you have recorded the results you can move the fan to the next section and repeat the test for all 8 sections.
- Once you find the quietest section try adding a small square of fiber tape to the fan blade and repeating the test. You may find the vibration increases, move the tape 180deg and try again. If the vibration again increases you can stop and move onto the next part of the process. If the vibration decreases you now try adding another small square to the same position to see if the vibration increases or decreases.
- Once you have determined the optimum amount you can remove the tape and add Thick CA glue. Do this slowly and measure the vibration after each application. To speed the process of curing the CA I use kicker. Slowly add the CA and measure vibration as you go.
- The last step is to add the spinner. Again, mark the spinner and begin testing for vibration as you have done previously. Check all 8 sections and find the least amount of vibration. Once complete you can tighten the screw and hit the skies with a fan that really sounds the part.
Written by gozerian
Before I leaped into the hobby world as a fully-fledged hobbyist, there were so many things I wish someone told me before I entered the community.
Here are some of those things ...
1. It’s addictive
2. It’s expensive
3. It’s time-consuming
Honestly, you'll probably spend more time building and fixing things, than actually flying.
4. Only other RC fans will understand the obsession
5. There are a lot of fails and near misses...
6. And more fails...
7. Always follows the instructions.
I wish I knew that with batteries to ALWAYS put red in red and black in black.
8. Keep Your Face Away from Propellers
9. Hot Glue Guns are....hot!
Hot glue guns will melt your skin.
10. Always be careful with tools
Note: Hot solder hurts when it flicks on your face.
Have any advice for anyone considering joining the hobby world that doesn't appear in this list? Share in the comments box below.
Hear it First: Join our Mailing List
Sign up to receive new product updates, exclusive discounts, news, and more!