Learning to Fly RC can be daunting and many of us struggle with landings.
With the right advice, you’ll be landing like a pro. They say, taking off is optional but landings are mandatory. The more landings you do the better you’ll become at it. Remember practice makes perfect. Landing your RC plane is, without a doubt, the hardest and most nerve-racking part of the entire flight, particularly when you're just learning to fly control airplanes. With that said, it can be mastered with patience. Learning to land your RC plane safely is something that we all have to come to grips with. At some point, it just clicks and you can land just about anything. I now find that I enjoy landings and I especially enjoy the compliments I receive from my fellow club mates. Let’s face it, watching someone grease it in is just amazing.
Hot Tips
The practice is important. If you spend a few weekends practicing your landing technique you’ll be surprised at just how much better you will be landing. It is often said that if you don’t get the approach right, you’re not going to land right. They are right of course. If you’re trying to correct a poorly executed landing it quickly becomes a nightmare. Landings need to be uncomplicated so that when broken down into steps, they become easier, especially with practice. Get a feel for the stall speed of your aircraft by climbing to a safe altitude and then slowing the aircraft until it stalls. Take note of what happens; does it drop a wing, drop the nose, or does something else happen. When you’re coming in for a landing you’ll want to land as slowly as possible so getting a feel for stall speed is very important.
Simulator
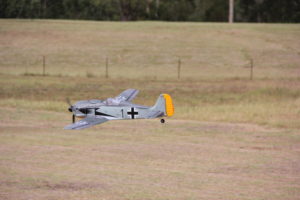 A simulator is an excellent place to practice your landing maneuvers. Focus on the coordination of all four control inputs. Remember that throttle controls ascent and descent whilst the elevator acts as a brake.
Landing Approach
The approach is important as it sets the aircraft up to land. The procedure is made up of 5 parts, Crosswind Leg, Downwind Leg, Base Leg, Final Approach, Flare, and Land. At some stage during a flight, all RC operators will need to land their aircraft. Taking off is optional but landing is compulsory. A good landing will result in the aircraft remaining in one piece and being serviceable. A bad landing will result in a lot of extra work and expense to repair the aircraft. All pilots are judged on their ability to land, and it is the one maneuver all RC operators must master. Landing is one of the more difficult skills to learn, however, landing can be mastered and enjoyed. A good landing approach is fundamental to a successful landing. You need to be able to put the aircraft where it needs to be in order to perform a good landing.
Landing Approach Sequence
Landing approaches are about lining the aircraft up with the runway ready to commence a landing. The following sequence explains what's involved:
- Fly the circuit concentrating on the aircraft's height and speed
- On the downwind leg reduce the throttle of the aircraft and using the elevator to keep the nose of the aircraft level
- Perform two 90 degree turns to ensure the last turn finishes on the centerline of the runway about 50 to 100 meters short of the runway
- Try not to bank any more than 30 to 40 degrees and apply a sufficient amount of elevator to keep the aircraft level (ie do not gain or lose height)
- Use the rudder to tighten the turn without having to bank any more than 30 to 40 degrees. Try not to go past the centerline of the runway but roll out level on the centerline or just short of it. If needed perform a small correction to get aligned. Use ailerons and rudder (see Figure 25) to control the rate of turn. You will need to practice arriving on or short of the center line and not overshooting it.
- With the nose of the aircraft, the level uses the throttle to control decent. Reduce throttle and put the aircraft into a gentle glide.
- Monitor the speed of the aircraft and if required apply a little throttle but try not to adjust the elevator. You may find a blip or two of the throttle is enough.
- Once on the centerline of the runway keep the aircraft level, from side to side ie wings level, and nose to tail level. Use the ailerons and/or rudder to make small smooth corrections to keep the aircraft on the centreline.
- The landing approach should be repeated until you can line up with the center of the runway every time, without going over the centerline.
- If you find that you have not performed the landing approach properly fly through (do not attempt to land) and have another go. There is no shame in a go-around. Take a deep breath and try it again.
Flare and Landing
 Once the aircraft is lined up with the runway and is straight and level (wings level and nose to tail level) at a reasonable height then a landing can be performed using the following sequence:
- With the aircraft lined up with the centreline of the runway, reduce the throttle of the aircraft and keep the nose of the aircraft level.
- Use the throttle to control decent. Reduce throttle and put the aircraft into a gentle glide.
- As the aircraft slows down the wings produce less lift and the aircraft will start to descend.
- Monitor the speed of the aircraft and if required apply a little throttle but try not to adjust the elevator. You may find a blip or two of the throttle is enough.
- Once on the centerline of the runway keep the aircraft level, from side to side ie wings level, and nose to tail level. Use the ailerons and/or rudder to make small smooth corrections to keep the aircraft on the centreline.
- Once your aircraft is just a few inches above the runway reduces throttle and continues to input up the elevator trying for as long as possible to bleed off all speed and lift.
- Flaring is achieved by pulling the nose of the aircraft up slightly and keeping it up, using the elevator. As the aircraft bleed off speed it will lose lift and eventually settle on the runway, without bouncing.
- Once on the ground, the operator needs to ensure they continue to steer the aircraft along the runway using the rudder.
Extra Tips
- If the aircraft is descending too quickly apply throttle so the aircraft speeds up. If the aircraft is not descending quickly enough the reduce the amount of throttle. Try not to point the nose of the aircraft down. If you do put the nose down you will lose height however the aircraft will also pick up speed. The elevator controls the pitch of the aircraft ie whether the nose is pointing up, level, or down and the throttle controls the rate of descent, by increasing or reducing the amount of lift the wings produce.
- Use small smooth adjustments to keep the aircraft on the center line and heading along the centerline of the runway, keeping the wings level and the body of the aircraft level.
- Control the aircraft's descent such that the aircraft meets at or just past the front edge of the runway at about six to ten feet high.
- If the aircraft bounced yet you were traveling as slowly as possible your plane may be nose heavy.
- Spend a few hours watching modelers land taking note of the poorly executed landings. They will demonstrate some of the things we have discussed here.
Key Points
The following points will assist in mastering landings:
- The elevator controls the pitch of the aircraft ie whether the nose is up or down. The throttle controls the rate of descent.
- Minimal control inputs (get set up correctly - wings level and aircraft heading in the right direction, small adjustments only).
- Aircraft should be pointing level, not down or up. Do not get into the habit of pointing the aircraft's nose down to lose height as you will just gain speed.
- Practice landing approaches from both ends of the runway. This includes high and low approaches and short and long approaches. Wind direction will change so also tackle crosswind landings when you have begun to feel more confident.
- Call out "landing" on the downwind leg so that those around you know what is happening. This means people will steer clear and fly around you.
- Concentrate on height and speed control throughout the circuit when preparing to land.
- Lining up on the centerline - use 30 degrees of the bank for the final turn which places the aircraft on or very close to the runway centerline.
- Land under power (even if just above idle). When the prop is spinning air is moving over the air surfaces and therefore the plane remains responsive.
- Cut throttle on or just before the crossing threshold.
- Practice landing by performing touch and goes. This involves landing where the aircraft's main wheels just touch the runway and then taking off straight away.
- You must practice landing from both directions. It's fine to gain confidence in one direction but you will need to master both directions.
Learning Curve
You will likely come across some common issues when you’re leaning the land:
- The downwind leg is too close - which results in tight turns and overflying the runway's centreline. Take your time and go around. You will perform your best landings when you are not stressed trying to correct for a poor approach.
- The base wind leg is too close - results in tight turns and either too high or too low to land properly
- Excessive speed prior to or during the landing approach resulting in an inability to lose enough speed to land. Remember, keep your nose up and use the throttle to control decent and elevator controls airspeed.
- Inability to approach aligned on the centreline - poor set up for landing. Go around and try again.
- Approaching too high, too low, or too far away - the inability to adjust the rate of descent. Remember, keep your nose up and use the throttle to control decent and elevator controls airspeed.
- Nosing the aircraft down to lose height - aircraft will pick up speed not slow down as it should. Avoid nosing the aircraft down as you will just build speed.
- Dumping the aircraft onto the runway (not flaring). This creates an expensive repair bill so don’t be afraid to go around. Always land with enough battery that you could go around if you needed to. The reason you flare is to bleed off as much speed as possible
- Not being able to land properly from both directions.
Hear it First: Join our Mailing List
Sign up to receive new product updates, exclusive discounts, news, and more!

