There is no doubt that a well-finished model railway is simply stunning and something that can be admired by fellow hobbyists and just about anyone that casts an eye over the layout. It is the additional detail that people admire and appreciate. How many layouts have we seen where the train operations are wonderful but it’s the scenery and background things that are just as interesting. If you intend to build a great layout you’re going to need to become an expert with an airbrush. Airbrushing is used on just about every aspect of a model railway. In this article, we take a deep look at Airbrushing and the related accessories.
Whilst it may seem daunting at first I guarantee that your airbrush will become your best friend and perhaps one of the most used tools on your model railway. It is a tool that you’ll continually use as your railway comes to life and as you make structures, scratch build, lay track weather rolling stock and locomotives. my aim is to provide you with the fundamental basics, so you can make good decisions about the equipment you ought to buy and how it should best be used.
What is an airbrush?
You might be familiar with a spray gun that would be used to paint a car at a repair shop or even a full-size train. An airbrush is really just a miniature spray gun that is similar in principle to the spray gun. The airbrush has a little pot that is filled with paint and often this is glass to help you see how much paint you have left. When you’re ready for paint to flow you simply depress the spray button and a fine jet of air will carry with it very fine paint particles.
Why use an Airbrush when spray cans are available?
There is no comparison when we compare an airbrush to a spray can. A spray can much like a light switch and it’s either on or off so the operator is not afforded any control over the application of paint. An airbrush is a true tool that in the hands of an artisan can produce the most realistic scenes a weathering. You can’t do that with a spray can.
With a spray can I have to accept the paint colors on hand whereas an airbrush allows me to choose high-quality paints and mix those to attain the color I’m after. High-quality water-based acrylics will provide a much finer and more professional finish.
Although a good airbrush is expensive it will soon pay for itself many times over. Low-cost airbrush will do a good job too but they have some limitations that we’ll discuss later. Even the lowest cost airbrush will give a better finish. Spray cans are not cheap; they just leave a cheap finish. I prefer water-based acrylics and although some water-based acrylic spray cans are on the market the color palette is limited and you will pay a premium for those cans and end up with a poor finish. Did I mention I really like airbrushes?
Getting Started
HobbyKing has a great range of tried and tested airbrushes that hobbyists have used for many years. Not only do they have airbrushes, but good quality compressor. Should HobbyKing not have what you’re after your local hobby shop may have something of interest.
How does an Airbrush Work?
An airbrush is a simple device. When the spray button or spray level is depressed, the air is allowed to flow. This causes the paint to be siphoned from the paint pot up into the air stream and is atomized. More advanced airbrushes work slightly differently. By pulling back on the button this pulls the needle away from the tip, causing the paint to be siphoned from either a color cup or a jar. The flow of paint is increased by moving the button back further. Air flowing around the tip atomizes the paint. For close work, spray at lower pressure, and use less paint flow for tight, close precise painting such as painting rail or weathering find details.
What do you need to operate your airbrush?
- Airbrush
- Air compressor or compressed air or an appropriate gas
- Paint - Preferably water-based acrylics. Oil-based enamel is difficult to clean up but can still be used
- Masking tape
- Thinners (depending on the paint used)
Types of Airbrushes:
 A single-action airbrush is the most common type of hobby-grade airbrush on the market today. It is a very simple design that atomizes paint. You adjust the flow of paint through fine adjustments to the nut at the tip. It is difficult to vary the amount of paint sprayed accurately while you use the brush- you must stop painting and adjust by turning a nut near the tip and perform a few test sprays to ensure you’ve got it dialed in. That said, even the cheapest airbrush is great for general use, and even if you purchased one you would not regret it.
A double-action airbrush will allow you to vary the flow of paint by pulling back on the air button while spraying, so you can spray a fine line, or a heavier spray, without stopping to adjust the airbrush. This is a more advanced type of brush- but in the long run more useful, since it can spray from about 50mm (2”) down to about 1.5mm (1/16”) wide.
An internal mix airbrush mixes the air and paints inside the airbrush body; an external mix brush atomizes the paint outside the body - at the tip. The internal mix airbrush atomizes the paint into finer drops, giving a less “grainy” finish. So- for painting the outside of models, an internal-mix airbrush may be important.
The actuator button, when depressed allows air to flow. Pulling back on the button pulls the needle away from the tip, causing the paint to be siphoned from either a color cup or a jar. Air flowing around the tip atomizes the paint. Pull the button farther back and you get more paint; allow the button forward, the paint shuts off. Move closer to the work, and spray at lower pressure, and use less paint flow for tight, close precise painting such as painting rail.
Brands
You could spend a fortune chasing brand names with many upwards of $300. I have two brushes that I use often and with one costing less than $10 and the other under $30. The $10 brush is great for coverage and general use. It is easily cleaned up and put away. The other is a much more precise item and I tend to only use that when necessary as it’s a little harder to clean up. A couple of great airbrush kits are:
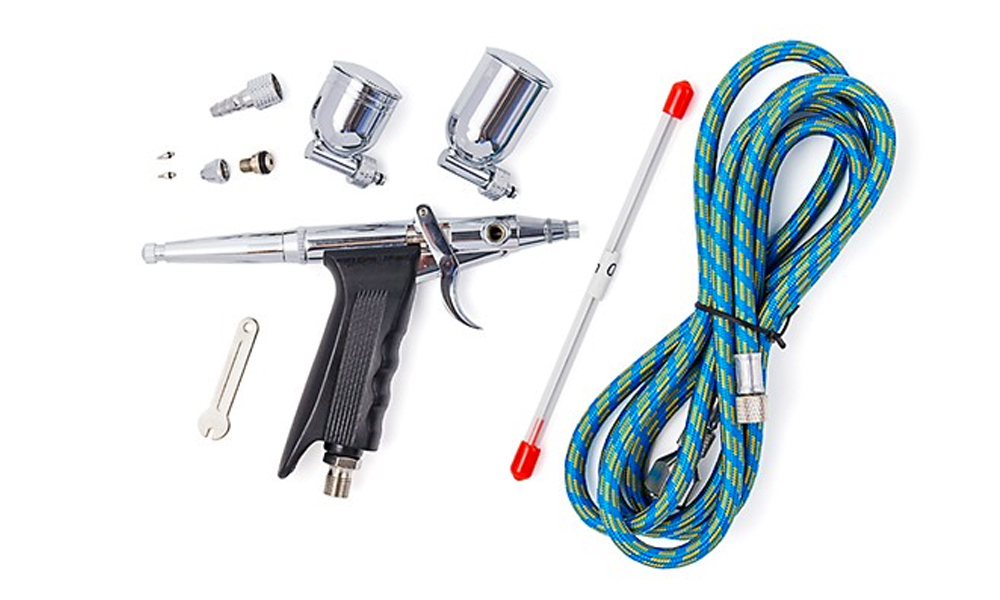
- Single-Action Air Brush Set
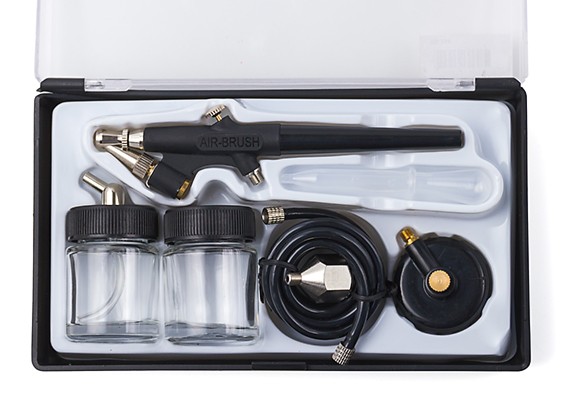
- Pro Series Gravity Feed Airbrush Kit with Double Action Trigger
Would I spend more than $50 on an airbrush?
You can absolutely find expensive airbrushes to buy but they will likely not give you any better results. The products I have suggested will give you a long service life and if looked after will outlive you. You’ll find that these products are low cost but not low quality and will far exceed your expectations. So to answer the question, no! I expect you’ll be completely happy with the two airbrushes above and of course, the airbrush is only as good as the operator, so you would be better off spending time on learning how to use that flashy new.
What Air Compressor should I buy for an Airbrush?
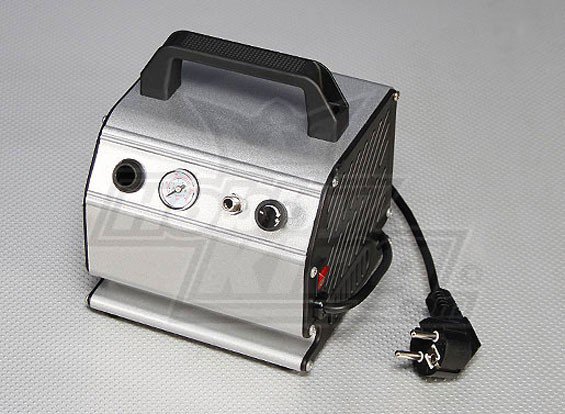 You don’t need to spend a lot of money on a compressor, but you do need one that can deliver enough air. You need steady pressure from start to finish to give you the best finish possible. This means buying a compressor that is bigger than what you need and often hardware chains have fairly good deals on large compressors. These are perfect although If you like you can use one of the smaller units. A great example of a good air compressor is HobbyKing's Air Compressor, it has adjustable pressure and pressure gauge.
You can run your airbrush on any source of cleat air, but you need at least 40 PSI for the thick low-cost acrylic paints commonly used for painting scenery. You use lower (15- 25 PSI) pressure for other paints like Tamiya and Humbrol for example.
Do I need a Moisture Trap?
All atmospheric air contains some water vapor, which will begin to condense into liquid water in the compressed air or gas system when the air or gas cools past the saturation point, i.e., the point where it can hold no more water vapor. The temperature at which this happens is known as the dew point. This dew point becomes all-important in determining how much-compressed air drying is needed. We use a moisture trap because it will cause issues with your paintwork and affect the finish.
Safety Precautions
You are dealing with atomized paint particles and they are not good for you. Don’t breathe those in and take appropriate precautions. Some of the paints you use will use volatile thinners and these pose a fire risk from the atomized vapor. If the levels reach the right point it can become an explosion risk. Respirators are cheap and easy to use so don’t forget to put one on.
Practice Makes Perfect
Now we’re going to get our hands dirty and start painting something. What we paint is really not important as the whole exercise is to get you comfortable with the compressor, the airbrush, and the whole process. We won’t be painting anything important or complex. If you wanted to spray a base coat on to your plywood bases then now might be a good opportunity. A bottle of cheap brown or tan earth-colored paint would be quite suitable. You can try different pressures however I suggest that around 40 PSI should be a good starting point. You can adjust the air pressure from there.
Things to Know
- Paint an extremely well it area and if possible outside in daylight
- When applying paint, do so in very thin passes and build up slowly
- Never add so much paint that it runs
- Apply paint and allow to dry in-between coats
- Keep the airbrush nozzle away from the job or surface
- Higher pressure will draw and apply more paint
- Paint found at the hardware store might be ok for scenery and weathering but not for fine detailed work
- Avoid painting in high humidity
- Use a water trap
Re-Creating the look of the Prototype
We've all seen the operational wear and general grunge, nasty black exhaust stains on the prototype? Oil leaks, built-up grime, and fueling marks. So if they are there on the full size, why not add it to a model? Exhaust stains are easy to reproduce with an airbrush and dark sooty colors from the exhaust stacks in the direction of airflow. pastel chalk can achieve a similar result so experiment with each.
For fluid leaks, take a look at your reference photos to find the appropriate location for oil leaks. A light application of gloss or semi-gloss lacquer tinted with a bit of blackish brown (just slightly) should do it; the goal is to get definite streaks while at the same time staining the general area. skills, use your imagination, and try out any technique that seems logical.
Weathering Rolling Stock
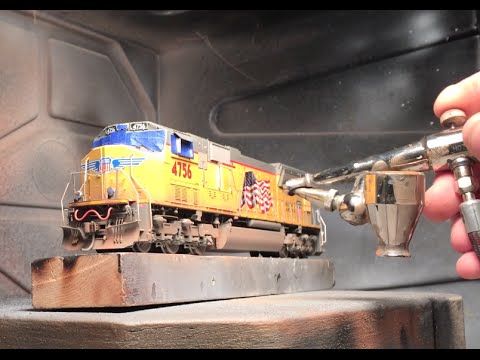 One of the greatest uses for an airbrush is for weathering your, layout, models, and structures, and to be honest there is no real alternative. It provides, without argument, the very best finish. Simple color additions like tans, whites, and browns, sprayed at low pressure can add so much depth and character to a model. Take your time, grab a beer, and don’t be in a rush. Gradually blend in the effect you’re after and remember that you can always wipe it off if you don’t like it.
Any treatments applied to the surface of a model, be it chalks, dust, or a basic light airbrushing, can be referred to as weathering. The aim is to produce the illusion of reality. We seek to change the way the model looks in order to take away the plastic look in order to make it look used, worn, damaged, faded. When we look at the full-size example they are always, dirty, faded, grubby, oily, rusty, or just in service. Weathering is not for everybody, and many people prefer the out of the box experience so they can appreciate the panel lines, rivets, and all the fine detail that goes along with it.
I personally prefer rolling stock to look like it's in service, as it should look. I can understand passenger rolling stock looking like someone loves it because that rolling stock is often cleaned, washed, and looked after. The only person you need to impress if you and if you’re happy with it and you pay the bills then so be it.
Weathering is really an illusion and we’re hoping to tricks the mind into being unsure if they are looking at the full-size prototype or a little model. The perception of the model is the important part because we all know the model is not real but our minds can perceive the model as being real.
Weathering Steps
- Obtain photos of rolling stock with the look you’re attempting to reproduce.
- Keep an eye out for 2nd hand rolling stock that is going cheap and it will give you something to practice on
- Select a wagon and start by removing the bogie or trucks, depending on where you are in the world.
- Using warm water a few drops of dishwashing liquid and a soft-bristled brush or even a toothbrush, begin to wash the wagon and remove all dust and fingerprints. Be sure to get into all nooks and crannies to remove all debris
- Use a hairdryer on the lowest setting to dry the water from the model. Remember to check the heat setting as it may damage the model if on the hottest setting.
- You should no longer hold the wagon by hand but rather use a lint-free cloth. This will ensure you don’t get the dust of fingerprints.
- If you have a lazy Susan you can mount the model on this, however, if you don’t have a rotating table, you could use two pieces with a pin in-between so the cardboard rotates.
- Ensure you have bright lighting and if possible use natural daylight Paint carefully- be sure that you keep a fixed distance from the wagon and take your time.
- Move the airbrush away from the job and start on low pressure and come forward if required.
- Remember that dirt and grime accumulate near the ground, and on flat surfaces.
After you have finished painting you can sometimes end up with a shiny model that just doesn’t look right. You have to flatten the finish using a matte lacquer over the model. This seals the surface and removes any toylike effect of the glossy polystyrene plastic. Testor makes a product called dullcote and I recommend you use their aerosol can and don’t spray it. It is a pest to clean out of your airbrush.
Masking
 Masking is an essential skill you’re going to have to learn. It is inevitable that you’re going to have to mask up areas to get the finish your after. Things like windows, rooftops, doors, detailed lines, etc. If you want sharp lines or stripes you simply have no choice. This is where you want to spend good money on good masking tape because there are good brands like Tamiya and 3M or you could end up with some dollar store tape that isn’t fit for any purpose.
Masking tape is easily cut with a sharp hobby knife into the shape you desire. Be sure to use a sharp blade every session or snap off the tip to make sure it's sharp. If it is not sharp it won’t cut right and you’ll get paint bleeding underneath.
To avoid paint bleed make sure you use fresh masking tape and when spraying is sure to use light coats. If the surface becomes wet it becomes easier for the paint to wick into places where you don’t want it. After you have sprayed a coat remember to press down your masking tape.
Fixing Mistakes
You can remove over-sprayed acrylic paint by using isopropyl alcohol. You can even remove semi-dry acrylic paint with alcohol. If you chose to use enamels then you’re in a world of hurt as it's very difficult to remove and you’re likely to damage to model paint underneath. The lesson here is don’t use enamels as they really cannot be easily undone.
Cleaning Your Airbrush
You must clean your airbrush after each and every use. If you don’t get the paint out you can just about guarantee that it’s going to take hours to clean or is completely gone. In addition to the end of use cleaning, the airbrush must be cleaned between colors. This is why water-based acrylics are just so easy to use and clean.
Make sure that you disassemble the brush and clean every single bit you can. I also suggest that once you clean the paint cup, fill with water, and draw that through the brush. You must ensure that there is no residual paint left in the brush because it builds and will obstruct the brush from working correctly.
Hear it First: Join our Mailing List
Sign up to receive new product updates, exclusive discounts, news, and more!