I was pleasantly surprised when a huge box appeared on my doorstep containing my Durafly SlowPoke model.

The first step, as always, is to unpack the box and check over all the parts for damage and to make sure you have everything. I had to trim some of the stickers back where they were covering the wire fixings on the fin and tailplane, then flex all the control surfaces a few times to loosen up the hinges.
Tail End Construction
Take the tailplane, fin, and rudder assemblies and dry-fit the parts together. Make sure that the fin is central and mark the position on the Tailplane. Then dry fit the complete assembly to the fuselage and check that you get the full movement of the control surfaces. I had to lightly sand my rudder cut out so that I could get full swing with the elevator in all positions. When happy with the fit, you can start gluing the parts together. I used Uhu Por for mine, but you can use epoxy or foam-safe CA depending on what your favorite adhesive is.

Now, you will need to glue the fin and rudder to the tailplane first and then glue the completed assembly onto the fuselage. I found that mine was not a perfect fit but as I am going to recover and repaint it later I will be filling any small gaps with filler, to get a smooth joint. Find the bags that contain the rudder and elevator control horns and fit them to the control surfaces noting that there are marked areas where they are fitted. There are two screws that go into threaded backplates in opposite corners, just do not over tighten them or you will crush the polystyrene. The ball joints are held on with 2ba nuts and bolts, be careful as the nuts get lost easily as I found out. That's the tail end finished, I did find that the paint and stickers are easily damaged so try to be gentle when building the rear end.
Main Wing Construction

Rotate the aileron servo arms to 90 degrees and screw the control horns to the ailerons, then connect the control rods making sure you do not lose the 2ba nuts. Slide the wooden wing spar into one of the wing panels (no need to glue it in). Then slide the other wing panel onto the spar and glue the two roots together. Take the two plastic wing support plates and either glue or just push (depending on how you feel) them into the cutouts in the underside of the wing. The undercarriage drops into the slot in the front brace and is held in by a plastic bracket and two tiny screws.
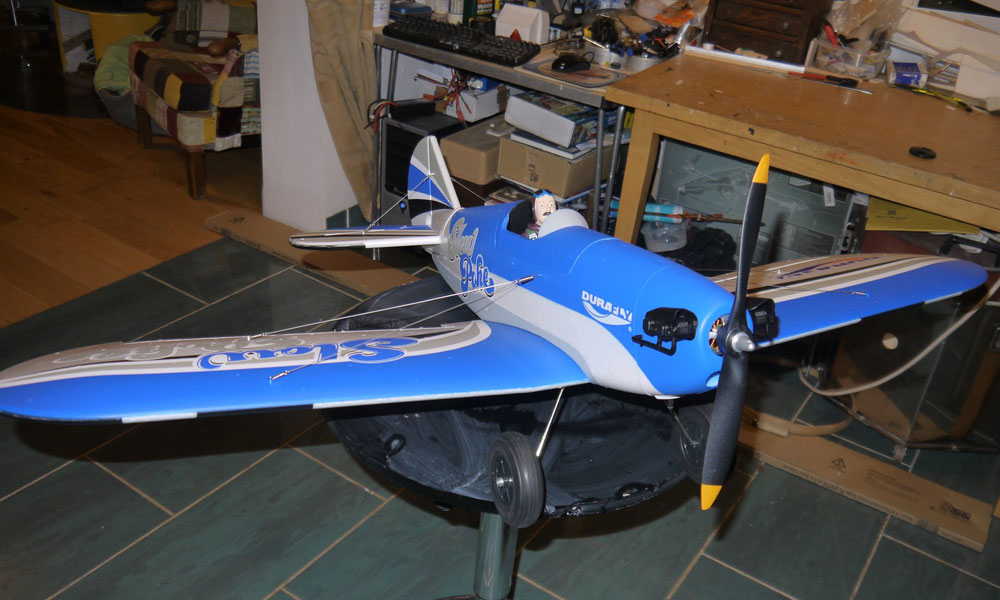
Final Assembly
The two short bolts go through the front holes of the U/c plate into captive nuts built into the wings. Then the wing can be bolted on using the other four steel bolts. Longest at the front, the shortest at the rear. Feed the aileron servo wires through the slot in the underside of the fuselage wing seat and connect together using the supplied 'Y' lead. All that is left to do now is to add the supplied rigging wires and glue the dummy exhaust stub under the nose. These are fitted using the supplied springs and just clip-on, the springs keep the wires tensioned when the model is in flight. Two short ones go from the fin to the tailplane. The front wires are in two different lengths, the longest ones go to the rear of the wing, shortest to the front. The exhaust stub glues into a hole under the fuselage just behind the cowl.

Bolt the prop on and the SlowPoke is ready to be set up for flying, (though I would take the prop off before setting up the control throws). The C of G is set between 80 to 85mm back from the leading edge, I would choose the foremost position for the first few flights, just to be on the safe side. All in all, a very simple model build with very few niggles encountered during construction.
A Quick Summary
Overall, while I really enjoyed building this plane, there were some criticisms I had with it, so here is a summary of all the good points and all the not-so-good points.
Negative
Though I would not say that it was really all that bad by some stickers are a bit susceptible to damage if you are ham-fisted like me. Another problem I had was that the small nuts meant that I kept dropping them.
Positive
- Ease of construction
- Lovely looking model
- Very comprehensive kit
As I already mentioned, I did enjoy building this plane and now I can't wait to get her flying now. Then I will be stripping off the stickers, recovering and repainting her, and adding some scale details for that finishing touch.
Written by Tony Bennett