Model RC Aircraft are subject to punishing extremes that take a toll on the components and the airframe.
We have all seen landings where a plane hits the deck hard only to bounce back into the air, stall, and bounce on the runway again. The corpse of the crippled aircraft, along with any lost limbs is dragged from the strip to be put back together in a makeshift field hospital. Maintenance is often overlooked because nothing has failed yet and most would say that if it's not broken, don't fix it. Full-size aircraft are subject to fairly rigorous maintenance schedules and rightly so. You may be wondering what does this have to do with little toy planes. It’s not like we’re carrying people and of course, this is true, however, many of us fly with or near other people and therefore we should do everything with our control to avoid an accident. This has the added benefit of you returning home with your plane and not a bill for damages.
Control Horns
Check all control horns and clevis for visual signs of damage or wear. Depending on the type of plastic used, discoloration marks can be a sign of fatigue. Wiggle the control horns and assess the rigidity, adjusting as required. If you’re in doubt, replace them. Some types of plastics are particularly prone to fatigue and can fail without notice. I replace them with nylon control horns, as they are as tough as nails. 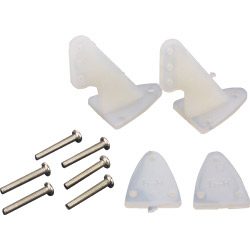 Clevis has been known to come to lose so consider placing a 2mm wide strip of silicone fuel tube and sliding this over your clevis. This should help reduce the chance of the clevis detaching from the control horn. Some manufacturers include these little-precut tubes with a model and so do not but they are easy enough to make. Check that control surfaces do not have too much play. Ideally, you do not want any play (unwanted movement), as it tends to result in the aircraft handling poorly. In extreme circumstances, it can result in a flutter of a control surface and if not caught quickly the surface can fail. Either way, you’ll be lucky if the aircraft ever fly again. Ball links are cheap effective ways to travel slop immensely.
Control Surface and Hinges
Check all control surfaces are firmly fixed to the aircraft. To do this, gently pull at the control surface and confirm the hinges have a solid purchase. If you find a hinge that requires attention you may need to remove and replace the hinge. I find sliding a sharp blade down both sides of the hinge allows the hinge to be freed from the model. I use polyurethane glue on hinges as it expands into all crevices and has an incredibly strong bond. It can be used on all materials, wood, metal, foam, and composites, and is not brittle unlike Cyanoacrylates (AKA CA or Superglue) My personal preference is for pinned hinges, however, some complain that it is easy for the glue to wick into the pin and cease the hinge. By carefully applying a little vegetable oil to the pinned end of the hinge, the glue will not wick, nor will it stick to the moving part. Just be sure to apply it carefully and very lightly with an old paintbrush.
Never try to glue a foam hinge that has torn as it will absolutely fail. Using a brand new blade and a ruler, cut right through the foam hinge using the ruler as a guide. Use a straight edge to assist with cutting slits for hinges.
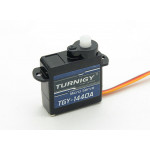
Servos
Check those servos are secured properly by applying a little force to see if there is unwanted movement. If necessary you should tighten the screws and replace any perished grommets. Power up the aircraft and cycle the servos through the TX, whilst applying a little pressure to the control surface. Check that servo are not binding or jumping gears. If you locate a servo that is troublesome change it out. If you replace a wing servo consider changing the other side as well, the same goes for flap servos. Check visually for signs of wear and tear and address as required. Also, use this time to check noisy servos and fix the issue. If a servo is making noise it is indicative of pressure being applied by an ill-adjusted control surface. A noisy servo is being powered and this can lead to excess heat, shortened working life, and possible failure. (Note: Digital servos are very noisy by design and can continuously buzz. Some common causes are tight ball link, flap pushing closed or open too hard, retract doors needing attention. Elevator servos are supercritical because you could land a plane with a failed aileron servo but the same could not be said for a failed elevator servo. You’re going to have a bad day. 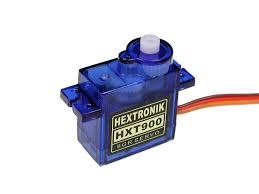 For park flyers 1200-1300mm wingspan, HXT900 is an excellent choice for a plastic gear servo or if you’re after something a little more rugged then I would suggest a corona mg929.
Glued Joints
Many aircraft are assembled with glue and over time glue can perish for any number of reasons, creating a ticking time bomb. I recently observed a glider fail mid-flight and ditch in the surrounding field; upon retrieval it was clear that the glue had perished and caused the horizontal stabilizer to break free, resulting in the elevator pushing the nose and losing control. This could have been avoided with a basic maintenance check.
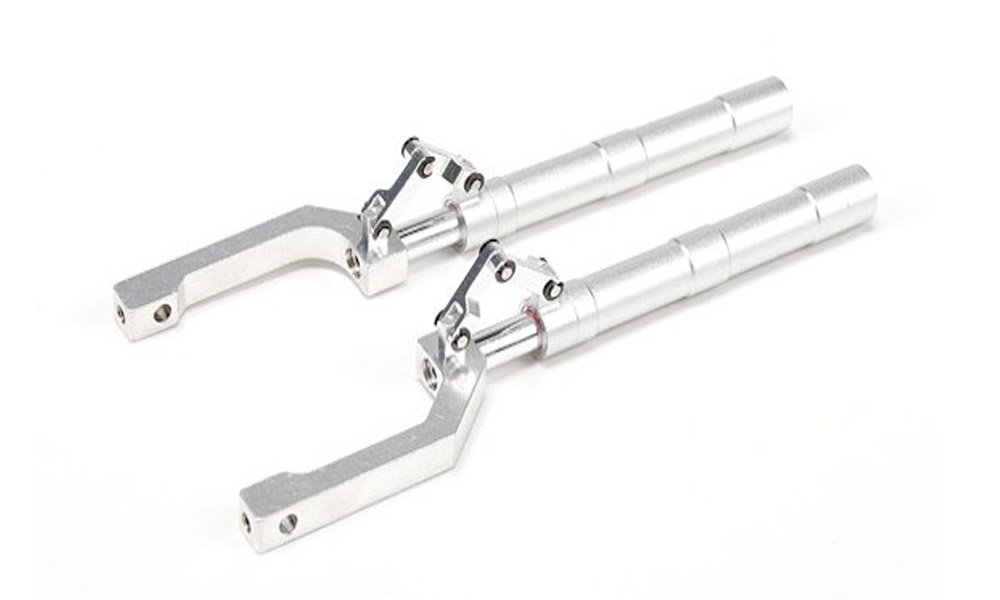
Landing Gear
Landing gear takes a beating, although considering what we put them through it holds up well. In fact, it's surprising that they manage to survive at all. Often the glue that holds the landing gear in place can become weak and begin to pull away from the aircraft. Polyurethane glue is perfect in this situation as it fills gaps and does not become brittle. I would strongly advise you not to use a brittle glue-like CA (Cyanoacrylate) Often the metal pins and axel can become bent in a hard landing. Although you can bend them back to shape you can expect these to fail if you bent them back more than a few times. The metal will work to harden, fatigue, and fail so if you think the metal has been stressed and you’re in doubt, replace it. A pin costs only a few dollars so don’t ignore it. If you lose a wheel in flight or on landing the resulting damage will be far greater than a dollar. Check that wheels track correctly and ensure the wheel does not bind on the strut. This acts as a brake and will make take-off and landing very difficult, if not impossible. Sprung landing gear can attract dirt and debris so consider disassembling the spring and piston to clear any dirt and clean the oil from those parts. You can then substitute with graphite grease as this will not attract grit or dirt.
Checklists
Get in the habit of checking your aircraft as it may save you from an avoidable crash. There are two kinds of checks that we should do. Pre-flight and post-flight checks.
Pre-Flight Checks
|
Post Flight / Put Away Check
|
Written by gozerian
Hear it First: Join our Mailing List
Sign up to receive new product updates, exclusive discounts, news, and more!