"Almost" Ready to Fly
Apr 30, 2018
Not a bad plane, but be prepared for lots of mods to the kit!
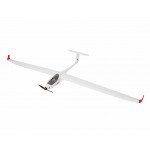
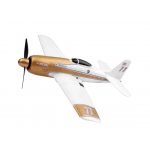
Needless to say, it's an Extra 300. You get a nice acrobatic balsa wood airplane. I started off building balsa plane with gas engines back in the day, so it was nice to get back into a balsa build after a lot of foamies. Anyways, this plane looks nice, but it takes a while to get there.
1st thing is hardware. The kit was missing engine mounting hardware. Typically you get a motor with the mounting bracket and screws to mount the motor to the bracket, but the kit should provide the hardware to install it on the motor mount. This did not. Also, the tail wheel did not have the rod pre-bent, so be careful maintaining the correct tail wheel orientation.
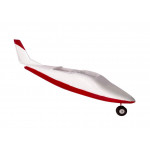
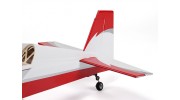
Did I mention the laughable 1.5" main wheels that come with the kit? They are sooooooo skinny compared to the wheel pant openings. I recommend getting some wider wheels for aesthetics. If you're not flying at paved runways, then you might want to not even install the pants. I didn't. To top it off, they sent some 2.4mm nuts instead of the proper 3mm for the wheel pant installations.
2nd, the manual leaves a lot of operations out. Here are some pro-tips for y'all.
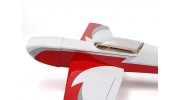
The manual completely leaves out the elevator install. Due to the tail design and horizontal install, the elevator has to be installed after the stab is mounted. The C-shaped rod that comes with the kit is used to link the (2) elevators. Prior to installing the horizontal, with the elevator loose installed, lay the rod over the elevators and mark where the legs go into the LE. I used a 3/32" drill for the holes into the LE. Be careful trying to stay centered on the thickness since the balsa is thin and the LE is rounded. After drilling the holes, use and exacto knife and cut a v-shaped trench along the LE from the holes to the roots/inboard ends. Remove wood and monokote. This will allow the rod to sit flush with the LE providing a better fit for the elevators. After you install the horizontal you have to wiggle the C-rod in the little opening between the TE of the horizontal and the fuselage. When you install the elevators, coat the hole and groove with epoxy, coat the section of the C-rod that mates with the elevators. I recommend using a shim or tape to protect the surrounding areas while it is curing and to insure that the rod is snug in the groove while curing. This method will aid the elevators in deflecting at the same rate. If you install the rod without the groove+epoxy you might see that the deflections are different from the servo driven side to the slave side and that will cause a roll when you deflect the elevators. I suspect this may be the cause of the other reviewer's experience.
The same method should also be used with the tail gear. However, epoxy is optional. There is only (1) control surface, unlike the (2) elevators, you don't have to tie them together. The tail wheel bracket is held on with (4) screws and ain't moving, so I think its optional to use the epoxy. I just taped over the notched area and it worked great.
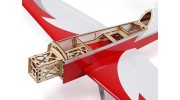
The cutouts for the servos were oversized for the recommended 9g-17g servos. I used (4) metal gear 9g servos and the cutouts were too large. I checked the dimensions of my 9g compared to the 17g and recommended store page servos. They were the same, so it wouldn't have made a difference. I had to provide balsa support pieces and shims for the aileron servos and a doubler over the elevator/rudder cutout with the correct sized cutouts. The 9g servos worked fine in operation.
After assembling the wing and drilling out the mounting holes, mount it to the fuselage and install the lower fuselage cover while the wing is mounted to the fuselage. This will insure that your cover is installed in the right location for best fit! For my kit, the mounting holes didn't line up with the access holes in the cover, about 1/2 a hole off, but my fit was perfect. If you get the same problem you can always slot the hole in the cover until you can get your hex-wrench in there.
Lastly, the biggest problem I had with the build was the cowl. It just didn't seem to fit right with the motor mount location. I had to angle it down to a noticeable degree to allow for shaft clearance. I think this maybe a design flaw between the electric to gas conversion. There's not much I could do but "live with it" and I didn't really notice any performance issues.
The only different setup recommendation I can give is to use 2200 mah battery. I initially tried the 1300 mah and thought the CG was too far back with the battery mounted as far forward as possible. The additional weight of the 2200 worked well. You might have to trim the bulkhead common to the battery tray to allow for installation.
Finally, make sure you set your throws correctly. Initial flight with this bird was white knuckled for me, because the throws were set too high and this bird will turn! You might want to start off at around 40% aileron and 70% elevator/rudder from their recommended throw rates.
For $80 + shipping, this isn't a bad balsa wood ARF kit, but just remember that the "Almost" is used very liberally during the build.

")
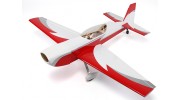
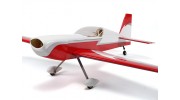


 Extra 330 L Balsa Kit