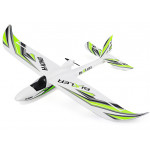
HobbyKing Extra ™ 300L 930mm Aerobat Balsa (ARF)
")
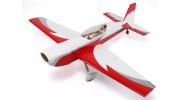
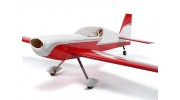


HobbyKing Extra ™ 300L 930mm Aerobat Balsa (ARF)


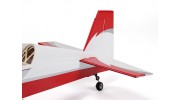
Además de la estructura del avión pre-construidos y cubierta, la HobbyKing ™ 300L adicional incluye un carenado pintado de fibra de vidrio, el tren de aterrizaje de aluminio, y moldeados pantalones de la rueda de plástico. Un paquete completo de hardware incluyendo CA bisagras, barras de control, y la unidad de rueda de cola completan el modelo.
caracteristicas:
• casi listo para volar - el montaje final completo e instalar su elección de la electrónica
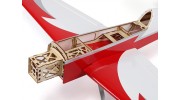
• Construida de balsa peso ligero y el fuselaje de madera contrachapada
• carenado de fibra de vidrio pre-pintado
• escotilla de acceso garantizado magnéticamente
Especificaciones:
Envergadura: 930mm
Longitud: 860 mm
Área de ala: 16.5dm2
Necesario:
4 x 9 ~ servos 17g
28 outrunner serie.
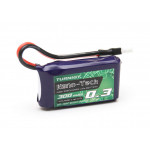
3S 11.1V 1500mAh Lipo 1300 ~
20 ~ 30A ESC
Transmisor y receptor de Canal 4
-
 Extra 330 L Balsa Kit
Regístrese para subir videos, por favor Iniciar Sesión o registrarse

Regístrese para escribir reseñas, por favor Iniciar Sesión o registrarse
Adam | Comprador verificado
-
Overall
-
Quality
-
Value
"Almost" Ready to Fly
Apr 30, 2018
catta | Comprador verificado
-
Overall
-
Quality
-
Value
Customer Rated
May 30, 2016
catta | Comprador verificado
-
Overall
-
Quality
-
Value
Certified Buyer Rated
Mar 23, 2016
| Thing 1 | Download [132] |
| Thing 1 and 2 | Download [88] |
| Thing 1 and 2 motors | Download [118] |
Regístrese para subir archivos.
Por favor registrarse o registrarse para empezar a ayudar a los aficionados ahora!
Accesorios


Special Price 9,57 €
You save 2,37 €
Was 11,94 €

Special Price 10,11 €
You save 2,52 €
Was 12,63 €

Productos Relacionados
-
Turnigy 1300mAh 3S Lipo 30C PaqueteSKU: T1300.3S.30

Special Price 9,57 €
You save 2,37 €
Was 11,94 €
-
Manía Rey 20A ESC 3A UBECSKU: F-20A
11,63 €
-
Turnigy ™ BMS-MG 380MAX Micro Servo 4.1kg / 0.16sec / 17,4 gSKU: BMS-380MAX
17,52 €
-
Turnigy nano-tech 1500mah 3S 25 ~ 50C Lipo Pack deSKU: 9210000076
Special Price 10,11 €
You save 2,52 €
Was 12,63 €