ターニッジーX3S 3Dプリンター(米国プラグ)


ターニッジーX3S 3Dプリンター(米国プラグ)


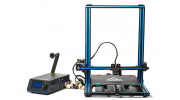
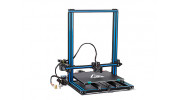
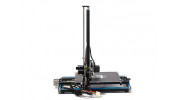
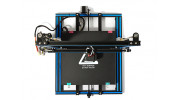
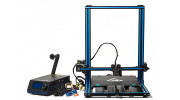
大容量プリンターをお求めやすい価格でご紹介! ターニッジーX3S 3Dプリンターは、3D印刷プロジェクト、スペアパーツ、彫刻、およびデザインの作成に最適な大きなヒートベッドを備えています。 ターニッジーX3Sプリンターの広い印刷領域は、彫刻や家庭用品などの大きな長い印刷に最適です。PEIシートで覆われた取り外し可能なFR4印刷ベッドにより、完成したモデルを非常に簡単に取り外すことができます。
X3Sは、PLA、ABS、およびPETGを完全に印刷し、低速でTPUを印刷するためにも使用できます。
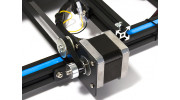
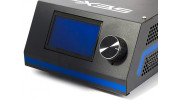
高品質の液晶画面とコントロールノブを収納した便利なコンソールボックスで機械を制御します。シンプルで効果的なレイアウトにより、プリンターは使いやすく、ワークベンチやオフィスに設置できます。 Vスロットアルミニウム押し出し材、オールメタルフレーム、3軸すべてのプーリーベアリングを備えた、これは、大きな印刷をしたいが大きなお金をかけたくない人のための家庭やオフィス向けの頑丈な3Dプリンターです。
仕様:
印刷サイズ:330x330x420mm
プリンターサイズ:521x523x606mm
ホストサイズ:200x310x94mm
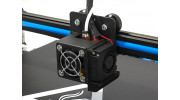
ノズル径:0.4mm
ノズルの印刷温度:<275°C
画面:12864LCDディスプレイ
フレーム材質:アルミ
印刷速度:40-120mm
冷却:4010冷却ファン
ヒートベッドの寸法:330x330x3mm
ヒートベッド印刷温度:<90°C
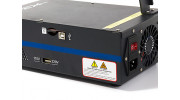
入力:AC 110V / 220V
出力:DC 12V(20A)
温度制御タイプ:1000Kサーミスタ
定格電力:240W
ソフトウェア:Repetier-ホスト、Cura
接続:USBケーブル/マイクロSDカード
正味重量:12KG
プラグ:米国


DONALD | 確認済みの購入者
-
Overall
-
Quality
-
Value
Great Product
Dec 05, 2021
Joe | 確認済みの購入者
-
Overall
-
Quality
-
Value
great value for your money
May 17, 2021
Paul | 確認済みの購入者
-
Overall
-
Quality
-
Value
Useless without upgrades
Mar 09, 2019
Jason | 確認済みの購入者
-
Overall
-
Quality
-
Value
Nice printer after some much needed upgrades
Mar 01, 2019
john | 確認済みの購入者
-
Overall
-
Quality
-
Value
Not good for the impatient first timer. This one takes patients!
Dec 28, 2018
Darrin | 確認済みの購入者
-
Overall
-
Quality
-
Value
Great Value, easy to assemble.
Dec 10, 2018
Eric | 確認済みの購入者
-
Overall
-
Quality
-
Value
Cheap - OctoPrint Update
Nov 06, 2018
Eric | 確認済みの購入者
-
Overall
-
Quality
-
Value
Cheap
Nov 05, 2018
Michael | 確認済みの購入者
-
Overall
-
Quality
-
Value
Great printer at a great price.
Oct 28, 2018
| First 2 prints. | Download [2] |