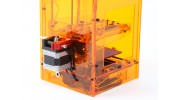
Printer Mini Fabrikator 3D por menino minúsculo - 110V US - Orange


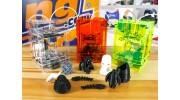


Printer Mini Fabrikator 3D por menino minúsculo - 110V US - Orange
Awesome!


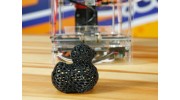
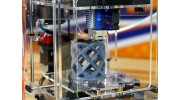
Printer Mini Fabrikator 3D pelo menino minúsculo irá surpreendê-lo com a qualidade de impressão um pouco máquina pode produzir, é comparável a grandes máquinas muitas, muitas vezes o preço. Nosso objetivo com trazer esta impressora para o mercado era de oferecer aos nossos clientes uma forma rentável para experimentar impressão 3D com uma pegada que pode acomodar primeiros projectos de mais amadores. Devido ao pequeno tamanho geral desta impressora vai se encaixar no mesmo o mais restrito de espaços de trabalho e pode ser pego e facilmente armazenado, tornando-o ideal para escolas e alunos.
A impressora TinyBoy original foi projetado Parker Leung em torno de um conceito que até 2016 todos os alunos devem ter a oportunidade de ter uma impressora 3D em sua mesa; a juventude é o nosso futuro e isso é parte da razão pela qual temos por trás dele. A outra razão foi por causa da incrível qualidade de impressão que você pode alcançar nesta impressora para um custo tão baixo.
Como qualquer hardware de computador do Mini Fabrikator precisa de software para executá-lo, recomendamos usar Repetier-Host como o software de impressão, pois é um simples de configurar e usar o programa que a maioria dos clientes vai ter instalado e funcionando em cerca de 15 minutos. Fora isso a impressora está pronta para ir.
Temos também partenered com menino minúsculo assim que você é capaz de usar sua comunidade para discutir o seu Mini Fabrikator com outros usuários, compartilhar idéias e mostrar seus projetos de impressão lastest. Você também vai encontrar outras dicas e truques úteis, configurações Repetier-Host, cópia do manual e manter-se atualizado com as últimas notícias da equipe de menino minúsculo. Clique aqui para saber mais.
Menino minúsculo foi originalmente concebido como uma atividade de aprendizagem onde os alunos da escola iria construir a impressora si, isto significa que a impressora é incrivelmente fácil de manter e reparar a si mesmo e até mesmo atualizar com as coisas como luzes LED, arrefecimento directo, ecrã LCD e slot para cartão SD ou mesmo uma cama de impressão aquecida.
Para mais informações, assistir a esses vídeos:
Vídeo diária
Guia de set-up
Guia de impressão
Mini Fabrikator pelo menino minúsculo, impressão 3D para todos.
Características:
• Grande área de impressão para a sua dimensão global
• Open Source concebido e apoiado
• Compatível com vários aplicativos e softwares populares
• Portátil e fácil de configurar
• À prova de futuro com fácil impulsionada comunidade modificações DIY
hardware • base Marlin com capacidade para expansão
• Diversão para todas as idades
especificações:
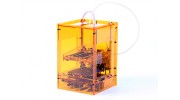
Tamanho: 15cm (W) x 15cm (D) x 22 centímetros (H) (exc titular filamento.)
O tamanho de impressão: 80 milímetros x 80mm x 80mm
Filament: 1,75 milímetros PLA
Borda: ramps1.4 mega2560 com stepstick 4 A4988
Alimentação: Externa 12V 6A Transformer
Software: Repetier-Host
TinyBoy é uma impressora 3D design aberto e você pode obter os detalhes aqui conta Github (http://github.com/HKCOTA/TinyBoy) , que está licenciada sob uma Licença Creative Commons Atribuição-Compartilhamento pela mesma Licença 4.0 Licença Internacional CC-BY-SA
-
 Mini Fabrikator 3D Printer By Tiny Boy - Orange - US 110V
Registre-se para enviar vídeos, por favor assinar em ou registar

Registre-se para escrever comentários, por favor assinar em ou registar
entomophile | Comprador Verificado
-
Overall
-
Quality
-
Value
Customer Rated
Oct 15, 2015
| Comprador Verificado
-
Overall
-
Quality
-
Value
Certified Buyer Rated
Sep 08, 2015
Registre-se para fazer upload de arquivos.
Por favor assinar em ou registar para começar a ajudar amadores agora!