Introduction
Before we get into this review and overview of the Basher RockSta, I need to confess something.
This is my first RC Car.
When I was a boy I had a few cars that were 'remote control' by the virtue of a long cable that came out of the back into a plastic control that contained a few controls – forwards, backward and steer left and right. Back in those days true (yes I am that old) R/C cars and trucks needed radio special licenses to use and cost hundreds of pounds. I wanted one, but that kind of extravagance was out of my family's price range.
Fast forward to now, the R/C hobby has exploded and the choice of products and technology can be a little overwhelming. I've spent the last 10-odd years in the air flying helicopters, multirotor, planes, and gliders so when this new upgraded RockSta appeared with everything I needed in the Box (apart from the batteries) - I was all in.
Ground vehicles also represent a great way to have fun with the hobby even when the weather is poor. Blowing a gale? No problem, pop the LIPO into the car or truck instead and you can spend a happy hour racing around and exploring the local environment.
Specifications
The RockSta is one of the bestselling R/C ground models from HobbyKing and it's easy to see why.
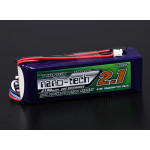
For less than £80 you get the vehicle and remote control, all bound and ready to go. You will need some batteries for the transmitter and Rocksta itself. The controller takes standard AA batteries and the RockSta will need a little 2S LIPO pack. I'm using the ZIPPY 350mAh pack here and it fits perfectly and gives almost half an hour of crawling. This updated version has all-metal gears, the originally used plastic and under heavy load could strip or break. I've seen the metal gears on the website but on this newer model they are there out of the box.
The control allows for 4 types of steering that can be changed at the push of a button. Front and rear-wheel steer, all-wheel steer, and a mode that links the front and back axels together so the model 'crabs' left or right. Handy when you're getting into a sticky spot and need a way to move without turning.
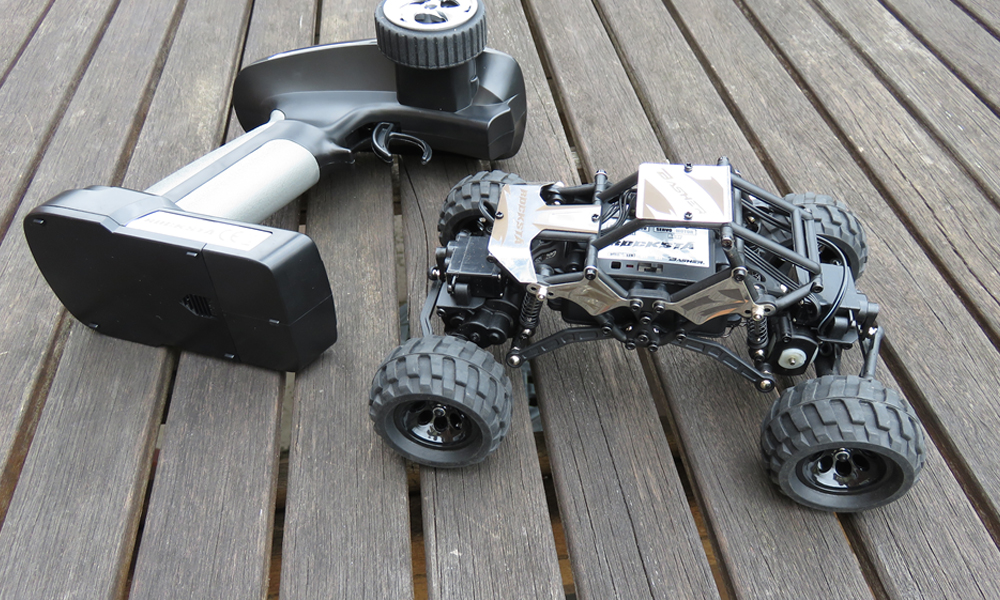
The small brushed motors that power the model are down on the axles themselves helping to keep the center of gravity low. The suspension for such a small model is very good, you can adjust the caster angle is needed. When combined with the soft grippy types make for a model that will try it's best to climb up and over just about anything.
The body itself is metal with metal 'shields' screwed into the 'bonnet' sides and top of the model. All of these look very nice and include an engraved logo and detail. In mine, I removed the top plate for the FPV gear (more on that in a moment).
One thing that may surprise you (it did me) was how compact the model actually is. It's only 95mm high, 130mm wide, and 187mm long with a weight of around 274 grams. It'll sit across your palm easily.
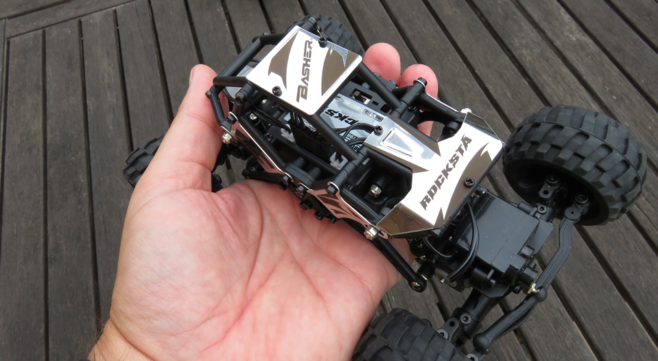
The ground clearance on such a compact model is very good at a decent 28.2mm so roaming around a field or garden you'll have to work hard to get hung up.
Unboxing and Setting Up is a very quick and easy process
There isn't a lot of unnecessary packaging inside, just the car and the transmitter. The car is protected by a formed plastic clamshell half that protects it during transport. Pull the 'P' clips from the battery compartment in the bottom of the body and pop in the LIPO, install your AA batteries into the transmitter and you're set.
Using
The control is actually quite nice for this price. The movement of the steering control is accurate and the resistance and feel of the movement are good. The trigger control makes the model move forward is squeezed and reverse if the enclosed trigger is pushed in the opposite direction. Easy.
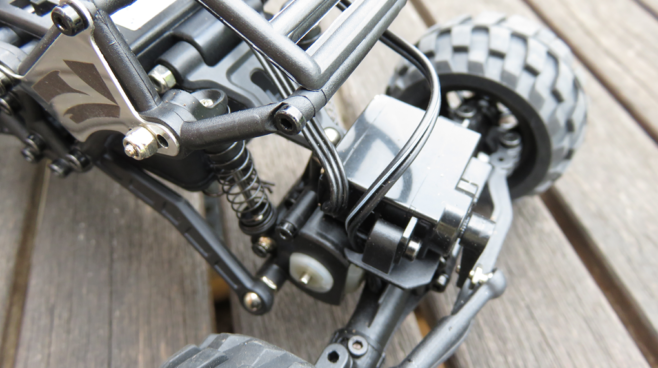
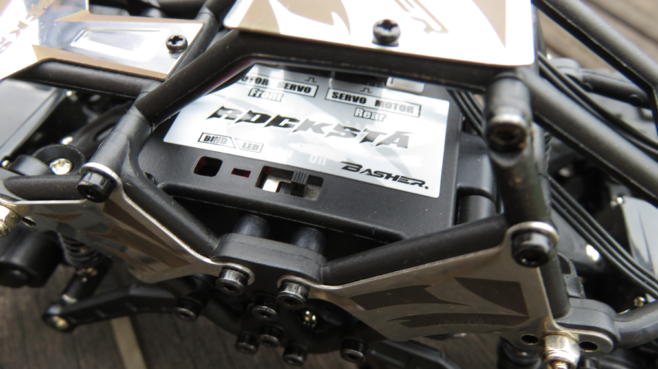
The transmitter is turned on using a small switch under the smoked plastic top that hinges up out of the way and protects the controls when you're driving. On the model, there is a small switch (see above close up of the center of the body) that turns the model on. The binding was already taken care of so as soon as both were ported up it was ready.
I'd recommend running it on a flat surface indoors first to trim the steering servos. There are controls to trim the main controls and reverse them too under that smoked plastic on the transmitter. To trim the model run it forwards and backward on the level smooth floor a number of times and see which way it has a bias for. Use the trims to remove that bias so you can run the model forwards and backward without it slowly changing direction.
Once that's done you're ready for the road (or dining room, or lumber pile, or rock garden...)
One thing to note is that the model isn't fast. The gearing alongside those motors is designed for low speed and lots of torque. Even at full throttle, it'll manage a slow walking pace. But, the result of that low gearing is one tenacious rock crawler.
Anything below about 2” high will present this model with no problem at all. Larger obstacles can be conquered by careful use of the steering to 'grab' the obstacle and careful throttle use.
And that is the fun of this model. It's not about tearing about the local field at high speed it's about challenging yourself to navigate a certain route and work out the best way to drive it successfully.
The only thing that will stop this RockSta in its tracks (apart from an empty battery) is a twig through the gaps in the frame or trying too hard and rolling the model onto its back. But for me, that was fun but it was missing an FPV camera.
Adding FPV
When I looked at the places that could support a little FPV camera I thought that the 'bonnet' was going to be the best bet. It was at the front and low enough so that it would be somewhat protected when one of the inevitable 'roll-overs' occurred.
Thanks to an excellent suggestion from a subscriber I decided to mount it on top of the model. Why? I hear you ask. It's about perspective.
Having the camera on the top of the model does two things – it allows you the best view of the upcoming terrain and also acts as a datum so you know if it looks like the camera will go 'under' an obstacle then the whole truck will too.
Knowing that I set out to make a nice solid FPV mount that wasn't too heavy. I could have cut into the body of the model and taken power from the main battery but I wanted the option to be able to return the model to a 'stock' condition and also didn't' want to impact the driving time. I also wanted to use a compact camera and video transmitter so pulled a RunCam Racer camera and one of their excellent TX200 backpack style transmitters with a dipole antenna and all the connections you need to simply plug this all together. All I needed then was a small 'stick' lipo like the ones used in indoor quadcopters and helicopters and I was set.
I designed a 3D printable enclosure for it and then mounted that to the top of the model. There is limited room on the model for a 'pan' servo and no way to add an extra channel to control it with the 'RTR' components in the box but maybe next time.
I've made the design of the FPV pod available to download from my Thingiverse pages.
The only extra thing I did do was pop a blob of hot glue over the connection for the antenna into the TX200 transmitter on the back of the camera. It helps keep the antenna in place in those roll-overs.
TOP TIP: If you are using a dipole style antenna like the one in the image then make sure that you use similar on any FPV goggles you use. Use a 'rubber ducky' antenna and if you have a diversity setup then invest in a 'Linear Patch' antenna too. You'll get much better reception and clarity (see my review video of the RockSta on YouTube to see what I mean.)
Summary
If you've been looking at getting an R/C ground vehicle to try then this is a great model – if you're not interested in speed. For crawling around the back garden, garage, or indoors it's a well-specified little rock crawler.
As this isn't a new design there are lots of spares and availability so if you do manage to bend or break something then it's easy and inexpensive to repair.
I would have liked it to be capable of a little more speed and for the motors to be brushless but having those motors enclosed like they do help keep them out of harm's way. This little model is responsible for making me consider now looking at a larger, faster model to add head tracking FPV too. RockSta, I'm blaming you! Now, if the weather or conditions mean that I can't fly then this is how I scratch that RC hobby and FPV itch!
Written by Painless 360