Lieferant werden Blog Neue Artikel
Registrieren

Gesamtpreis

0,00 €

Warenkorb 0 Warenkorb 0 Loading...

MINI MWC Flight Control Board und DSM2 kompatiblen Empfänger ACC / GYRO / BARO / MAG

Generating Links

MINI MWC Flight Control Board und DSM2 kompatiblen Empfänger ACC / GYRO / BARO / MAG

Preis:

Now save speichern 0,00 € 0,00 €

34,57 €
Bereits gekauft Discontinued Product

Please continue searching for a similar product.
SKU:
9154000006-0
Kostenloser Versand? Klicke hier um mehr zu lernen!

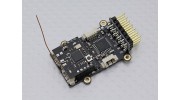
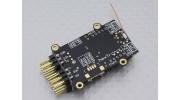
Der neue Mini MWC Flugsteuerungbrett ist Meilenstein für den Fortschritt und den Einfallsreichtum der MWC-Plattform. Die Kombination der Leistung des ATMEGA328P mit einem Beschleunigungssensor, Gyro, Barometer und Digitaler Kompass mit einem On-Board-7-Kanal DSM2 kompatiblen Empfänger (mit einem Onboard-bind-Taste!). Alle mit Gold beschichtet Verbindungen und Stellfläche nicht viel größer als eine große Münze auf einer Qualitäts-Doppel Kupfer PCB verpackt! Die Welt der Mini-Multi-Rotoren nur zu ihren größeren Bruder gefangen.

Die MWC Plattform bietet eine kurze Liste der Funktionen und verfügen über ähnliche; Auto stabilisieren, Höhen-, Einfach-Modus und vieles mehr, und mit der verfügbaren GPS-Option auch in einer festgelegten Position trödeln und zu Hause Optionen zurück! Sie können sogar eine optionale OLED-Display für eine einfache Programmierung und Feedback zu befestigen entscheiden!

Eigenschaften:
• 7CH DSM2 kompatiblen Empfänger (PPM SUM)
• Selbstspannungsprüfung
• FTD1 Schutz
• ATMEGA328P Mikrocontroller
• MPU6050 Accelerometer und Gyro
• BMP085 Digitale barometrische Sensor
• HMC5883L Digitalmanometer / Kompass
• C8051F330 MCU
• CYRF69103-Radio
• Dual IIC Ports
• UART
• GPS-Port (GPS nicht im Lieferumfang enthalten)
• OLED-Bildschirm-Port (OLED nicht im Lieferumfang enthalten)

Folgende Funktionen können durch den MINI MWC Flugsteuerungbrett realisiert werden:
-Auto Stabilisierung
-Stabilize Die Höhe
-Behoben Überschrift Kurs
-Hovering An einer identifizierten Position (benötigt 12C-GPS-Wandlerkarte und unterstützt durch GPS)
-Return Flug automatisch (benötigt 12C-GPS-Wandlerkarte und unterstützt durch GPS)
-Und mehr

MINI MWC Flug Board unterstützten Modi:
-GIMBAL Individuelle Wiege Kopf Stabilisierung
-SINGLECOPTER-VTOL einachsige
-BICOPTER-BICOPTER Avatar
-Tricopter
-FLYING WING
-VTAIL
-Behoben-Flügel Flugzeug
-4-Achse (QUADX, QUADP, Y4)
-cradle / Gimbal Kopf Stabilisierung
-6-Achse (Y6, HEX6, HEX6X)

Optionen nicht enthalten: (Aktien wird in Kürze verfügbar )
-MX-FTDI Programmierstick-Tool
-OLED Bildschirm können direkt auf MINI MWC Flugsteuerungbrett montiert werden
-IIC Zum UART-Konverter Board, Es ist das UART-Signal von GPS zu einem IIC-Signal für den Wechsel
-GPS-Modul

Specs:
Größe: 47.7X23.5X11mm
Gewicht: 7,8 g
Arbeitsspannung: 5-8.4V

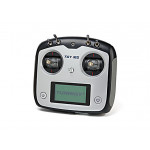
* Sender für MINI MWC Flugsteuerkarte benötigt DSM2 und 4 - Kanal oder über (wir empfehlen 6CH oder höher) zu unterstützen

Video hochladen

Registrieren Sie sich bitte, um Videos hochzuladen anmelden oder Registrieren

Themen
Sortieren nach
Neueste Themen
* Nickname:

* Deine Antwort:


Geben Sie den im Bild gezeigten Text in das Feld unten ein
*Verifizierungs-Schlüssel:
Abbrechen
Senden
Poste ein neues Thema
* Nickname:

* Dein Thema:


Geben Sie den im Bild gezeigten Text in das Feld unten ein
*Verifizierungs-Schlüssel:
Beitragsthema

Registrieren Sie sich bitte, um Bewertungen zu schreiben anmelden oder registrieren

Motoko | Verifizierter Käufer

  • Overall
  • Quality
  • Value

Great Board but need some solid set docs

Jun 11, 2017

The board is great the only thing is sorting out all the setting I am use to Arduino for 3d printers but there is a lot of information on how to set up the firmware. this board is not one that you just plug and go it has a lot of setting that need to be made and not a lot of documentation. Be ready to do hours of research on the internet finding answers. All the answers or not easy to find and a lot of it is for the v1.2 board along with hit and miss. I am still trying to get the serial sum ppm sorted out and a issue of the heading being 180 degree out roll and pitch seem to have been sorted out. The binding to the orange orx DSM2/X module #9171000536-0 for the Trunigy X9 goes well. I still have a ways to go setting up this board before my 650mm hexa will be ready to fly.

EdAmps | Verifizierter Käufer

  • Overall
  • Quality
  • Value

Customer Rated

May 19, 2015

This is a great little 250 racer controller. I had a heck of a time getting the channel order correct for my OrangeRX T6. I loaded it with MultiiWii 2.3
and modded the config.h file a lot. The channel order is odd being PITCH,YAW,THROTTLE,ROLL in the ppm_sum setting. Also, I was able to get the buzzer and VBAT working great. I will try to post my config.h file and hardware mods to the files section.

Kontraptionist | Verifizierter Käufer

  • Overall
  • Quality
  • Value

Customer Rated

Dec 20, 2014

This is actually a lovely little board, it's just that it's NOT a plug and play kind of thing. If you're good with microcontrollers and electronics, then you're gonna do just fine. You need to get the little JST connectors and hook it up to an FTDI board and at the very least re-program it with the latest MultiWii software. Since the board lacks a DTR pin to automatically reset the CPU (for activating the bootloader) it's imperative that once you click "UPLOAD" on Arduino that you time it such that you power up the board (by plugging the serial adapter in to the board) such that it comes to live a second or so before the code starts to push out of the FTDI. Obviously, you can't do this by plugging the USB in to and out of the computer, as Arduino would have to re-enumerate the ports, etc etc, so make and break the connection between the FTDI and flight controller. You also have to upload the right setup of firmware. See (and set up) the config.h file in the Arduino firmware. Download it directly from Multiwii. The how-to and particulars of the code are out of scope of what I feel like talking about right now. Sorry. You're smart, you can figure it out. I will say this... It likes to fly backwards, so keep that in mind.

But yeah, all the nay-sayers, give it another chance. This board is fine, you just don't know what you're doing.

noobmatic2000 | Verifizierter Käufer

  • Overall
  • Quality
  • Value

Customer Rated

Oct 27, 2014

This board is absolute garbage. I have spent months researching and tuning this board to perfection....there is NO vibrations, even used the low pass filter. ESC's calibrated 20 times, eprom's wiped, etc. ,etc... after a minute, it will just DROP from the sky. There is nothing I can do to fix it. I have read EVERY thred, EVERY post, and EVERY review. (yes leocopter too) And this board WILL NOT fly reliably. At some point during flight it will just DROP to the left and crash. GARBAGE!!! Multiwii is also a dieing trend. Sure it has a lot of features (that no one seems to ever get working right) operating systems like open pilot, and other easy to use interfaces. So put it like this, you can buy a small toy quad (hubsan) for about the same $, and it flies AWESOMELY!! You put this board in anything, you are looking at LONG hours becoming a computer programmer just to never get it to work right. I know many other boards have great reviews...but NOT this one!! GARBAGE!

Leocopter | Verifizierter Käufer

  • Overall
  • Quality
  • Value

Customer Rated

Oct 20, 2013

This is a very good FC. Not easy to set up, but well worth the effort if you want the ultimate tiny MultiWii board !
This is how I set up my Mini MWC boards (after a lot of tinkering ...):
1- Building an interface between your FTDI usb board and the flight controler is quite simple : solder the 4 leeds of the 'mini micro 4 pin 1.25 T-1 JST connector' cable (the same one used on the Neo 6-M GPS module - SKU: 387000004) to a 6 pin header (GND, 5V, Rx, Tx). Solder an extra wire to GND. On the other end of the wire, solder a probe (I my case a 1 pin header with heatshrink tubing). You will need this probe to put the 328P in programming mode. Make sure Rx goes to TX and vice versa.
2- Plug you new interface cable to the board (or power the board via the output headers - D3 to D11) while pushing the bind button (the one on the top circuit board where the antenna is soldered). The red LED will blink rapidly. You are now in binding mode. Turn on your DSM2 compatible transmitter while pressing on its bind button (if you have a ORX orange DSM2 module). The LED on the Mini MWC will stop blinking then will stay on. It is now binded to your Tx.
3- In Arduino load the MultiWii shetch and select the HK_MultiWii_SE_V2 board. Its is fully compatible with the Mini MWC (you get the correct sensor orientation). Also make sure you uncomment #define SERIAL_SUM_PPM. If you plan to use an OLED display

Kundendateien
No File Name Download [2082]
No File Name Download [1597]
Initial config - simple and detailed Download [2096]
No File Name Download [2546]
instructions and updating Download [1446]
What is This ? Download [906]
No File Name Download [58]
EdAmps Hardware Mods Download [134]
LeoCopter's Guide Download [1464]
No File Name Download [1727]
  1. 1
  2. 2
Datei hochladen

Registrieren Sie sich, um Dateien hochzuladen.
Bitte anmelden oder registrieren um jetzt Hobbyisten zu helfen!