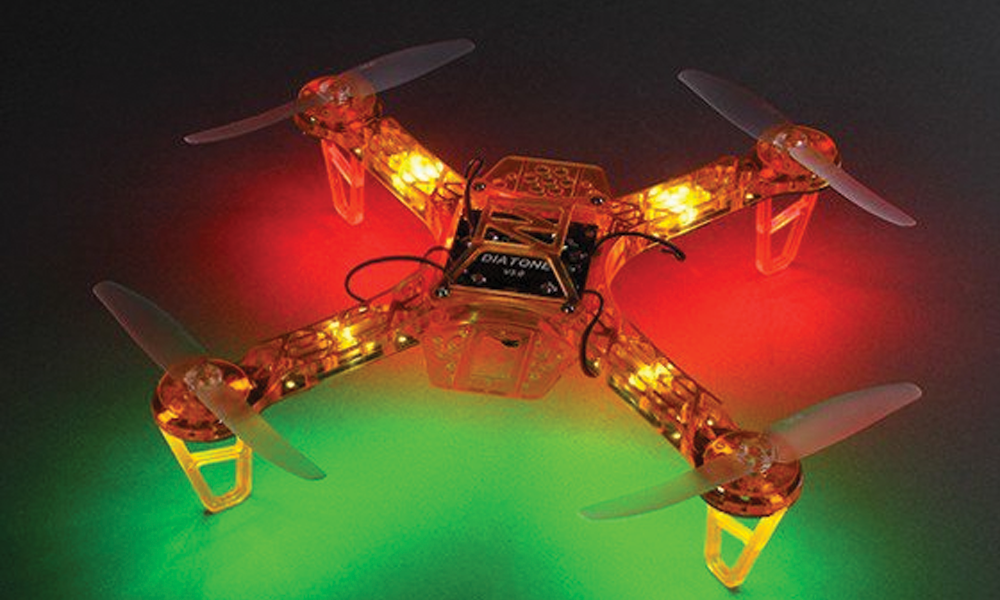
Adding LEDs and lights to a model is a very popular modification and is one of the easiest changes to make.
Light Emitting Diodes (LED) can make the model far easier to orientate when flying and also provide extra help in the darker winter days when visibility isn’t as good, particularly when flying at the start and end of a day. In addition to being a very useful aid to safe flying then can look great too!
What is an LED
 A LED produces a lot of light for a relatively small amount of power. They are available in a rainbow of colors, including ultraviolet, and come in a huge range of sizes and types. This makes them great options to add to your model and the designs and colors you can use are almost limitless making for a truly unique-looking model.
Types of LED
The low power consumption of these LEDs and their ability for many to plug into a 12v supply makes them easy to add to a model without reducing the flight time too badly. There are two main types of static LEDs that are used commonly used; the traditional 5mm package and the LED-string style where a number of LEDs are mounted on a roll or rigid PCB. The LEDs that come on rolls can easily that can be trimmed to size. Most single bare LEDs need only around 2 volts and a very small current of about 20-40mA to run. LEDs are now commonly available that come with a little resistor attached so they can directly connect to 5v or 12v power supplies commonly available inside a model.
Traditional LEDs
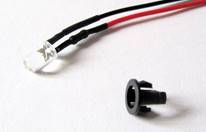 These are normally available in little bulb-shaped housings and can be purchased ready to attach to 12 volts (you can see the little resistor as a bulge under the insulation on one of the leads). They are commonly available in 5mm and 3mm diameter sizes but other sizes are available too. These types of LED only shed light in one direction with the top of the dome acts as a lens, so they are perfect for using as headlights where you want the light in one direction. Also available are boards or enclosures that use multiple LEDs together to increase the brightness and widen the light.
LED Strip
 Initially created for other purposes these LED strips are available in both standard and weatherproof rolls, as well as small pre-wired, LED strips. They can be cut to length and they are flexible enough to mount around corners and the ends of arms. They also shed light over a wide area so are perfect for LED strips that need to be seen from a wider angle. A small amount of soldering is required if using the rolls as each cut segment has the contacts for the voltage to connect to the 12v supply at the end.
Connecting the LEDs to your model
Wiring
If your model uses a 3s LIPO battery then you can connect these 12v LEDs to anywhere that carries the battery voltage – places like the power distribution board (PDB), the battery connector, or the outer two pins of the balance tap if needed. A good practice is to add an extra lead from the PDB to any model you build so you can connect it to your LEDs and also allow for you to ‘unplug’ them when not needed. If you are not using a 3s battery then you may need to install a 12v battery eliminator circuit (BEC) to the model to provide the power to the LEDs. Wiring LEDs in this way will mean that they are always on but provide a simple and easy way to connect them to your model.
Physically attaching them to the model
 Traditional LEDs can be fitted through holes in the chassis of your model using an LED holder. These small plastic clips make short work of securing the led into place. You can also use mounts to put traditional LEDs in the places you need, here we can see one of my models where we have used a 3D printed mount to hold two 5mm LEDs in place to act as headlights. The LED strips come with sticky backing and it can be tempting to simply stick them into place on the model. Moisture, dirt, and vibration will eventually weaken this bond so use cable ties to help secure the strip and stop it from coming loose in flight. Cover any exposed contacts that are carrying battery voltage with heat shrink or a blob of hot glue and secure longer cables to keep everything in place.
Using switches
 If you don’t want the LEDs on all the time then you can use an RC operated switch like the Turnigy RC Operated switch. This allows you to connect all the 12v leads to the switch and then use a channel from your radio to turn the LEDs on and off remotely.
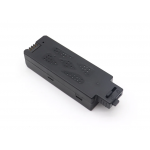
Other types of LEDs
Individually addressable LEDs
A recent addition to the LED family for Drones was the use of LEDs that can change color and be controlled by software like Cleanflight. These WS2812 controlled LEDs have a small circuit behind them and can change colors on the fly. These can be attached anywhere on the model and connected in a daisy-chain and setup so the colors change due to movement, the status of the flight controller, or commands from the transmitter.
Configurable Colour Changing LEDs
A wide range of LED strips and packages are now available that allow you to change the color of the LEDs using either your remote control or by simply selecting the color you want using small dip-switches. These are great to quickly add customizable LEDs to the arms of your model and let you change the colors when flying with friends or racing.
Care and safety
Whenever adding LEDs to model care should be taken to make sure that any wiring is connected observing the correct polarity. Use a voltmeter to ensure that the connections have the voltage you expect and that your connections will not create a short for the battery. Remember that the LEDs will add extra weight and also consume a little of the battery power too. Reduce your expected flight times to take this into account. Don’t rely on LEDs to fly safely. Flying at night and in poor visibility can be dangerous. Keep the model closer in when flying in lower light conditions and have fun! Written by Painless360
Hear it First: Join our Mailing List
Sign up to receive new product updates, exclusive discounts, news, and more!