Introduction
ImmersionRC has as long a pedigree in FPV as any other vendor today.
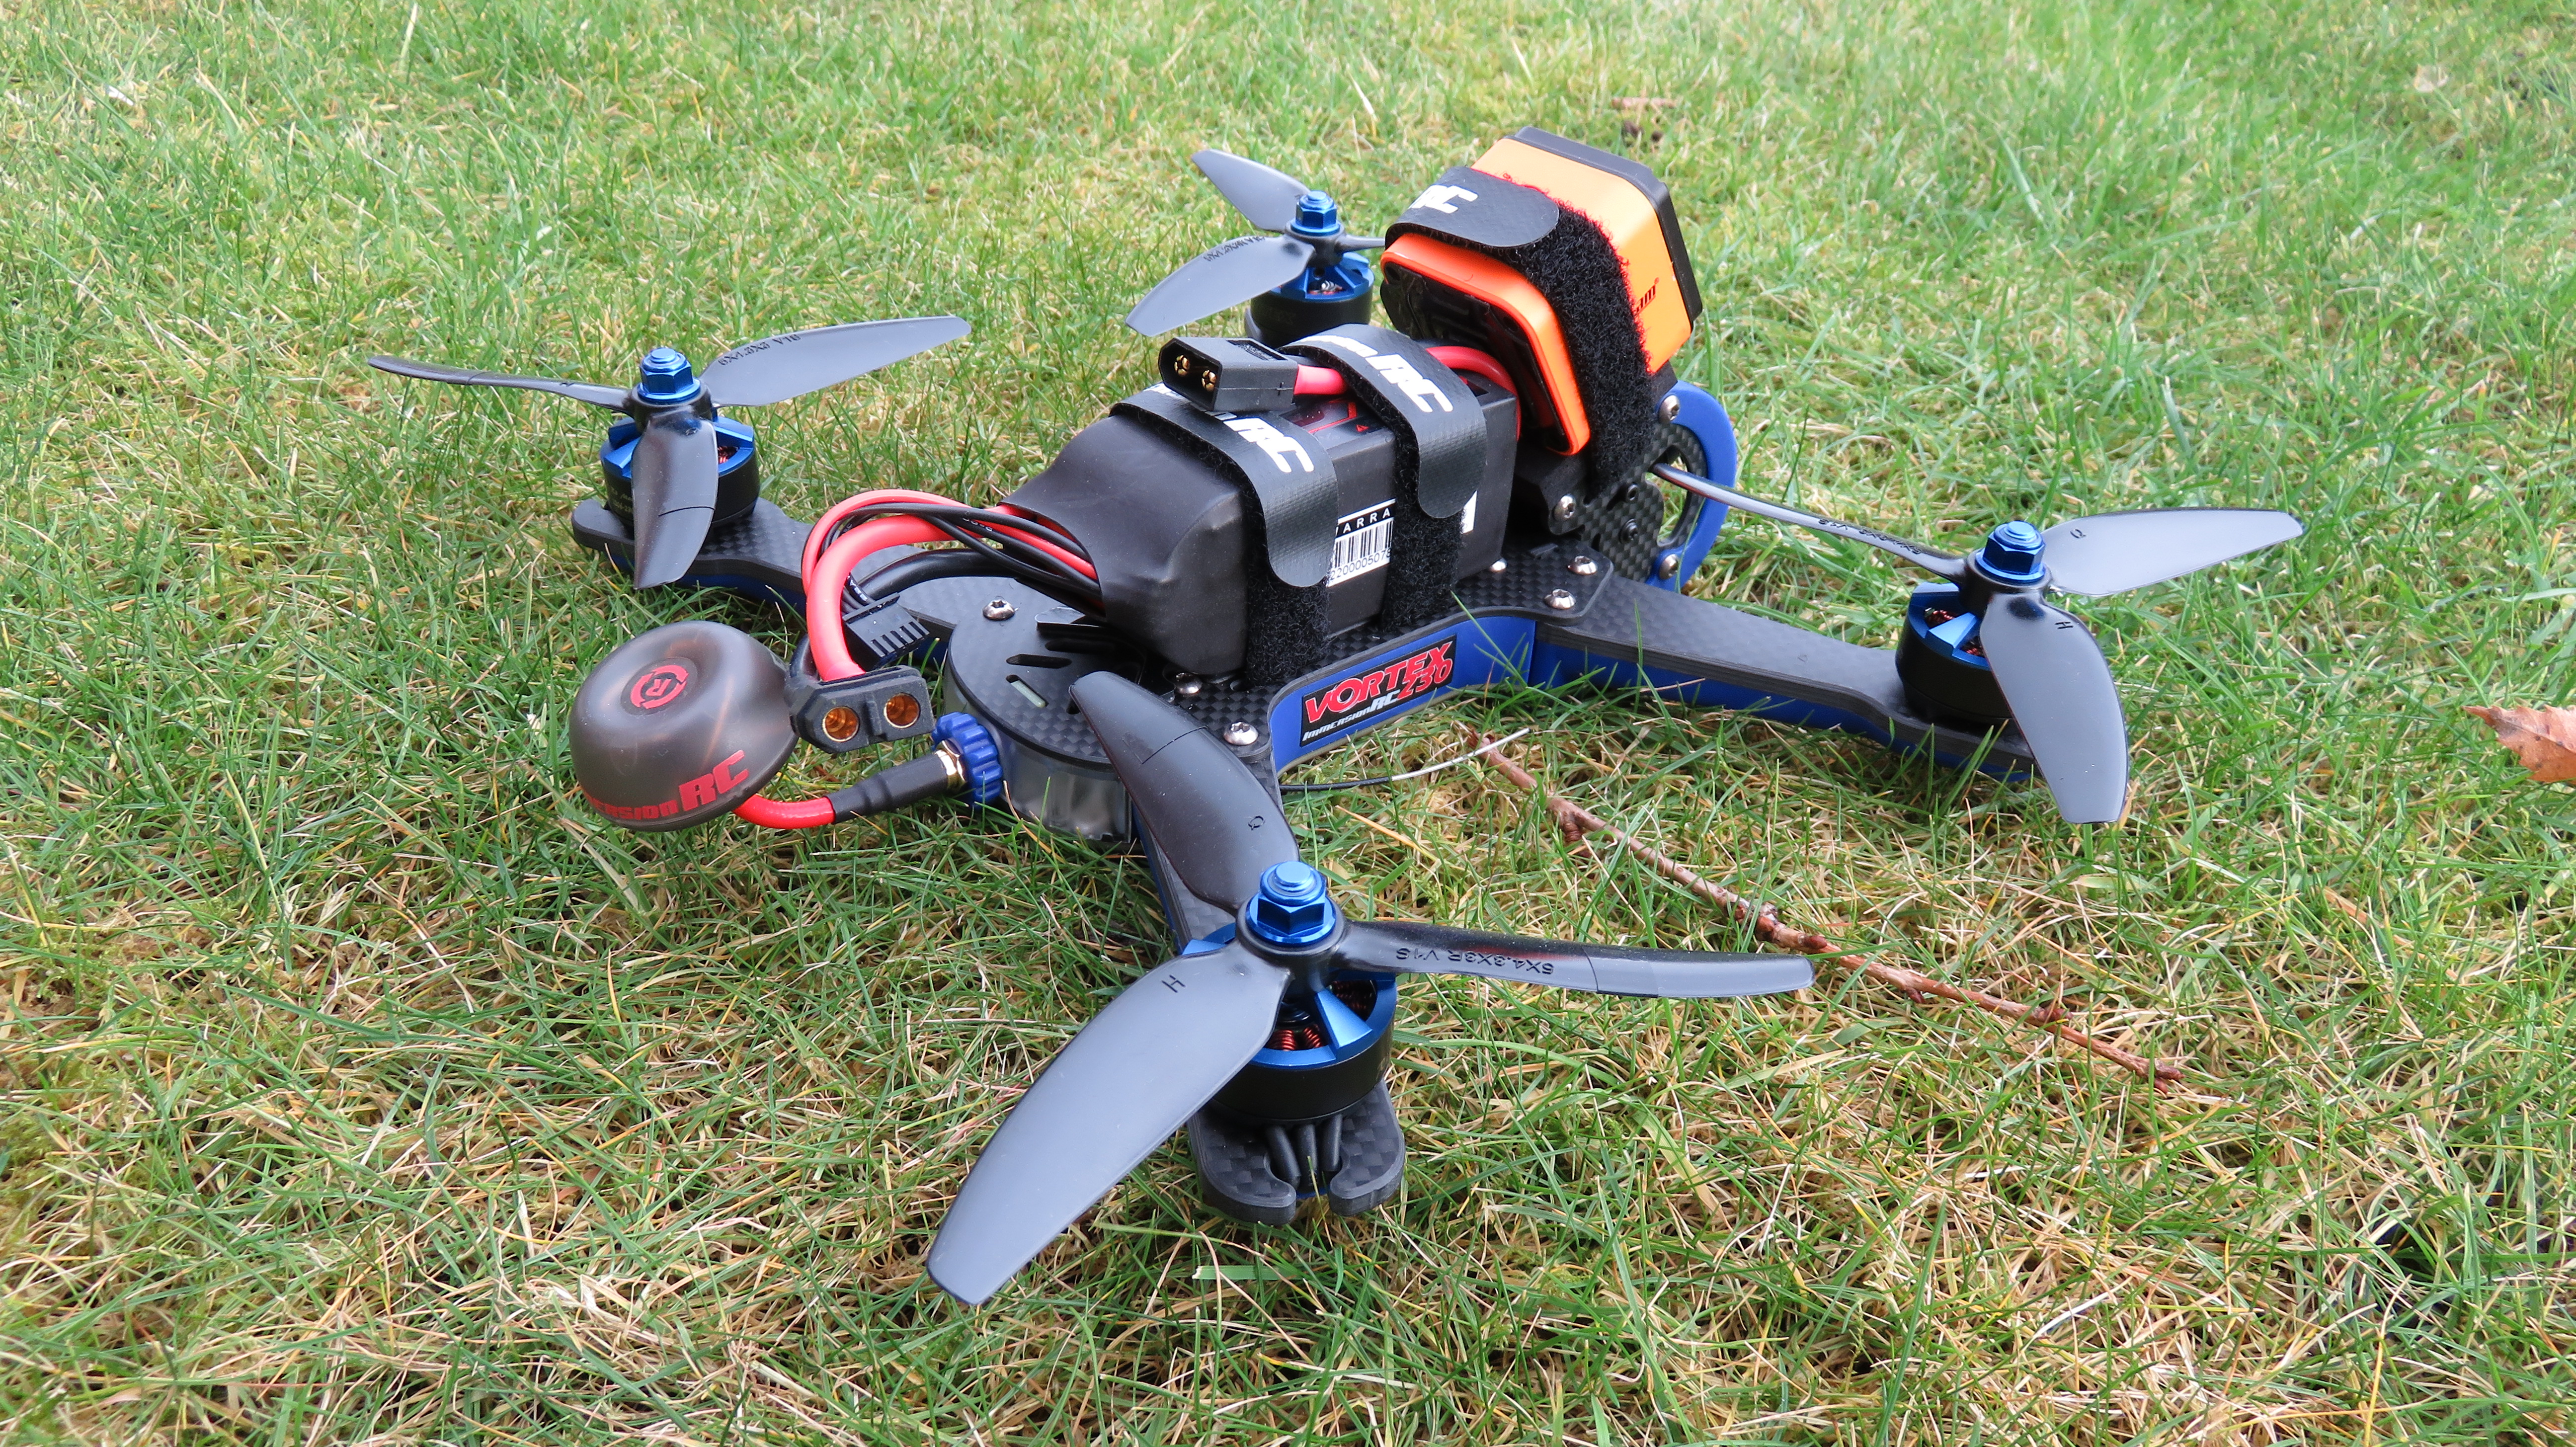
In 2017 I looked at their new TRAMP-HV video transmitter with their RaceWand and was impressed. ImmersionRC has also been producing FPV quadcopters for a while now and the Vortex 230 Mojo is the latest in the successful Vortex family. There is a huge choice for pilots looking for an FPV quadcopter model and most manufacturers use various qualities of off-the-shelf products. ImmersionRC has approached making FPV Quadcopters a little differently and used a few proprietary tweaks in this model to add extra functionality and differentiation over other FPV Quad models on the market. The result is a very well-built, very capable model but all of that comes at a price so let’s spend a little time looking at what’s under the covers and where that ‘Mojo’ is coming from.
Where is the Mojo?
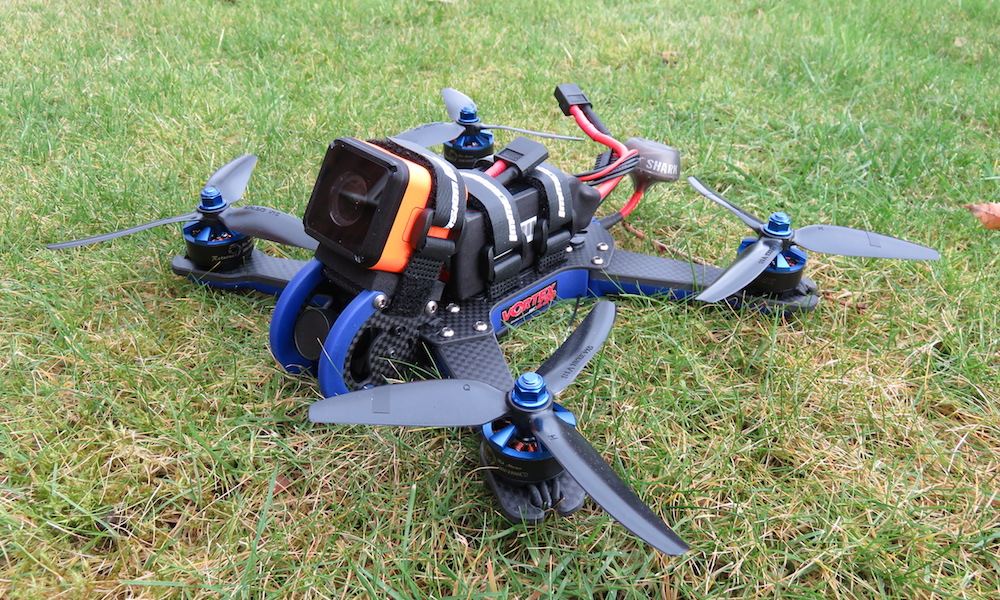
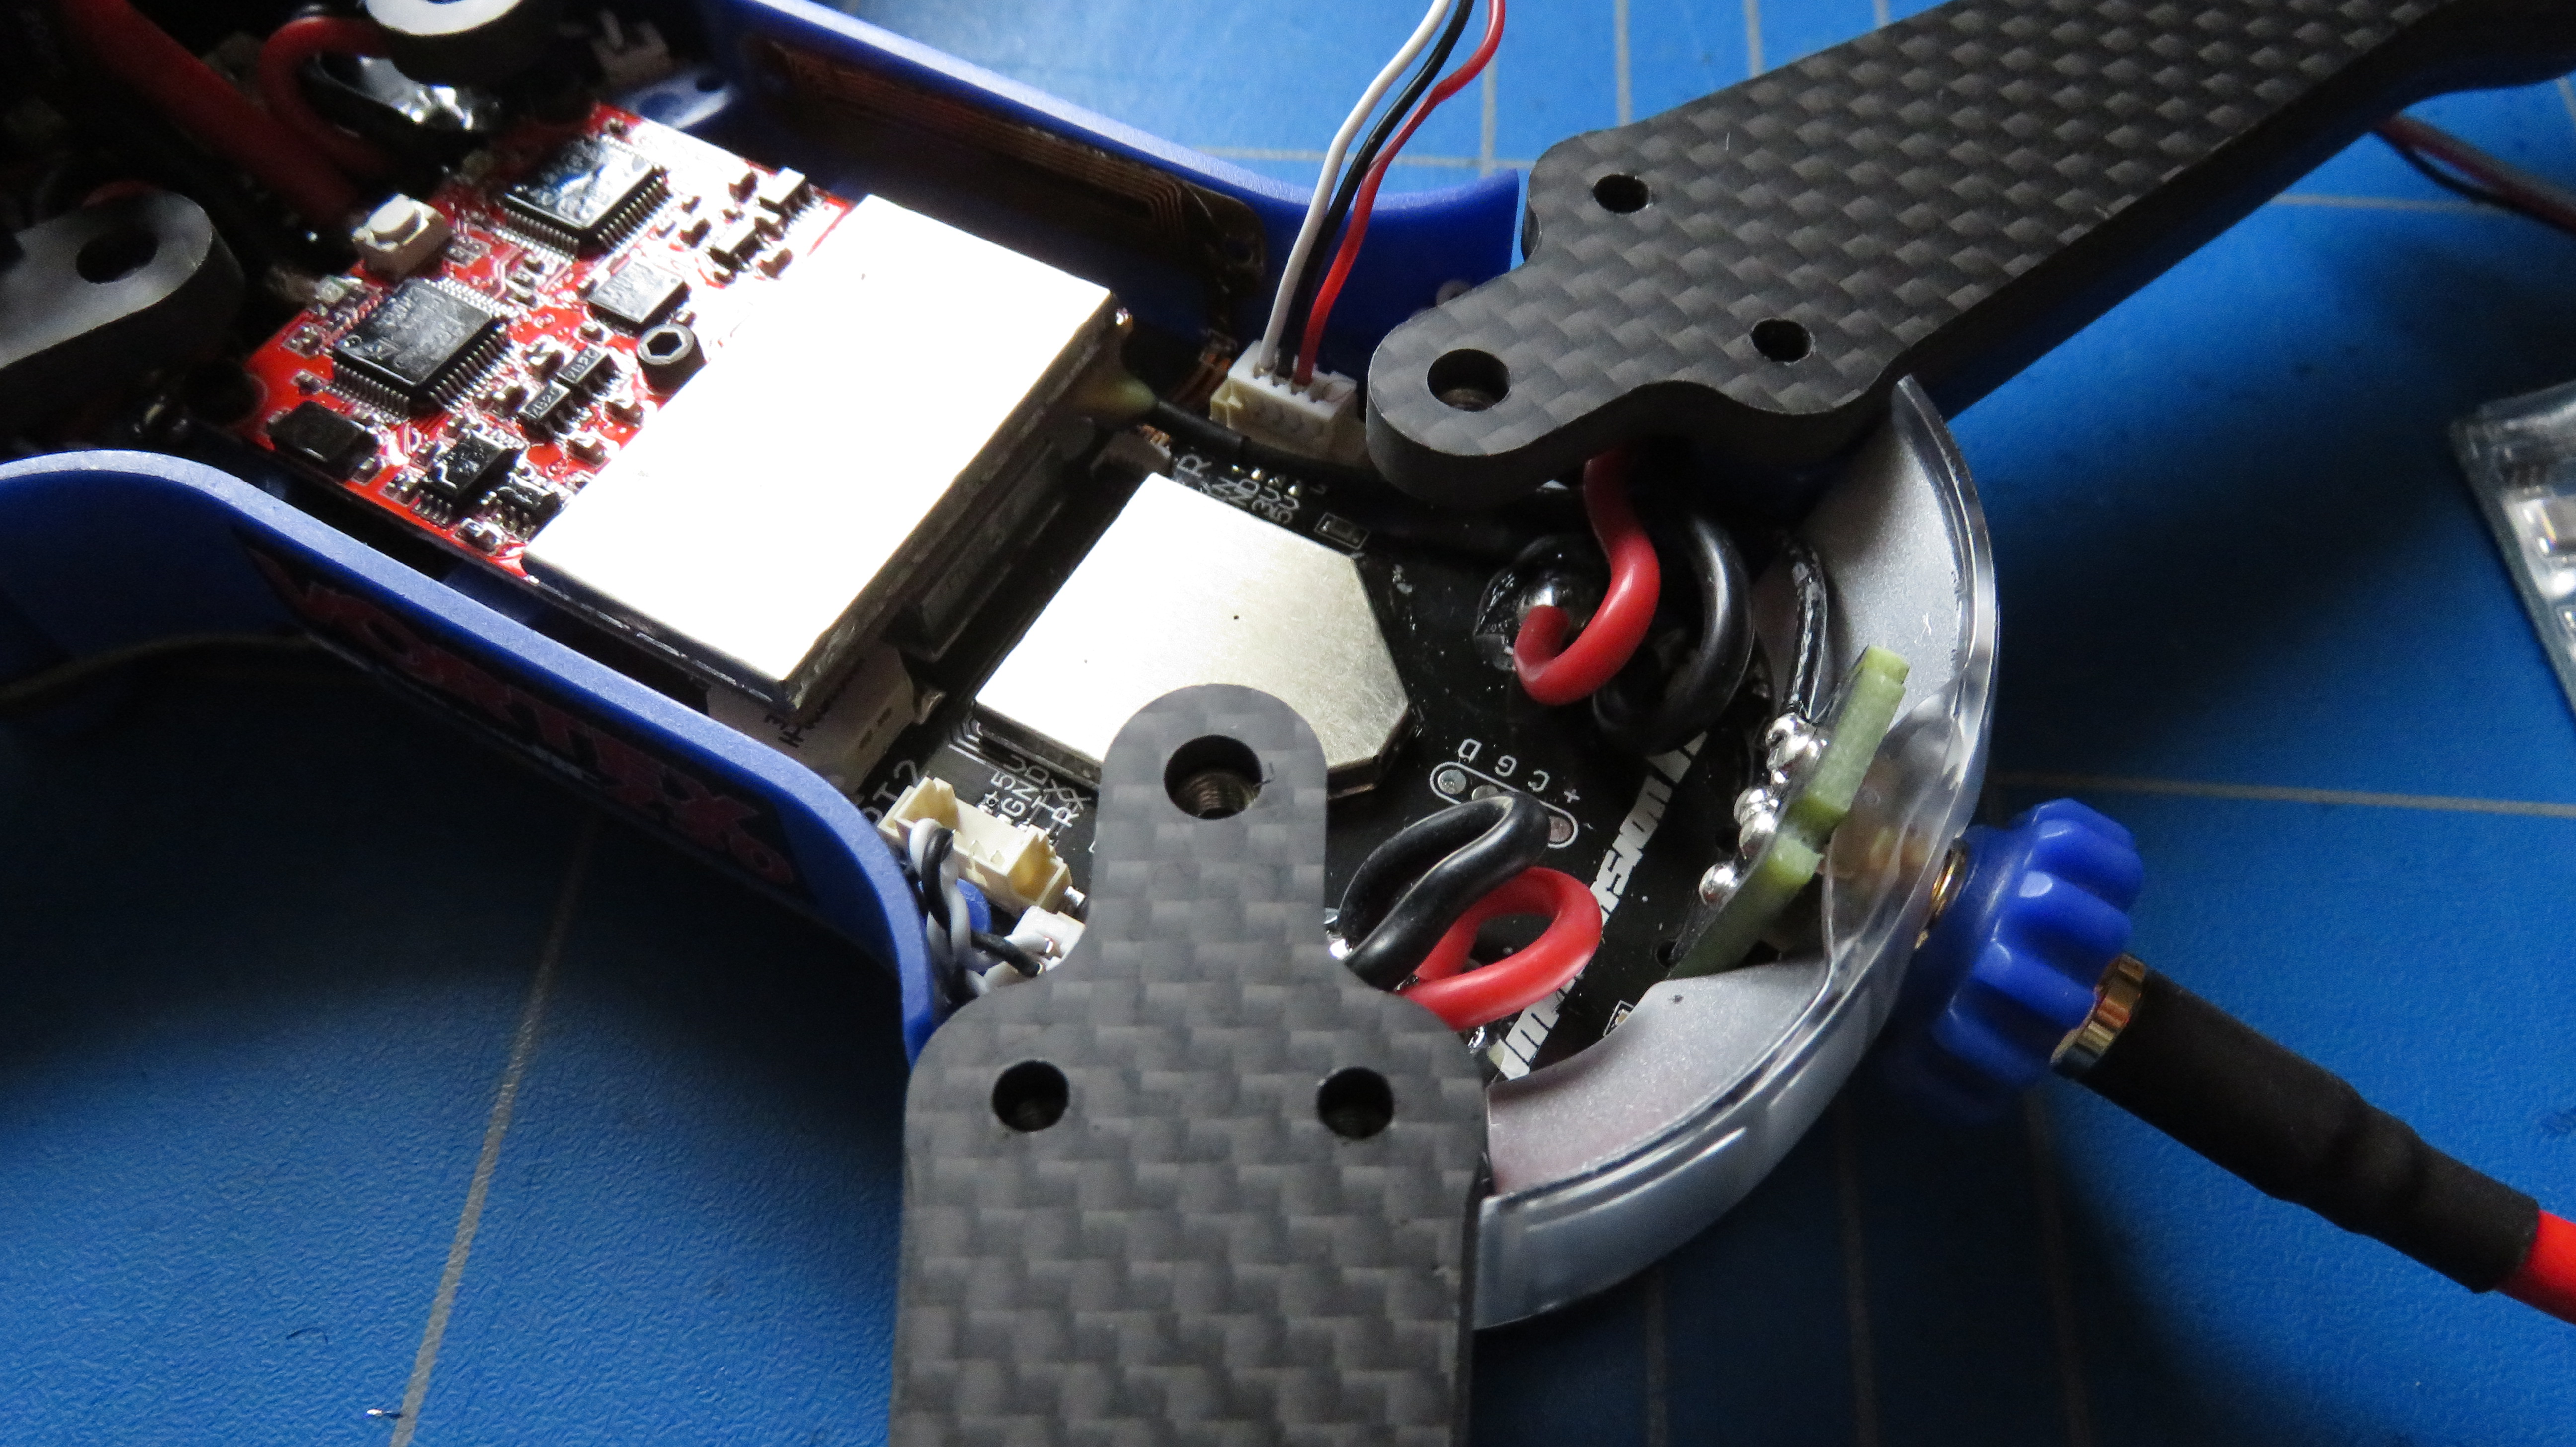
The first job is to install the supplied stubby Spironet antenna onto the back of the model, powering up the model without it installed could damage the video transmitter. Once you’ve got that done then it’s time to look over the model. The frame features a rugged camera mount, enclosed ESCs and main electronics, LEDs at the rear, and a top battery mount. It feels very solid in your hands and oozes quality.  The hardest thing to do with the model is to install your radio receiver. You can buy BNF versions too but in the box are a range of cables to use to connect your receiver of choice. I installed a trusty FrSky XSR onto mine. To install you remove the top deck of the model and there is a nice space at the rear of the internal components that should fit most of the mini receivers around. There are also a few options to route the antennas outside the main body, either through the LED covers or via small holes in front of the rear arms. When you open the model to install the receiver you’ll notice that all of the electronics are installed on one main board that forms the bottom of the frame. The other thing you’ll notice is that not all of the pieces look like the off the shelf components that almost every racing freestyle quadcopter manufacturer use.
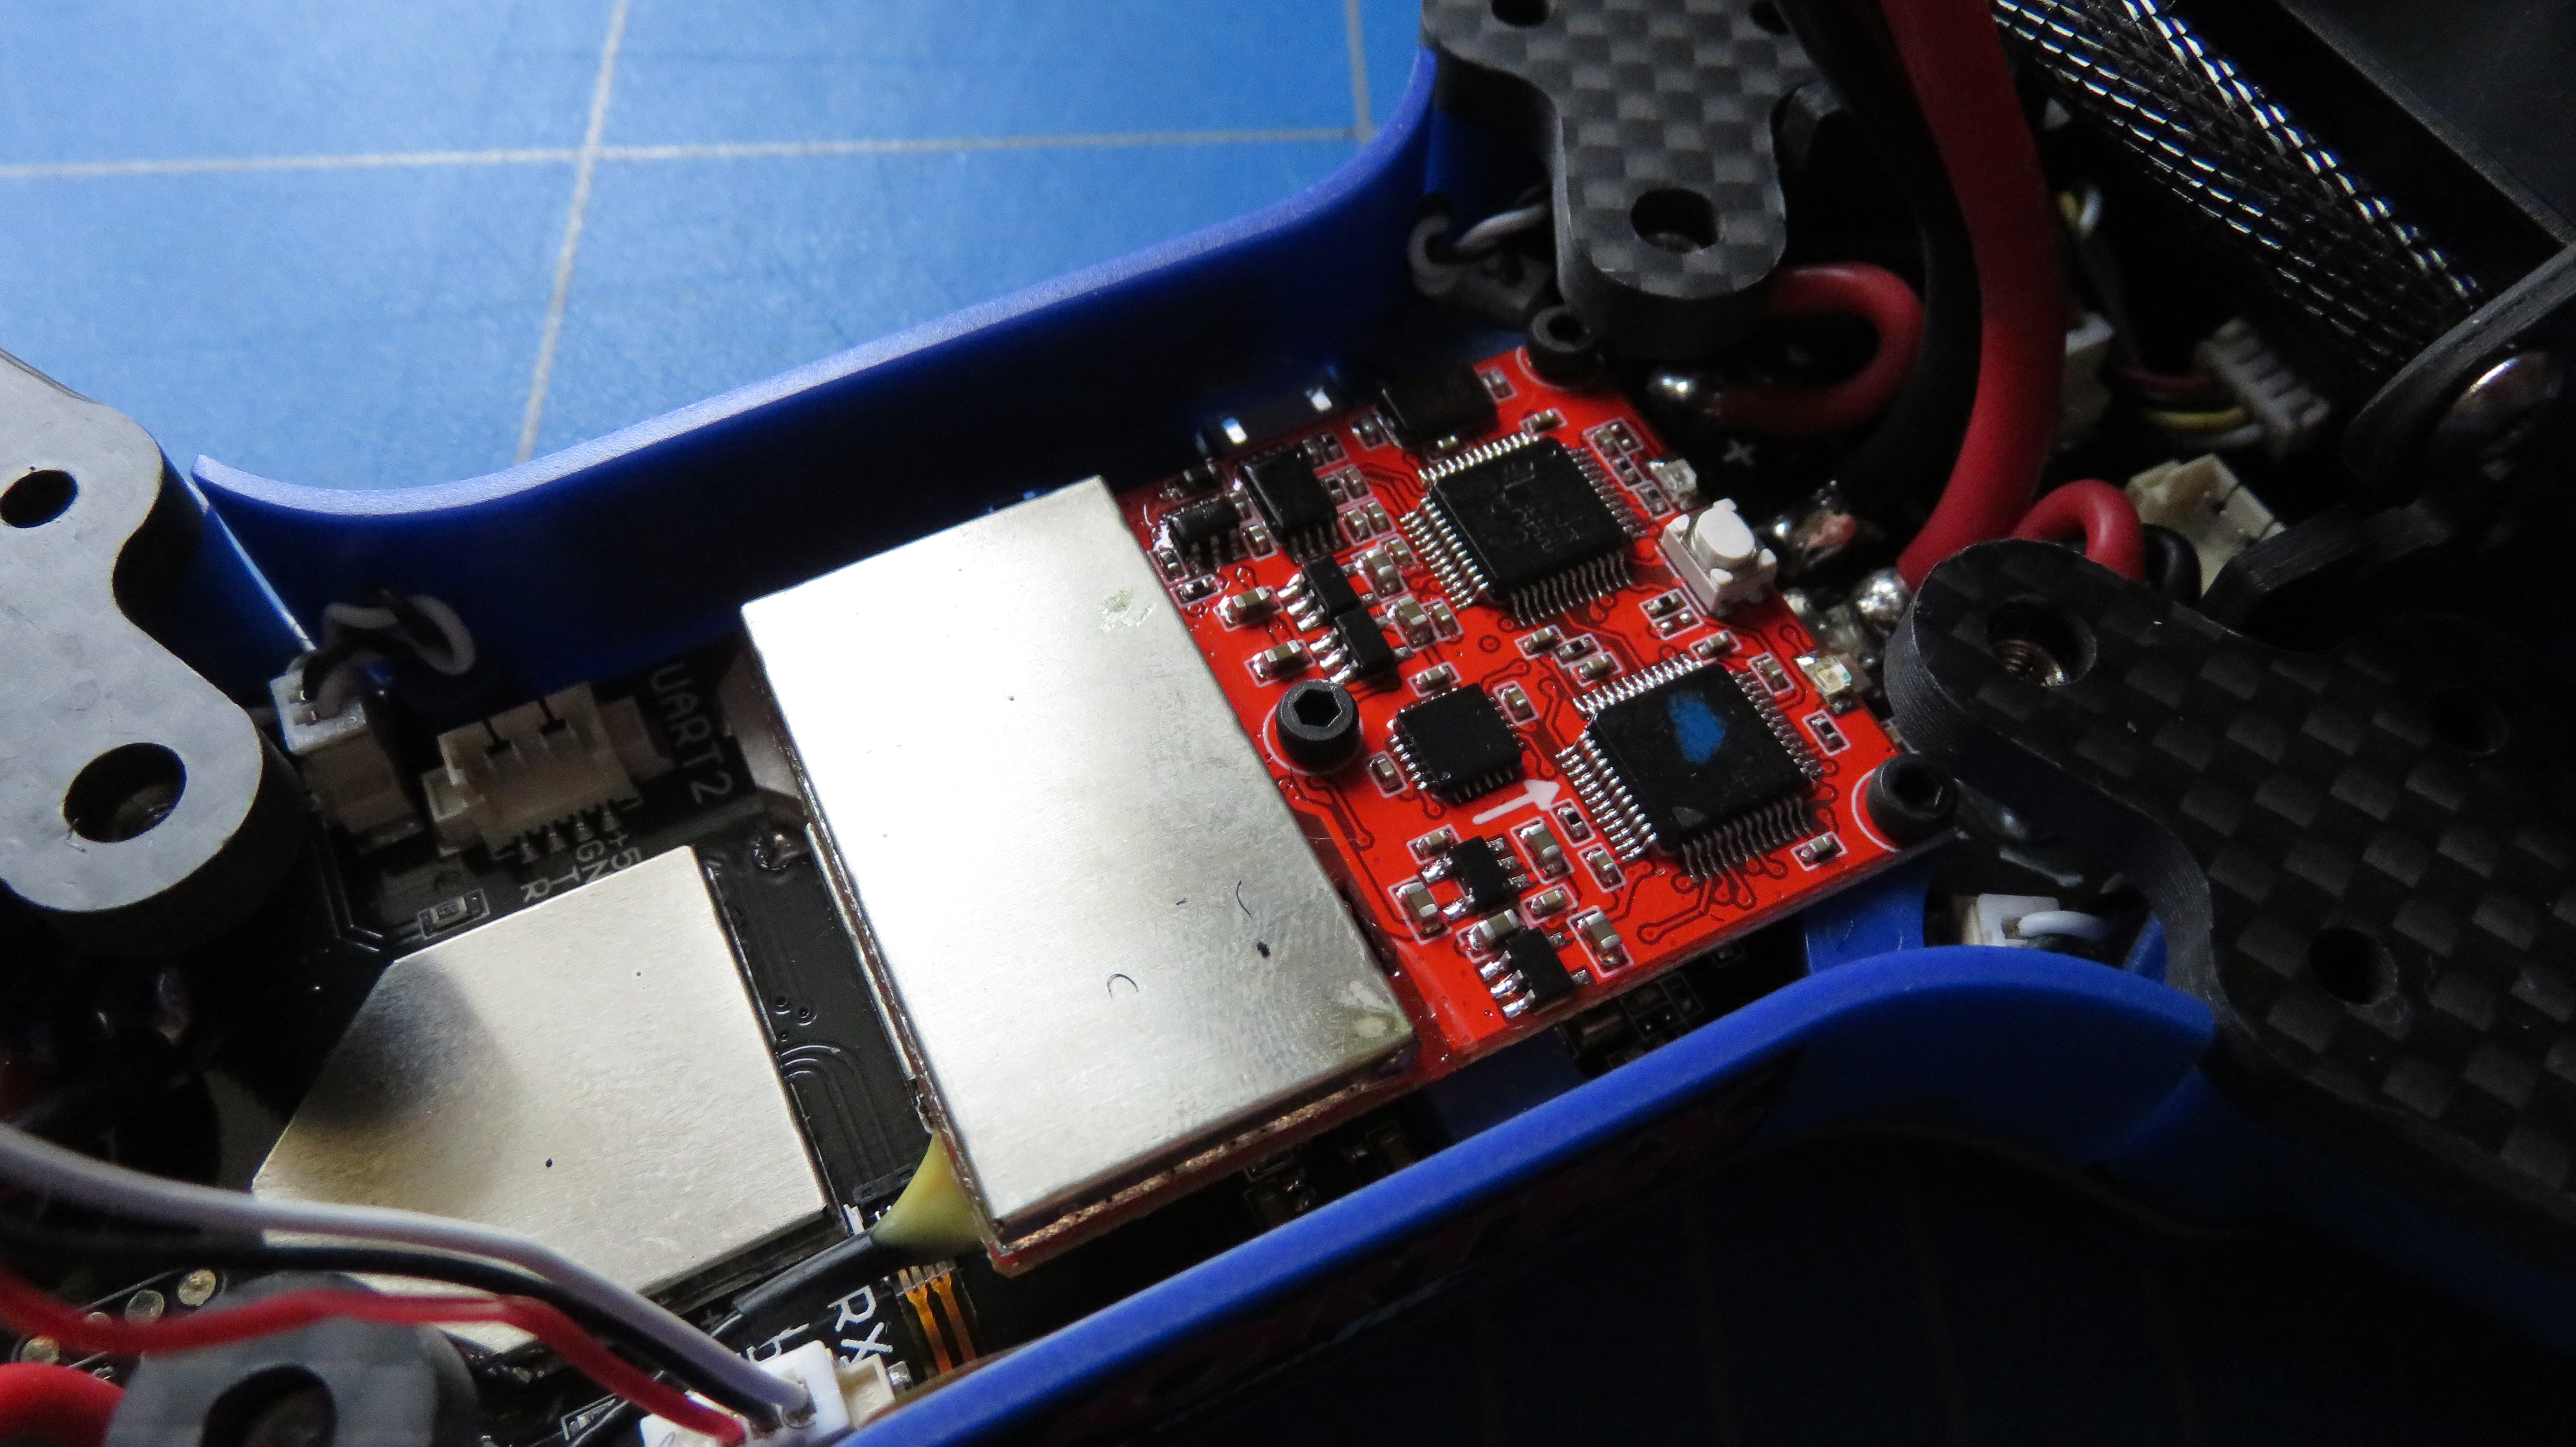
 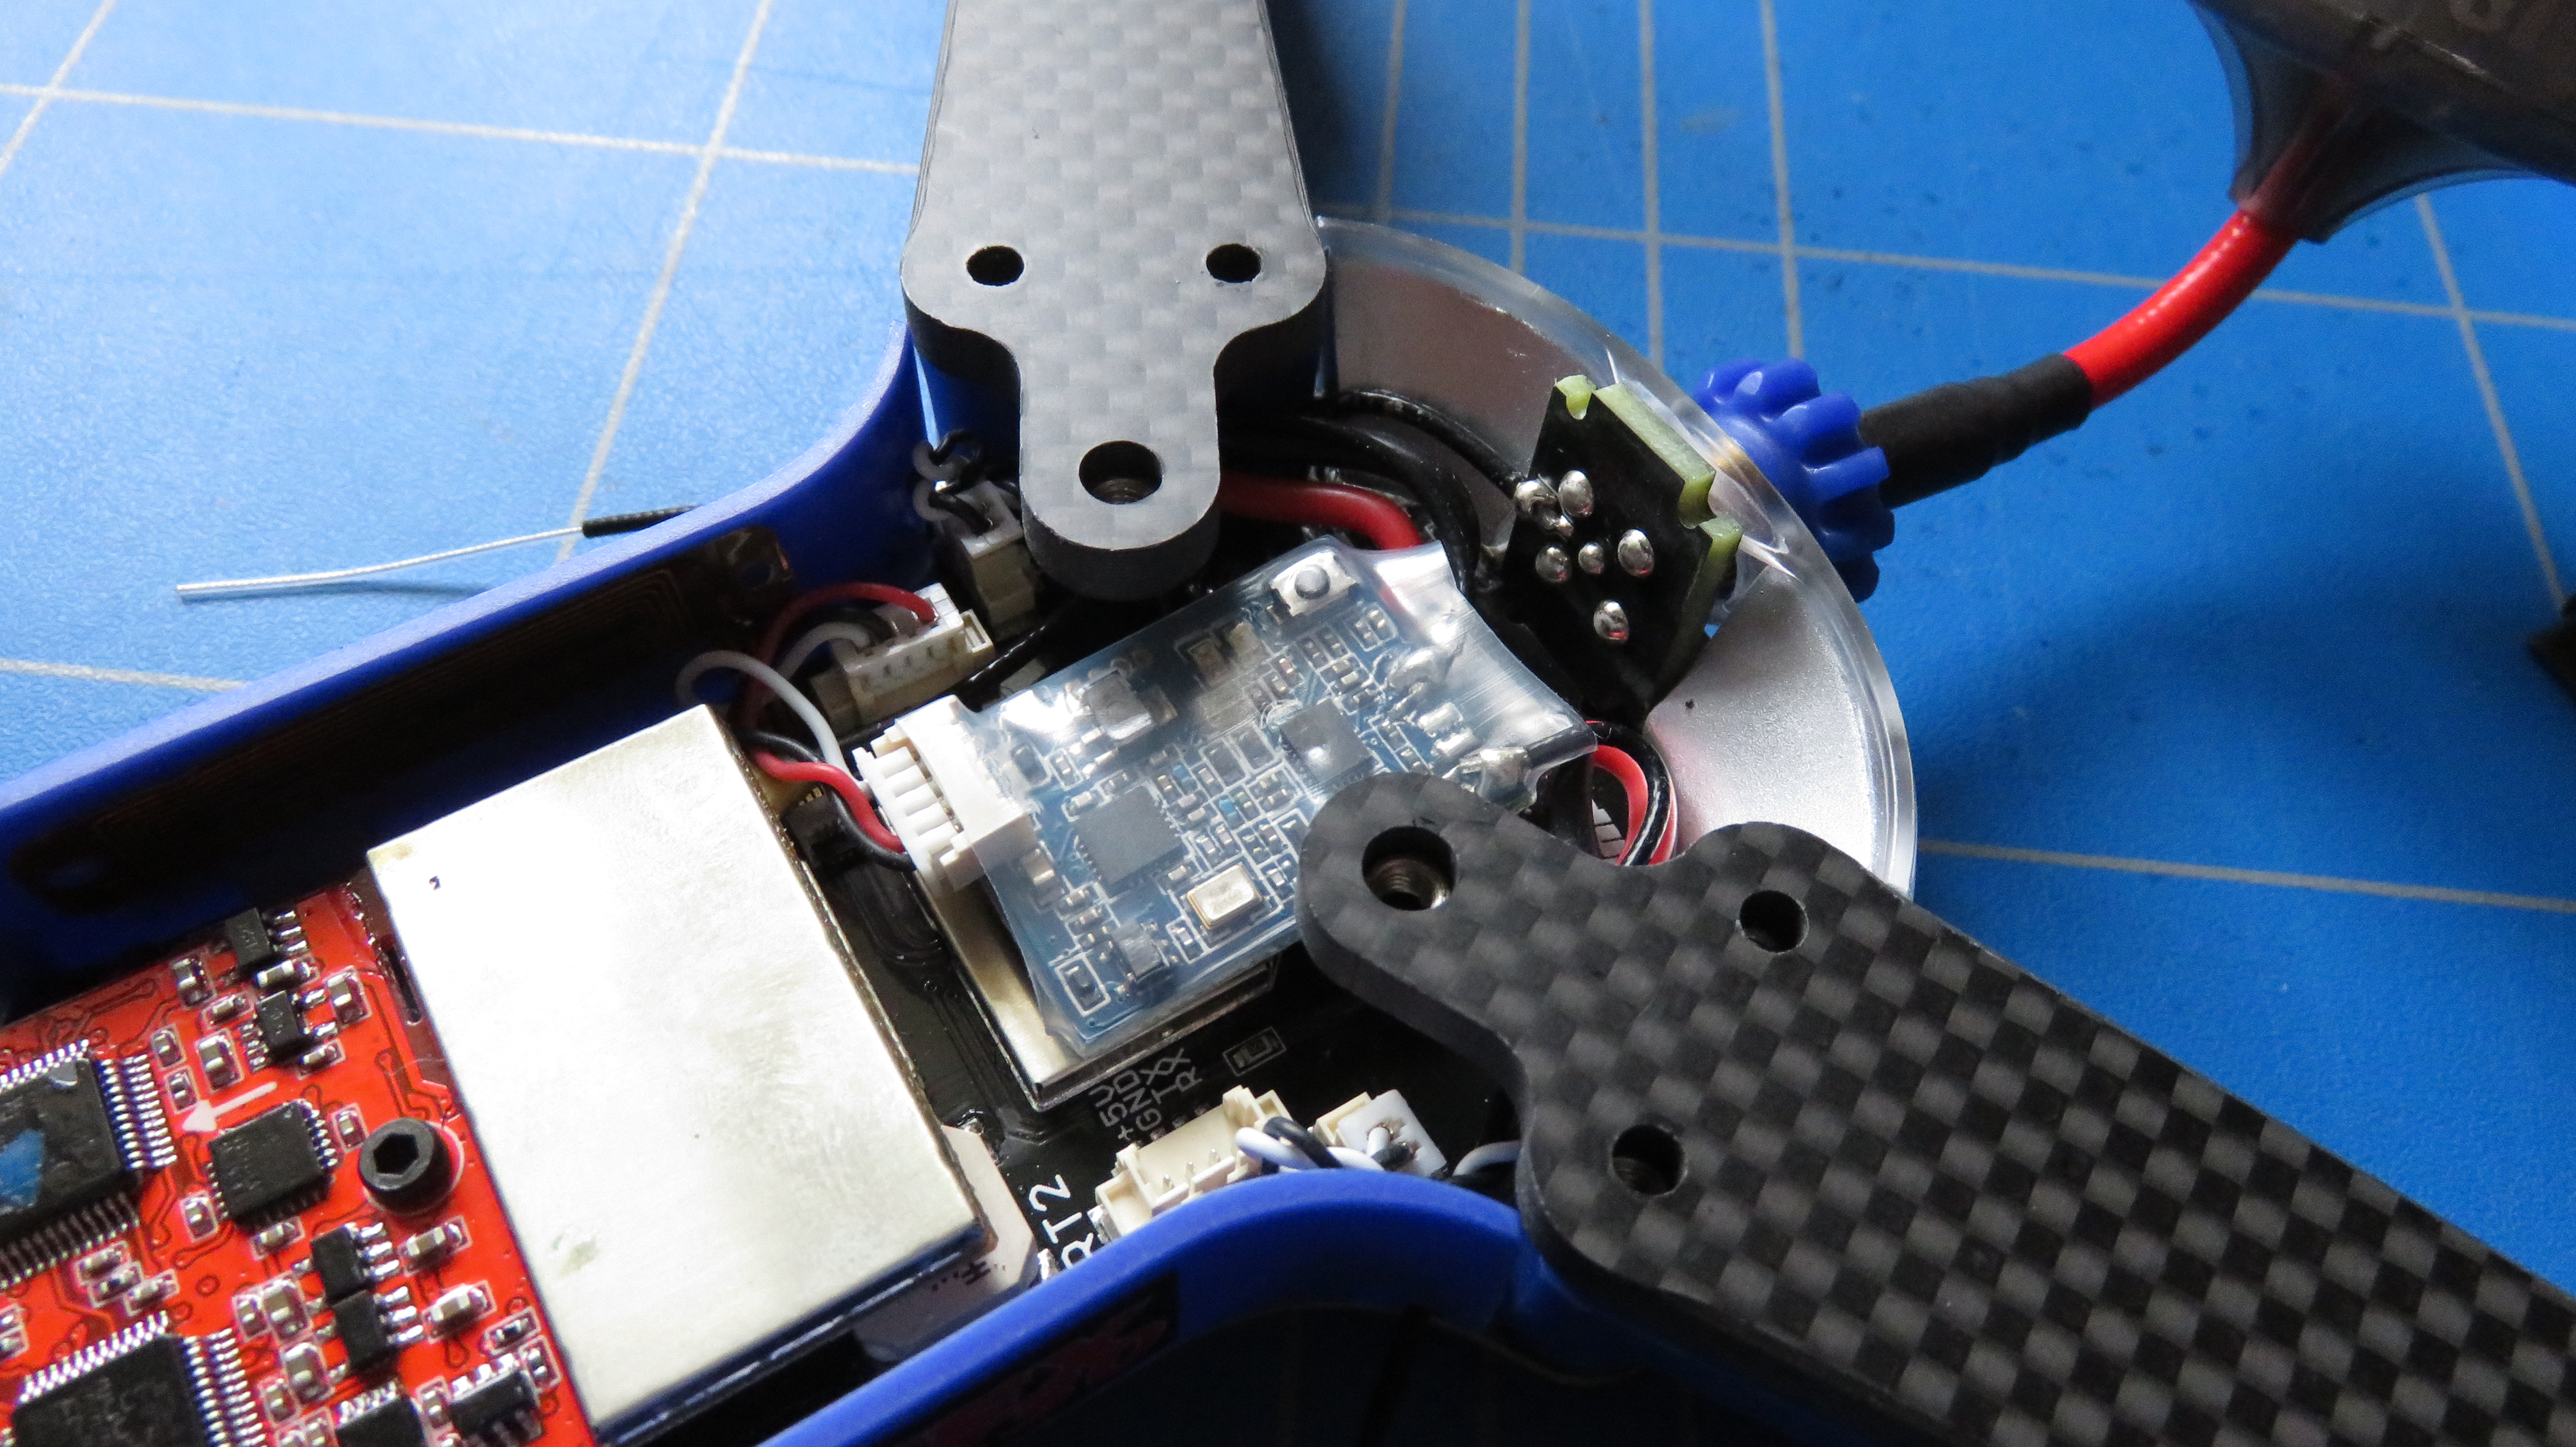 On this main motherboard are the F3 based flight controller, an F3 powered custom on-screen display (lots more about this in a moment) as well as an integrated ImmersionRC Smart 40 channel video transmitter. Even the LEDs are soldered directly to this mainboard. No connectors to come loose here. The ESCs hidden away under the plastic protectors on the arms are a little special too. They are full 32-bit ESCs running DShot 600 capable firmware and can support both 3s and 4s batteries on the model. They feature an extra trick called RotorSense that allows you to change the direction of a motor simply by turning it by hand. No more messing about in BLHeli or soldering pads to configure everything. The model will come pre-setup so you’ll not need to play with this feature but it’s nice to know it’s there. That Fusion F3 flight controller comes preinstalled with Betaflight as you’d expect. By default, it’s set up well with 8 kHz loop times and custom tunes from professional pilots. Due to the custom nature of the electronics in this model, not everything is standard in the setup though. LED control is not handled via Betaflight, neither is the OSD so when you come to set up and use the model it’s a little different from models using off-the-shelf components.
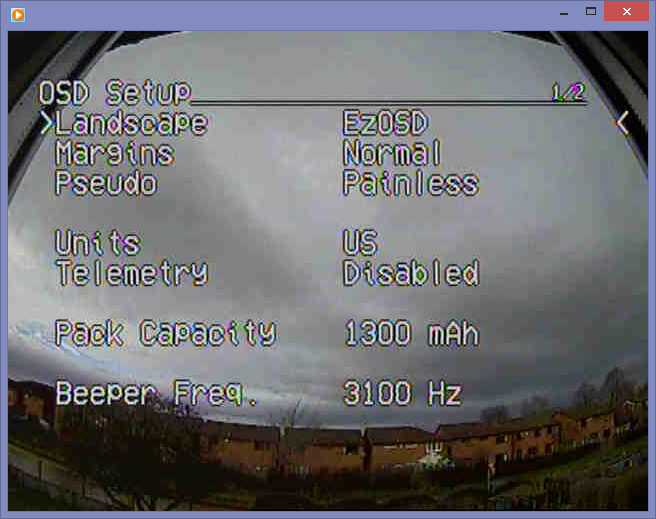
 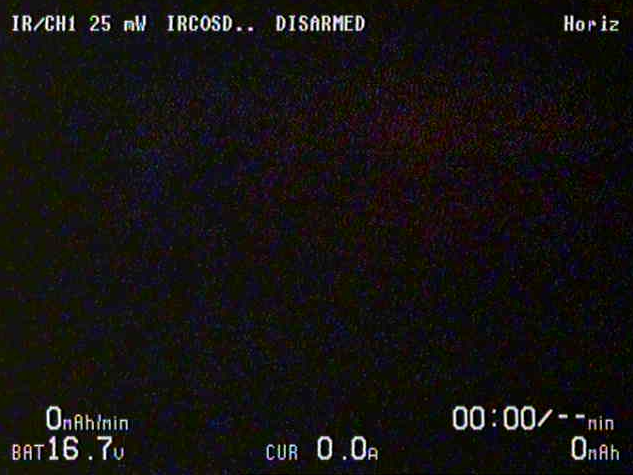 The OSD is very different from any other racing/freestyle quadcopter I’ve looked at. Holding the throttle control to the bottom left of the radio enters the OSD menu and here you can perform all of the things you can in a standard Betaflight OSD but those vector-based graphics allow a lot more too. You can configure the video transmitter, setup the camera, set up the way the OSD looks, change the tuning, and control the LEDs. The OSD also lets you run the transmitter setup wizard easily on the first start-up too but more on that in a moment. Other great features include the addition of the touch and race technology from ImmersionRC so the power, band, and frequency of the VTX can be set by using a race wand so if this model will be able to fly at races and events that dictate the use of the system for Vtx management. That inbuilt Vtx even reduced the power output when disarmed to not interfere with other pilots too. Nice touch. Another cool VTX setup trick is something called PitStick. When placed in this mode, the Vortex 230 Mojo will power up with the video transmitter disabled, and will only start transmitting when instructed to by the radio. The right stick is used to select channels 1 to 8 by using the extremes of stick movement. Up for CH1, Up-Right for CH2, and so on. The VTX can even be set up using DSMX on certain Spectrum radios. One of the really great features is the fact that the model has spent time in the hands of some of the world’s top pilots and their tunes and setups are available to use. The tunes on the model are very good and you can get the benefit of all that experience on day one. Some of the tunes may be too soft or aggressive depending on your flying experience and style so it is fun to explore them all and see the one you like the best. You can also tune it yourself of course!
Setting Up
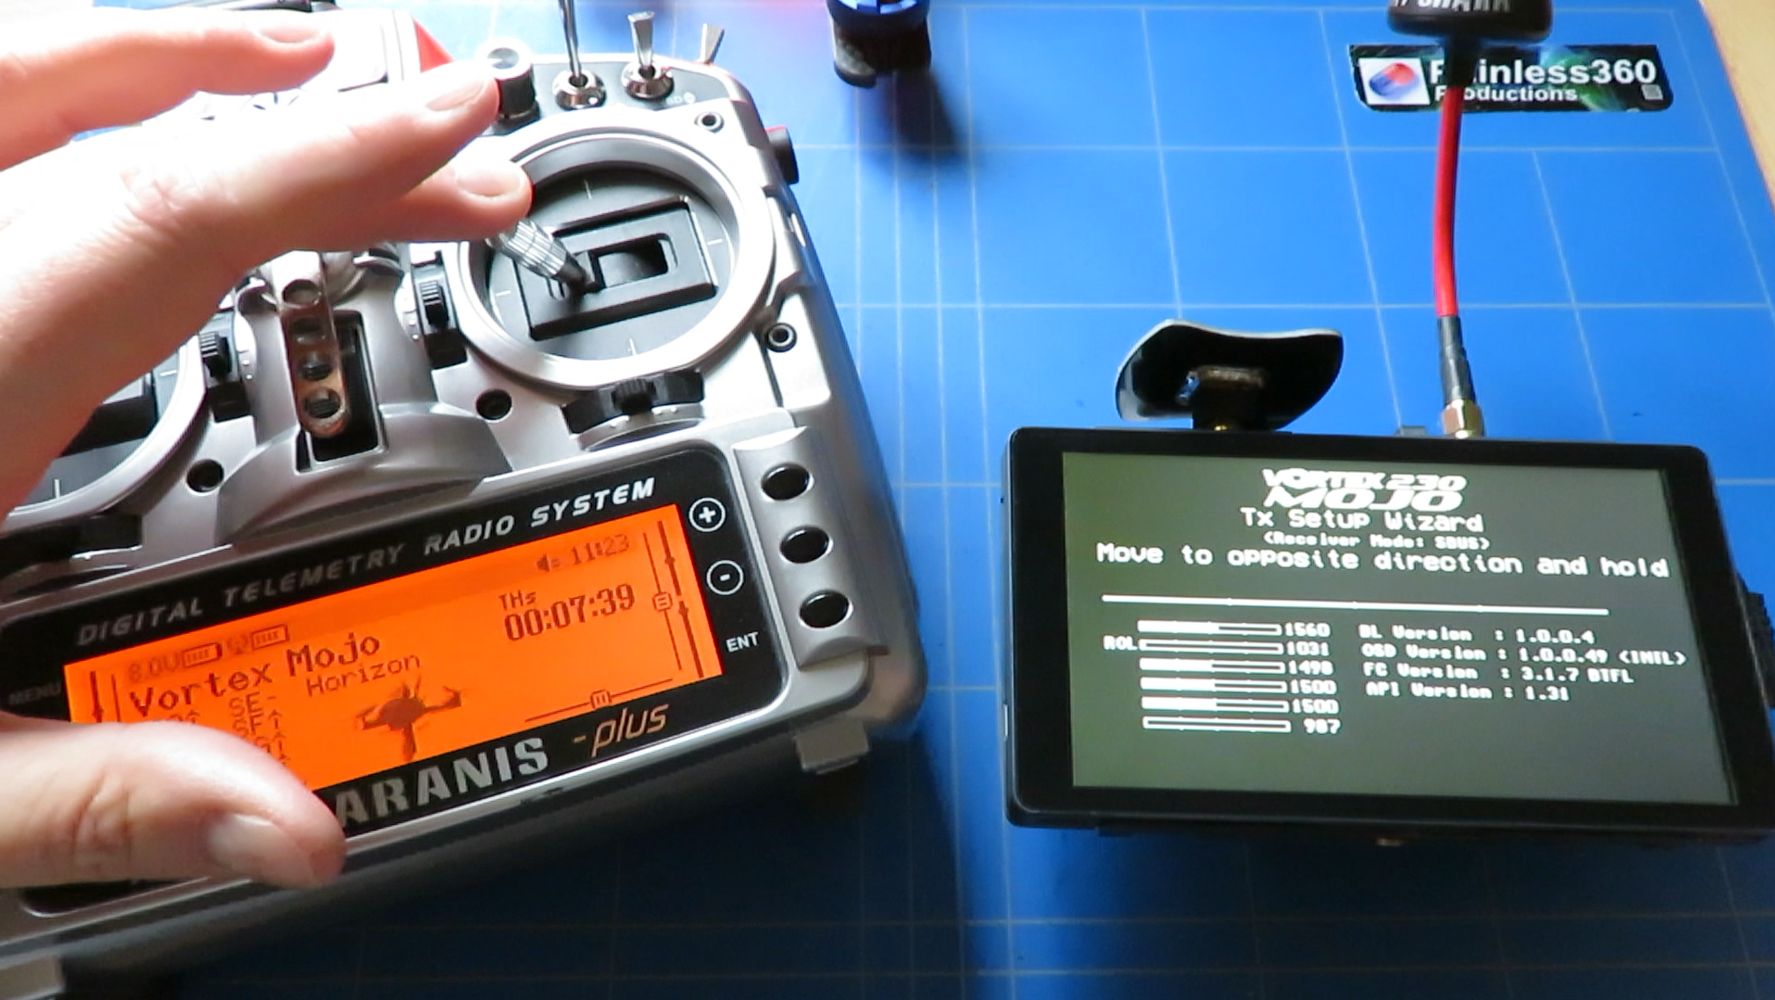
The big change from a lot of models here is that the first time you power on the system it will default to Fat Shark/IRC band Channel 1 and step you through a radio receiver setup wizard. You need to go through this before doing anything else. If you don’t then any Betaflight settings won’t save to the model. So make sure the receiver is bound, your goggles are on and set to that channel, and power on the radio for that first time! Once you’ve completed the setup then you can connect the model to Betaflight as normal but be aware that the LED and OSD controls are not managed in Betaflight, you’ll need to control those from the OSD itself using the radio.  By default, the Airmode and arming are not selected on a switch. I’d recommend setting that up in the Betaflight modes tab before flying. Upgrades can be performed via the Vortex application that used to be available through the Google Chrome App store but is now on the ImmersionRC website so don’t update it using the standard Betaflight app. There are lots of ‘extras’ that ImmersionRC has added to the standard build to support all of the extra good stuff inside, especially that OSD system.


Flying
As you’d expect from a model by one of the leading names in the FPV business, it flies extremely well. I’d use a 4s 1300mAh pack. There is plenty of power and those pro-tunes are wonderfully giving a very precise, locked-in feel to the way the model flies. The OSD works great and the vector graphics are clear and easy to use. Few quads have made me grin this much on the first flights.
Summary
This is a lovely model, but it should be at this price. There are lots of spares available too so if you break anything, you can get another one! The few ‘hard landings’ I’ve had here have been shrugged off by this tough little model so it may be a while until you’ll need anything apart from more spare props. The OSD works well but the lack of a customization option to change any of the three default layouts is disappointing. The default screen setups go from feeling very cluttered to missing key data like battery voltage/mAh consumed or remaining. But at this point, I’m nitpicking. If you’re a pilot who wants a well set up, a tuned model from a leading vendor with all of the support and backup that provides then this model is well worth a look. Written by Painless360


Hear it First: Join our Mailing List
Sign up to receive new product updates, exclusive discounts, news, and more!