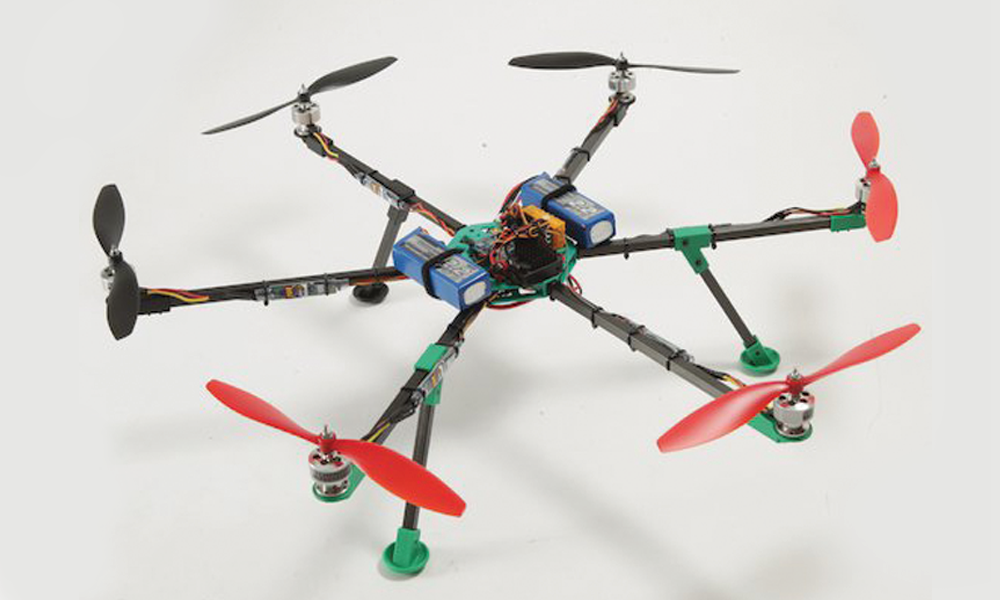
Learning to fly a multirotor is often underestimated. Videos on YouTube make it look so easy but a successful, safe pilot is months (if not years) in the making.
I did the same as many and the first take-offs (I can’t call them flights as they lasted less than five seconds and I was barely in control!) ended in broken props and disaster. Just last week I spent time fixing a small Hubsan multirotor for a family member after it became too damaged to fly. “Go through the lessons and take your time” I advised as I handed over the newly repaired and tuned model. “Sure, sure..” he replied as he walked off. I believe it took just 4 seconds before it has flown into another wall and broken another couple of props. When I started out there were a great resource and ‘lesson plan’ that new R/C helicopter pilots were always advised to follow. This series was called ‘Radds school of rotary flight’ and was designed to present the pupil with a new challenge in each lesson and build on the previous ones in a logical easy to follow progression. This is how I learned to fly helicopters in my early R/C career and it’s how many of the pilots I’ve helped over the years have mastered the basics of flying a multirotor. The following lessons are built on that great foundation but brought up to date to cover the technology we commonly come across when trying to fly a modern multirotor. I’d recommend that you start out with a smaller model, something like the Hubsan X4. They are lightweight, portable, easy to fly, and take crashes very well. Get one with a prop guard and even if you do catch something with the edge of the model it won’t spell disaster. Many try and learn on larger, more powerful craft and while I’ve seen that work for some who have the space for it, many simply give up after buying a third lot of spares and replacing the items it broke. Make sure you’ve got lots of space and ideally a flay floor for the first few, keeps pets and family out of the way, and prepare for a few frustrating days – by following these steps you should be a safe, capable pilot that spends more time flying and less time picking up and repairing the pieces (hopefully!)
Lesson One: The Basic Hover
The aim of the game here is to keep the model just off the ground, keep out hands off the rudder and use the elevator and aileron controls (Pitch and roll) to try and keep the model in an imaginary 1-meter square. Smooth floors are great for this lesson.  At first, this will be tricky as the model is hovering in its own downwash; this will help it maintain a height off the ground. As soon as you start to lose concentration, land, and take a few minutes before trying again. Use the auto-level features of the model at first to help get the feel of everything. The aim of this lesson is to be able to compensate for the drift of the model and start to learn to control both the height using the throttle. Repeat this step until you can hover the model without too much effort. When you can, move onto step two.
Lesson Two: The ‘Tail in’ Hover
Once you’ve got the hang of the first step then it’s time to try and fly the model a little higher. More power means more thrust and the potential for faster speed. The aim of this step is to get more control over that elevator and aileron but also develop much finer control over the throttle. Try and keep the model between your knees and waist. The model will be out of most of its own dirty air and you should try and keep the model as still as you can and also maintain the height using the throttle. You’ll notice that as the model moves it can sink a little; learn to compensate for that with the throttle. In this lesson, you’re still not using the rudder at all. In this step, you’re now coordinating your movements with the throttle. Keep at it until you can hover for a battery at a time without needing a break. This can take time to master.
Lesson Three: Moving in the hover
Now you can control the model and keep it still in one place you can start to work on moving it in a direction. When I started this felt like I was letting it wander in the direction I wanted rather than actually flying the model. Use the throttle and aileron and elvartro to move the model around in our imaginary square. If you have the space increase the size to 2m square but try and maintain the height just below your waist so you are looking down on the model. Again no rudder should be needed. The aim of this step is to start to feel how the model moves and get used to both starting the movement and maintaining the height, and also using the controls to then stop the movement when the model is in the position you want. It can feel like the model is ‘sliding’ in the air. I found it easier to imagine the wind from the model holding up the little quadcopter – like balancing a broom by placing the end of the handle in your palm.
Lesson Four: Adding the rudder
 This is the dangerous part for many pilots as I’ve seen lots at the end of step three assume they could fly a multirotor and then try and fly it in the park and get into trouble. Now comes the part where we start to use the rudder to rotate the craft slightly and try lesson three again without the rear of the craft pointing directly towards us. The challenge with any hovering vehicle is that without clever electronics the controls stay relative to the front of the model. Imagine if the model was pointing the right, pushing the elevator forwards will now move the model to the right, not away from you. This takes time to master and this step is missed by many that move to FPV as ‘they don’t need to do that’. Sadly, models can hover and move in any direction so being able to maintain that hover and recover a model with an FPV system has failed is considered by many to be part of being a responsible pilot. At first, just move the model just five degrees round in one direction and try and hover. It can help if you imagine that you are a tiny pilot sat in the model. Alternate the side you turn to and as you master each degree, increase it next time. When you get tired, take a break or try the previous lessons. You can try it without the auto-level features of the model turned off if you're feeling brave. Many complete the whole series using auto-level, that’s fine but I’d try it out and see what a difference it makes. The aim is to be able to hover with the ‘tail’ of the model pointing left, right, and towards you and be able to gently move around our imaginary 2 meter box.
Lesson five: Starting to Fly
Now you can hover in most orientations like a champ it’s time to ‘fly’. Remember – flying a multirotor is just hovering with a sideways movement! Pick a place outside and use a much larger imaginary square, I used 4-5 meters. Fly the model along each leg of the square and bring it to a hover in the corner and then rotate the model ready to fly down the next leg. You can go a little higher here but keep the speed down. This isn’t about racing (not yet!) but you’ll get to the point in this step where you start to turn smoothly in the curves by using the rudder and aileron together. By keeping the model moving you should have less trouble when the model is coming down the leg of the square towards you. If you get stuck, swing the ‘tail’ towards you to regain control and start again. Alternate the direction you fly too – many pilots develop a bad habit of only liking one way round. If you try something and it feels weird, that means you need to practice it more! The aim of this step is to start to fly after all of the lessons you’ve done so far. This part is huge fun and is building on a solid foundation in the previous steps. I did find myself cheating in this bit sometimes and finding the perfect amount of all of the controls so that the model flew in a circle – that’s fun and fine but not that this is about. Fly that square!
Lesson six: The figure-eight
 Just like the previous lesson but now you are flying in a figure eight in the same space. You’ll need better control and tighter turns to do this and it will help ensure that those pesky tendencies to only fly clockwise or anticlockwise are dealt with. The aim of this step is to put all the previous lessons together and get you co-ordinating all of the movements of the controls. If you’ve been using the auto-level feature of the model until now you can try this step with it turned off to see what it feels like without the help. You can also practice stopping the model over specific spots on the ground and performing tighter turns. Again, control the speed and don’t get overconfident. I’ve heard many pilots utter the immortal line ‘Oh, this is getting really easy now..’ just before a spectacular crash!
Lesson seven: The nose in hover
This is a tough one for many but great when you master it. Remember lesson two? This is the same but with the nose the craft pointing towards you. I suggest this as step seven as you’ve had fun flying and can go back to lessons five and six when you’ve lost patience with this bit. Some take this step in their stride, many (myself included) took years to master this one! Use that 1-meter square and hover below waist height (easy now isn’t it). Now use the rudder to rotate the craft 180 degrees and maintain the hover as still as you can. The aim of this step is to complete the ability to hover and recover the model in all orientations. I found that there was a trick that helped me crack this one – move the stick in the direction of the drift. It’ll help you and eventually, it will become almost as easy as hovering in the other orientations. Once you feel you’ve got it then you can play with moving the model about inside the square too.
Lesson eight: The random direction hover
This is a fun one. Hover the model at head height nice a far away and spin it, stopping the rotation randomly. Maintain the hover in that direction for 20 seconds before starting again. These drills will really cement the previous steps into your head. You can also fly the craft to another position between pirouettes to change up the drill too if you like. Many pilots who claim to be able to fly a multirotor can’t do this drill. By being able o do this I’ve recovered many models safely when something wasn’t right.
Lesson nine: Flying for real!
In this lesson you move into a much larger space and practice flying the boxes, figure eights, passes, and random stops and hovers. You’re flying! Well done.
Lesson ten: The final step
Now you’re flying safely then it’s time to move up to a larger more powerful model. Now you can test out the new model safe in the knowledge that you have mastered the basics. Fly respectfully and safely at all times and help others who are willing to learn to fly. Commonly a pilot will want to try FPV, see the next article on how to move from this step into flying ‘first-person view’ safely. Happy flying! Written by Painless360
Hear it First: Join our Mailing List
Sign up to receive new product updates, exclusive discounts, news, and more!

