Let’s talk about Jets – EDF jets.
Hobbyists are spoilt for choice when it comes to EDF jets. Just about every manufacturer has a gorgeous temptation to tease the Benjamins from your wallet.
An electric ducted fan or EDF for the initiated, are growing in popularity and set to become one of the most popular categories. Not all jets are created equal with many earlier examples underpowered and draggy. More recent models generally fly well with adequate power systems installed at the factory. The best thing about an RTF foamy is they have taken the guesswork out of it for you and they're generally well priced. Even with most of the work done for you the odd little hack or modifications can make it even better. Some of the changes will be aesthetic and some performance-based but a little extra effort during the build process will pay dividends when the fun begins. Never skimp on the build as you will regret it. I cannot remember how many Durafly vampires I have owned but they are a perfect example of an EDF jet that benefits from the odd modification here and there. I added a carbon fiber strip to the tail booms, added a carbon-fiber wing spar, and balanced the EDF. These modifications took around 2 hours to finish but the result was a better sound, crisper flight and I wasn’t concerned with stressful high-G maneuvers. In fact, I've given them a proper flogging. Generally, the electronics in most name brand EDF PNF jets are ok but if you’re not sure, swap them out. That goes for any aircraft but more so with an EDF.
Getting Assembly Right!
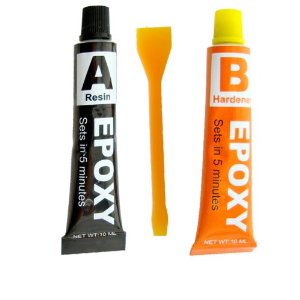
Most kits are supplied with some glue. The first thing you need to do is put it in the bin or the draw where bits and pieces live or go to die. (Everyone has one of those draws). Might come in handy for something but it won’t be building planes. Many spend large sums replacing electrics in planes but will happily use the tube unnamed glue in the box. Glue has a super important role in holding it all together so be sure to get it right.
What glue should I use?
 EPS (Expanded PolyStyrene) Epoxy (Araldite) Foam Safe CA glue (Cyanoacrylate) UHU POR EPO (Expanded Polyolefin) Standard CA (Cyanoacrylate or AKA Superglue) Polyurethane (Gorilla glue) UHU POR (Can be used on all foam types) Epoxy or Araldite (Can be used with caution as EPO can be waxy) EPP (Expanded Polypropylene) Standard CA (Cyanoacrylate or AKA Superglue) Foam Safe CA glue (Cyanoacrylate) Polyurethane (Gorilla glue) UHU POR (Can be used on all foam types) Epoxy or Araldite With that out of the way, grab a cup of coffee, perhaps even a craft beer and start flipping through the manual so you can map out the task ahead. Have all the bits and pieces laid out ready for the build. You’ll find a knife, pliers, painters tape, sandpaper, and a few alcohol wipes will make the job easier. For any component that requires gluing be sure to use the sandpaper to carefully remove the paint first because if you don’t it may become a failure point. Don’t ask me how I know as I won’t tell you anyway. Once the paint is removed dry-fit those parts and make sure it sits together right.
 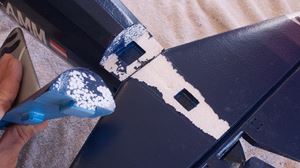 Avoid removing too much material as the goal is only to remove the paint in order to give the best surface to adhere to. It is not necessary to remove all of the paint, but do remove as much as you possibly can. Alcohol wipes are great for cleaning the foam surfaces to remove any oils or residue that may affect the bond. If you choose epoxy, go with the 30-minute variety as forms a stronger bond than the 5 and 15-minute varieties.
Hardware Selection
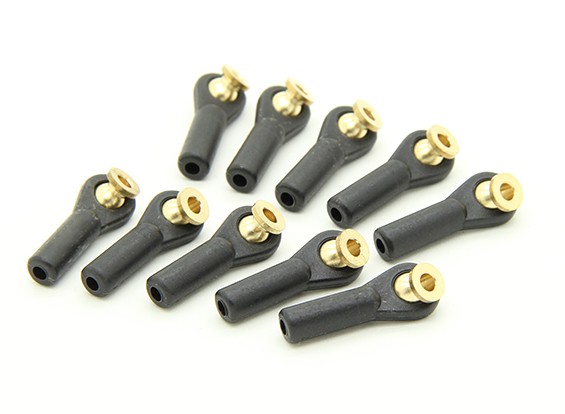
Your jet will be under an enormous amount of stress performing High-G so selecting the right hardware is a must. If you’re unsure about the supplied hardware swap it out. I like to use ball joints and nylon control horns For larger 90mm jets I use adjustable control horns.
Power System
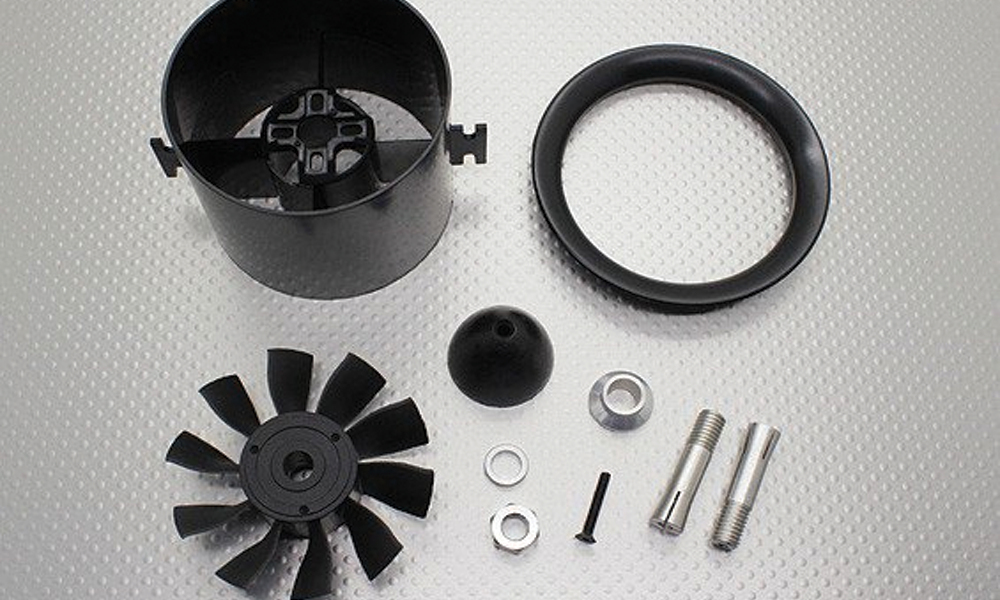
Most, if not all, Electronic Ducted Fan Jets will use high power setups that can generate a lot of heat. You must ensure that the battery, ESC, and Motor receive adequate airflow. You may need to rearrange wiring or adjust the layout to ensure airflow. Failure to ensure enough cooling may result in the failure of one of those components. A good flow of air will keep the temperatures down and increase the reliability of the electronics. Every EDF is powered by a high RPM fan unit which is often not balanced at the factory resulting in a horrible sound, reduced performance, engine wear, and possible damage to persons or property if the fan should fragment. Even a slight imbalance will result in unwanted vibration that will reverberate through the airframe and detract from the experience at a minimum. A magnetic balancer is not a good choice for EDF power systems. It's fine for a propeller on an aircraft but we’re looking adjust .01grams, so the balancer is not sensitive enough. There are many ways to balance a fan unit, but be sure not to remove any material from the blades. You should always add weight because if you remove material you will weaken the blades and it is highly possible the blades may explode. I use super glue to add weight to the fan. The balancing process is time-consuming and fiddly however it’s worth the time. People will compliment you and ask for advice on how they can achieve a similar-sounding system.
Tips and Tricks
When smoothing the exhaust be careful not to enlarge the diameter of the exhaust. This will have the effect of flaring the exhaust, which will result in slowing the speed of the exiting air. By forcing air to pass through a smaller exit diameter it has the effect of increasing the speed of the exiting air. You can search the venture effect for more information on this phenomenon. The numerous raised dimples in the inlet and exhaust ducts create turbulent airflow and reduce the EDF’s efficiency. All radio control planes are put under a lot of stress and you should check your plane regularly for wear and tear. Most issues are very easy to correct if spotted in time but failure to correct a part about to fail is a recipe for disaster.
How to use a wattmeter to test a power system
A wattmeter is simply plugged into the electrical system between the battery and ESC. I use the Turnigy wattmeter, as it's well-known and very reliable. The moment the wattmeter is plugged into the battery the unit will light up and tell you the battery voltage. For the purposes of testing, always use a fully charged battery and one that is in good condition. In the future, if you change to new batteries, be sure to run the wattmeter again and battery condition will affect the power output immensely. This is why people pay more for higher C-rated packs. 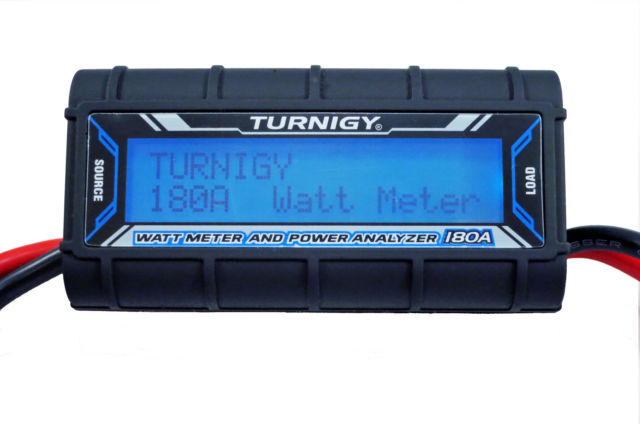 To get a reading you need to power up the system at full throttle but before you do that you need to ensure your plane is restrained and that no loose objects could be drawn into the prop or fan. Slowly move the throttle and watch the readings. Be sure not to exceed the power rating of your ESC, motor, or battery as damage will occur. As you are reading the wattmeter, during your full-throttle test, you may wonder why the voltage is dropping? There are two reasons. As the battery works, it loses some of its ability to push out the volts. Remember volts are pressure. The more amps the battery is pushing the harder it is for it to keep up that pressure. The second reason for the voltage drop is that we are draining the batteries' capacity, which in turn reduces its ability to maintain the pressure. The moment you get to full throttle write down the three key numbers, Volts, Amps, and Watts. Now compare them to the ratings on our battery, ESC, and motor. Is everything within the components specifications? If it is, then we’re good to go! If not, then fix the issue. This may be as simple as choosing a smaller prop or reducing the pitch. If you don’t fix it you’re going to have a bad day.
What do I do if the Watts indicates that I’m exceeding the limits?
We need to remember that amps are pulled not pushed. If you want to reduce Watts, reduce your load. This may mean smaller tires, smaller props, different gearing, etc. If the motor is rated for a much higher current draw you could use a higher rated ESC.
More Watts or Amps is good, right?
Not necessarily, to work out what is the most efficient setting we need to cycle through all of the settings. First, low timing and measure thrust and watts, then medium timing, and so on. Once you have worked out which setting is the most efficient you can try the PWM. Don’t rely on watts alone as you may be drawing more current and just reducing your flight time.
Balancing Steps
 Basic balancing will make a massive difference to the sound and performance of your EDF jet. A reasonably well priced magnetic balancer can achieve a fantastic result. The process is reasonably simple, the fan is placed onto a spindle and gently rotated in order to find and locate the imbalance. All fans will have an imbalance with the better quality units having less of a dramatic imbalance. Never, ever, remove material from a fan, always add material. By adding material to the lightest side of the fan we help to correct the imbalance and reduce the vibration. In a later article, I will cover one of the most effective methods for dynamically balancing your fan. Most of us have a smartphone that is equipped with very sensitive measuring equipment. We can use applications such as vibrate to measure the X/Y to measure vibration and find the position where the least amount of vibration is present. This results in the power system sounding like a turbine as opposed to a noisy vacuum cleaner. A balancer such as the Turnigy Precision propeller balancer is an excellent start for balancing fans. Ducted fans work by accelerating a relatively small amount of air into a high-velocity output stream and any disturbance in the inlet or exit airflow reduces the speed of air. To reduce resistance within the duct you can begin smoothing the surface. Remove any bumps and imperfections like injection molding marks. Exhaust ports should be as smooth and as possible without obstruction. Cabot’s water-based polyurethane can be lightly rolled onto the foam give strength and provide a smooth surface.
Push Rods & Control Surfaces
 An EDF jet travels at high speed so a tight, movement-free control surface is essential for success. If your control surface does not move freely, binds, or has to slop the potential for disaster is high. Slop may result in fluttering on the control surfaces and this often results in the plane breaking apart. There is often little to no sign of flutter until it is too late. It is a good idea to cycle through all control surfaces and check that the surfaces return to the same point each time the travel is cycled. If the surface does not return to the same spot, isolate the issue. It may be the servo, servo arms or the holes on the horn are too tight. I prefer ball joints as opposed to plastic clips however others may have different views. In any event, you need to ensure smooth, slop free movement of the control surfaces. Have fun, be safe. Written by gozerian
Hear it First: Join our Mailing List
Sign up to receive new product updates, exclusive discounts, news, and more!