Written by Painless360
For those of us in the UK, the De Havilland DH100 plane has a special place in our hearts. It first took to the skies on the 20th of September 1946 and was still in use up until 1979 in South Africa.
For its time it was a stunning looking aircraft and along with models like the DH 110 and the Vulcan Bomber defined an era of innovation and unique aircraft design by British engineers. Sat here writing this I can still remember the appearance of these aircraft at air-shows as a boy and the sheer speed and noise and unusual design were always a crowd-pleaser.
These designs are very much the influence on a lot of popular UK culture from the ’60s and ’70s too. Just look at shows like UFO, Captain Scarlet, and Thunderbirds and you can see their influences. So, it’s with that history and nostalgia that I ordered one of the latest incarnations of the model from HobbyKing. This version comes in a Canadian color scheme but my vinyl cutter can take care of that with some RAF markings to stick over the top!

The specs
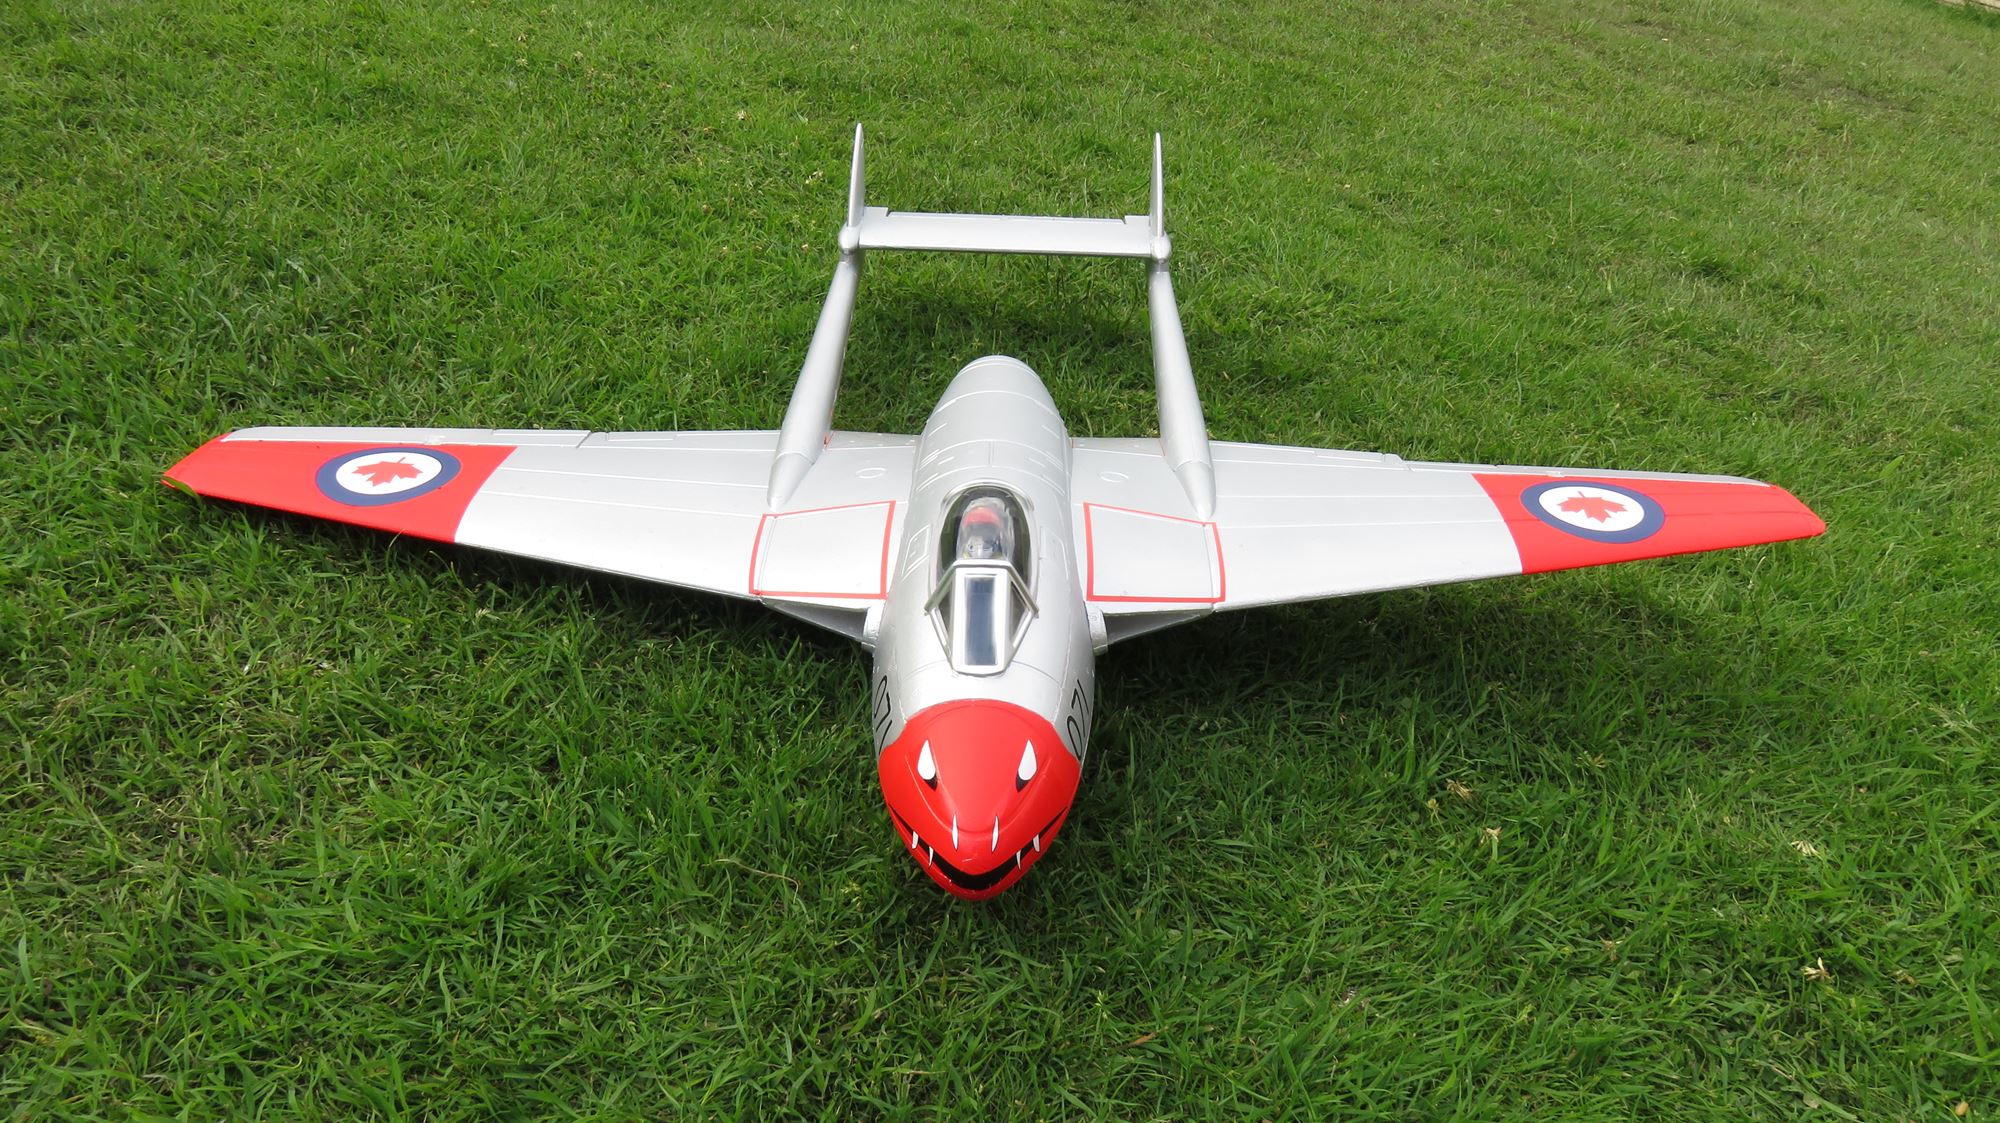
This model uses a five-bladed EDF fan run from a 60 amp ESC. The wingspan is 1100mm and the length 888mm. The flying weight will be about 1100g and the model also features retracting landing gear.
 Sadly the model doesn’t include rudder servos so you’ll be flying with Ailerons and Elevator only. The model has a few changes from the last version available too. The silver paint is a little more realistic and the booms holding the tail in place are now supported by a carbon fiber rod for stiffness. The mold has been improved too so the panel lines are sharper and the final finish a little smoother. In summary – for a model of this size it looks very to scale.

Compared with the actual plane, you’ll notice that there are a few changes to get this iconic jet into the foam. The inlets are a little smaller to provide the strength in the wings and the belly of the model is covered in louvers to help supply the air needed for the EDF but I can forgive that.
Building
 The first job is to make up the canopy that covers the front of the plane and is supplied with a little model figure. I found the model of the pilot to be a little short so have made a 3D printable extension for him so he appears to be sat in a more believable position under the canopy (https://www.thingiverse.com/thing:2402546).
The building is very quick with this model as there are only 6 other pieces – the main body, the two wings, the two booms, and the rear horizontal stabilizer.
 The manual is very clear and the hardest part is gluing the booms into the slots behind the supports in the wings. I’d recommend gluing them first and making sure that they are inline and give them lots of time for the glue to set up. I used hot glue for this and it’s worked well on the finish and the foam.</p?
One boom features the very long servo lead to the elevator on the rear horizontal stabilizer and there are recesses cut to feed that through the wing as you glue in the boom and keep it out of the way so make sure you feed that cable through as you glue everything.
 The wings do not feature carbon supports but are very thick in cross-section. Before you glue the wings into the body of the plane I’d remove the cover from the EDF fan underneath as the side of that hatch are part of the recess for the wing to fit into and if you glue the wing in place with that EDF cover installed there is an excellent chance that you’ll also glue the hatch in place too. Do that, and you’ll never be able to get back into the model without a knife.
I’d use a strong quick drying epoxy for the wings as you need to make sure they are pushed home and all of that huge surface area is glued and making contact. Hot glue will set up too quickly as you push the wing in and not allow you to get the main body/wing faces to touch and glue. Keep those air intakes as clear as you can to help with the airflow.
 The final step is to install the horizontal stabiliser. You’ll need to connect the pre-installed servo into that long wire that runs down one of the booms using the servo plug and then glue it home. Make sure everything is straight and level and check the rear tail assembly is in line with the main wings.
You will need a model setup on your radio for a rudder however as the nose wheel is steerable.
Once you’ve connected all of the servos and ESC to the receiver you are ready to go and fly!
Flying
This isn’t the first version of this model so there aren’t going to be any major surprises here. The previous versions are all fun to fly, forgiving for as a model of this type, and have very gentle stall characteristics.
Hand launches and take off from a runway are both super easy and the smooth underside makes belly landing on grass possible too. I’m a fan of models that allow you to land on something other than tarmac without snapping off the landing gear!
The EDF has a nice range of power but if this is your first EDF it will sound like it’s screaming! Even at a couple of hundred feet, you can hear this model EDF running clearly. The fan unit itself is not bad but as with any EDF not costing more than this model on its own – it could be improved with a balance. The turn of speed isn’t very fast but it can move at full throttle and has enough power for loops and rolls, even at 50% throttle.

The feeling of flying this model is one of a flying wing; I guess that’s thanks to the design of those huge wings and the lack of a rudder. It’s much more stable than some of the other ‘scale; planes I’ve flown and the appearance of it in the sunshine with that duller silver paint is simply beautiful.
One word of caution is the center of gravity. In the manual, it talks about the COG being 310mm from the nose but also talks of using a large pack too. I struggled to get the COG that far back for the first flights and ended up using a 2200 4S pack and had to remove some of the extra foam under the canopy to allow for a taller battery. I shouldn’t have bothered.
 The COG in the manual is too far back and the initial flight was a handful! There is a saying that a nose-heavy plane will not fly well and a tail-heavy plane will fly once. It took all my concentration and skill to bring it down again. The COG actually needs to be about 12-15mm in front of that point so watch out. At that position, you can use the larger battery the manual talks about.
Sadly that landing was a little harder than I wanted and the nose took a little bump. Amazingly nothing was broken and a quick dip into a very warm water bath pulled out most of those wrinkles in the foam.
I’ve highlighted the problem to HobbyKing so maybe by the time you read this the manual will have been updated.
Summary
If like me, you’re a British chap of a certain age or, from one of the many countries like Canada that flew the Vampire in service, this model is a great one to own and fly. The finish is good and the look of the model in the sky is unlike anything else.
It would have been nice to see some of the touches we’ve seen in other recent releases from HobbyKing – LED lights, rudder servos, landing gear doors, flaps –but what’s here is a very capable model for the money.
The landing gear is nice, despite the lack of covers. The nose wheel rotates into position as it drops, looks great.
One thing you may note in acrobatics is that those huge wings will flex a little. A carcon spar through then both and the canopy would have helped but in practice, the wings are so big that any flex is manageable.
 The one thing you do need to remember is that this is a lot noisier than a prop plane. I know for those of you who fly EDF that will be a ‘D’uh’ statement but for many who come to this model from things like the Tundra, Bixler, and EFX models the increase in noise will be a surprise.
You will need to think about where you fly as the smaller 1100mm wing size lends itself to smaller flying fields but that noise may cause you problems in some areas.
There are lots of videos and how-to articles on this model with mods to add the rudder servo, add flaps, and change out that EDF unit too.
While that’s a fun project for the winter, you don’t need to do any of that to enjoy this model of an iconic British design. Fingers crossed for the D.H.110 next!
Hear it First: Join our Mailing List
Sign up to receive new product updates, exclusive discounts, news, and more!