In the last article, we looked at the basics and covered the learning process at a very high level. In the coming articles, I'll look at some of the tips and tricks to help make sure that the learning experience is as pleasant as possible. In RC, as with many other things, you never stop learning - it's one of the fun parts of the hobby.
Technology is moving at a fantastic pace and we are seeing innovation in the hobby almost every week. But you don't need to be an expert in software, radio setup, and aerodynamics to have a great time with radio control What you do need is patience and practice and you'll quickly find that you can fly. With enough practice, you'll find that the effort needed just to keep the model from crashing happens automatically and you can get to the job of actually 'flying' and enjoying yourself.
Resources like YouTube have been a great help in bringing new interest into the hobby but haven't done as well letting pilots know how to get started and how to reduce the pain of those early months. In addition to practice, flying a model relies on good hand-eye coordination and decent reflexes. Those first few months can be hard work and sometimes frustrating as you learn with you spending more time fixing the model than actually flying it.
Choosing the right equipment can make all the difference.
In the summer I had a call from a chap who lives about 30 miles away who was about to give up on the whole hobby as he and his flying friend couldn't get their scale warbird to fly well. It was their first model and was proving too tricky to fly so they were about to throw in the towel. I suggested a better model to learn with and a few months later he popped me a message to say 'thanks' and let me know he has got into the air and was back to enjoying learning.
So, with that in mind this time we'll look at the equipment you'll need to get started and cover some of the 'do's and don'ts when buying your first models. This time we will look at the models and the radio and the next time the other equipment you'll need to consider too.
Choosing the Right Equipment
When I started out, it was a dilemma. Did I invest huge sums of money on the radio and other pieces or try and go 'cheap' and put up with the poorer experience? Luckily the hobby has moved on a lot since then so a decent radio doesn't cost upwards of £400/$500 and a great model doesn't cost about the same.
I see lots of pilots spending thousands on the radio, models, batteries, charger, FPV goggles, and other pieces because they've been told to by other in forums or by watching other pilots on places like YouTube but that's a lot of money and risk for most people. It might be that after trying to fly you find that R/C isn't for you after all and you'll see those pilots selling their kit on places like eBay and can be a great source of bargains (if the kits have been well looked after!).
You don't need to spend that much to get flying and you can do it with less chance of you wasting money too.
Some vendors sell products that come with everything in the box, the model, batteries and charger, and so on. These are great choices if you're not sure what you need but the downside is that the radios and charger are often super-basic and will end up in the bin as soon as you move on in the hobby.
The other option is to buy the pieces and put the kit together yourself. This can have a few benefits, it can be fun but you also learn how the model is made so if you do need to repair anything you already have a working knowledge of how it went together the first time!
Let's look at some of the options that I'd recommend for new pilots.
Plane
Fixed-wing models are one of the most diverse model types in the hobby, scale, gliders, trainers, acrobatic, discus-launch-gliders, wings, hybrids. The choice is endless.
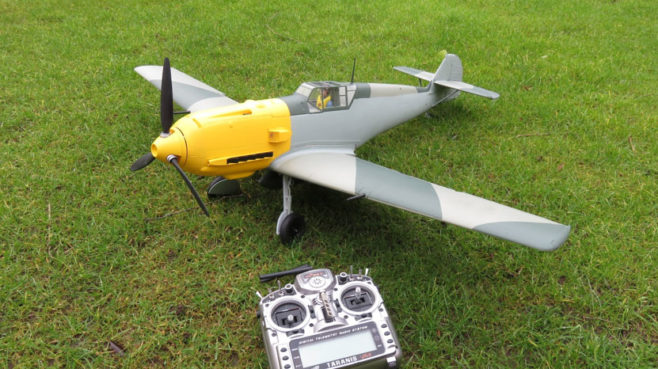
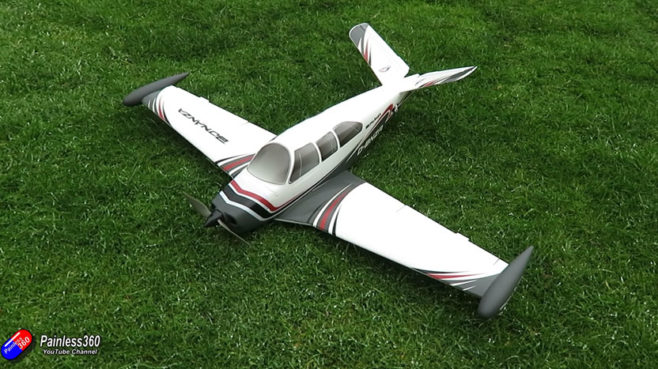
As I've already mentioned, a mistake that many pilots make is to invest in a nice scale warbird, a Mustang, ME109 or Spitfire to learn on. This isn't a great idea as these planes are fighters and designed to be very responsive to the basic levels of stability. Even with some of these tendencies designed out of these smaller counterparts, these models need contestant correction and work to keep in the air.
The most common crashes involve flying into the ground/wall/tree and damaging the nose of the aircraft. In scale warbirds, that is also where the motor and prop are located then you'll not only have to repair any damage to the nose itself but also to the motor and propeller too. That can turn a simple hot-glue repair for a trainer model into a few hours on the bench trying to get all of the soil out of the motor bearings.
So, having the prop and motor away from the nose is a good idea or ideally, not at the very front. Check.
The next thing to look for in the first plane is a center of gravity lower than the wings. The center of gravity is that point where the model naturally balances. It's usually about a third of the way back from the leading edge of the wing with the battery installed and just below the middle of the fuselage vertically.
In those warbirds, the COG is inline, or just above, the wing-line and as a result, you get those quick responses. If the COG is below the wings then it's like hanging a weight from the bottom of the model that 'pulls' the model back to level and helps stability.
OK, so I need a high wing on the model too. Check.
Lastly, the shape of the wing can make a huge difference too. When the wings are angled up like a very shallow 'V' that's called dihedral and again helps stability as the model naturally wants to return to level. Trainer planes often feature an additional raised area at the tip of the wing to increase this effect and those wings are called polyhedral wings. (Don't worry, that's about as far into aerodynamic terms and principles as I'll get into here). So ideally you need a motor not on the nose, a high mounted polyhedral wing on a trainer. The good news is that there are lots of choices for you in this category and these 'trainer' planes are not expensive and easy to repair!
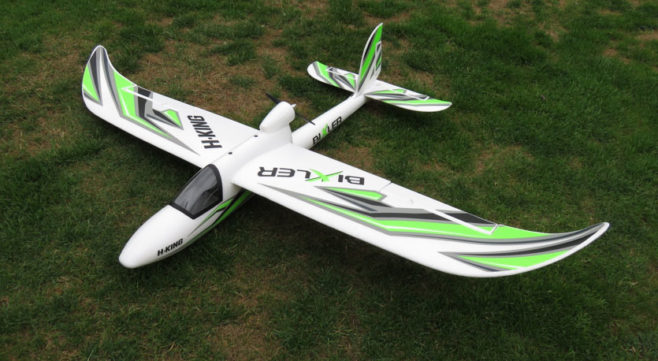
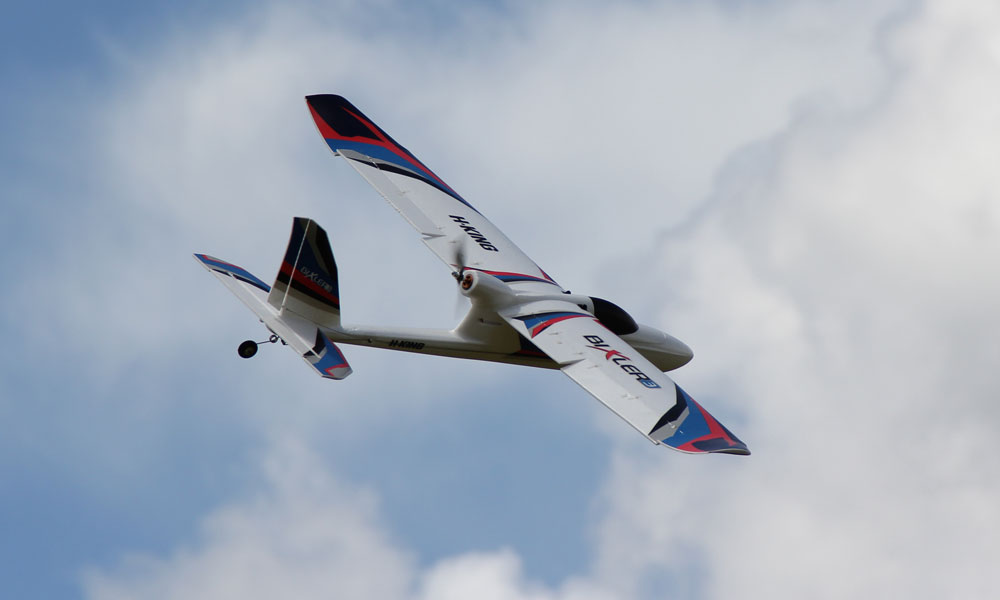
Models like the Skywalker and others give you everything you need in a first model but my pick is the excellent HobbyKing Bixler. There are three of them out as I write this and the Bixler V1.1 V2 and the V2 are perfect choices.
These models are easy to set up, will glide as well as perform basic acrobatics and they survive crashes very well with the motor and prop on their back. They may not look as cool as a Spitfire but for less than £70 you can have a model that will hold your hand through the entire learning phase.
The lack of landing gear also means that you can land then on pretty much any flat (and some not so flat) surfaces without worrying if the turn you have in the field is too rough for the landing gear on the model.
The other type of fixed-wing model that you'll come across is the flying wing.
Flying wings are very cheap and simple to make and setup but I don't recommend them as a first model unless you have some flight experience already. Although they have the prop at the rear they feature none of the other helpful features I've covered in this section. I'll talk more about wings when we take a closer look at the fixed-wing model setup in a future article.
Fixed Wing Stabilisers?
One of the questions I get a lot is about the use of stabilizers.
These are little boxes of electronics that sit inside the model between the radio receiver that is listening to the commands from the radio in your hands and the servos that move the control surfaces on the wings and tail of an airplane.
Their job is to help you fly the model and provide support for the movement you'll get when the model encounters a gust of wind but can also provide features like 'auto-leveling' where the model will pull itself back to a straight and level attitude when you let go of the sticks.
Many pilots have very strong opinions about these types of support but for me it's simple – if they help you fly and get into the air safely then it's good. Once you get more confidence, turn them off and learn to fly without them.
Relying on them can become a limiting factor in moving onto other models successfully but if you are happy with that and can't manage without them, then that's great too. It's about having fun!
Quadcopter

My first 'real' quadcopter was made for me by Armattan over 5 years ago and is still in my collection. I wasn't comfortable building one on my own as I didn't have experience with the technology or the confidence to build. What I haven't realized at the time was that lack of knowledge would also make the repair of the model, when I eventually did crash it, challenging too. With so many models available, and all those videos of pilots on YouTube who've been flying for years and make it look so easy, you can be lulled into a false sense of security and get yourself a fast agile model made for shipping around a high speed. And while these models are fun to fly, they would not be my choice for a first quadcopter.
Before you order one of the great models that come built and just need a few final tweaks and binding to your radio I'd order a small, indoor model like the Hubsan X4. Why get a small indoor model like that, why not 'bite the bullet' and start out with a larger model? The answer is simple - lower repair costs and confidence.
These smaller indoor quadcopters usually come with the little controller/radio and everything you need in the box. Many now include basic FPV so when you get to that part of the hobby you also have a practiced craft. Setup is a breeze and it's all ready to go once the batteries are charged.
Because of the small size and low weight, the model will shrug off crashes and mishaps, and while I still wouldn't fly it near your new flat-screen TV, it provides a great way to teach yourself what the sticks and controls on the radio do – throttle, pitch, roll and yaw and how to make the model move in the way you want it too.
I struggled to hover 'nose-in' (more on learning to fly in the next few articles) with the larger model as I was worried about damaging it, or myself. But over a few weeks one winter many years ago, I practiced several batteries each evening hovering in the lounge until one day it clicked. Every time I made a mistake and crashed it, I simply popped it upright in the middle of the floor and tried again.
Radio
This topic could be an article in itself.
Again, it's a choice between cheap or something that will last you many years. Modern radios are very powerful but can appear complex to setup but good radios that will last you many years and support multiple models on the same radio can be bought for less than £100/£130.
Radios like the X-Lite and QX7 from FrSky offer a lot of features for the money but OpenTX (the software that runs on the radio) can appear complex for some to set up. With a little work, you can make those radios do pretty much anything!
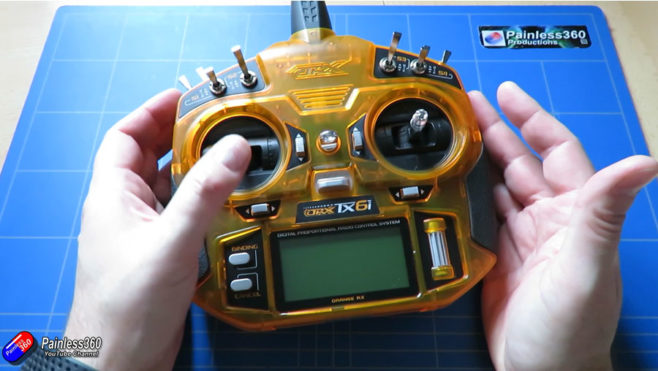
Other options like the Orange DX6i radio from HobbyKing are solid workhorses too. Much simpler to set up and inexpensive but less flexible when it comes to programming.
I started out with the radios that came with the 'ready to fly' models in the early days but then invested in modern radio and swapped all the receivers in those models to ones that worked with the new radio and the setup a model memory for each of them. The result was better control and only one radio needed taking to the field as well as keeping charged!
Whatever you choose there is only one thing to think about – the 'mode' of the radio. This is how the main four controls; throttle, rudder, aileron, and elevator are mapped to the two sticks on the radio itself. There are four modes with the most common being Mode1 and Mode2. On modern radios, you can change this but once you've learned on one setup, which becomes the one you'll use for the entire life, so see what others are using and choose the one that right for you.
If in doubt then I'd go for Mode2, but that's my own preference.
Next time
Next time we'll look at the other parts of the technology you need. There are the batteries and chargers, a simulator (as crashes in the virtual world cost you nothing but still teach you something) and our first look at FPV where you can fly by looking at the image from a camera mounted on the model itself.
Once we've covered all of the kits we can get into the nitty-gritty about learning to fly safely and then how to set up, maintain, and troubleshoot your models. Until next time!
Written by Painless360
Never forget to clean your HTML code and double check your content before publishing the articles!