When I first started flying RC I went through many motors. I'm sure that many of you would be familiar with this.
Need more thrust = larger prop = larger amp draw = large amounts of smoke pouring out the front of the plane. Some may have given up but that wasn't me. I still had more motors to burn out before I learnt what a thrust calculator is. More on that later. I guess a door is never closed without one opening. What was I to do with all these burned out motors that let out the magic smoke? Rewind them of course. You might ask why you would rewind a motor. Well, it's easy, it's cheap, and the money is better in my pocket than someone else's. I also enjoy a challenge so why not. There are advantages to rewinding your own motor and this is due to the quality of winds coming out of China. You can pack more copper in the motor and thus get more power out of the motor. Rewinding is nothing new and there are many in the RC hobby that rewinds their own motors and for all sorts of reasons. Of course, many are looking to rewind damaged motors but others are looking to get extra performance out of their motors. There is no great skills required and only a few cheap parts required.
Required
- Colored Felt Tip Pens
- Liquid Paper
- Laminated Copper Wire
- A little patience and time
First things first, It's very easy to make mistakes and get the windings wrong. This may end up in frustration and burnt windings but this is no reason to stop trying. Simply have another go. Take the windings off and try again. Provided you're learning from mistakes and getting better there is nothing to worry about. You'll be an expert in no time and maybe even helping out others to do something with the burned-out motors at the bottom of the hobby box. My first motor winds were successful but I used too thin a copper wire and this resulted in too many turns of copper being wrapped around the stator (What's a stator I hear you ask? We'll get to that next) which resulted in the motor KV being quite low. The motor had lots of torque and it could swing quite large props but it was not able to spin them very fast, at least at the size of prop that I wanted. Remember that all is not lost as you could try the next using a higher cell count batter to see how that performed or you may even have another task in mind. Remember that volts x KV = RPM e.g 11v x 1000kv = 11000 theoretical RPM. I say theoretical because when the motor has a load of a prop it's about 15% less. The battery will spin the motor faster and it may be enough. I learnt as I went along as much of it is trial and error. My next motor wind was too fast and it was not able to spin the motor slow enough to stop from overheating. It worked fine for a smaller prop so I left that in my draw for another project as it was a powerhouse. If you're looking, wind the motor the same way as the factory did it is important to measure the wire. You can do this easily with a digital calliper an also be sure to record the wire count. I found that taking notes with every build allowed me to refer back to them each time I had a go at rewinding a motor. Useful notes on the number of turns, copper used cell count and things of that nature. Before we move on let's talk about all the parts in the motor.
Brushless Motors
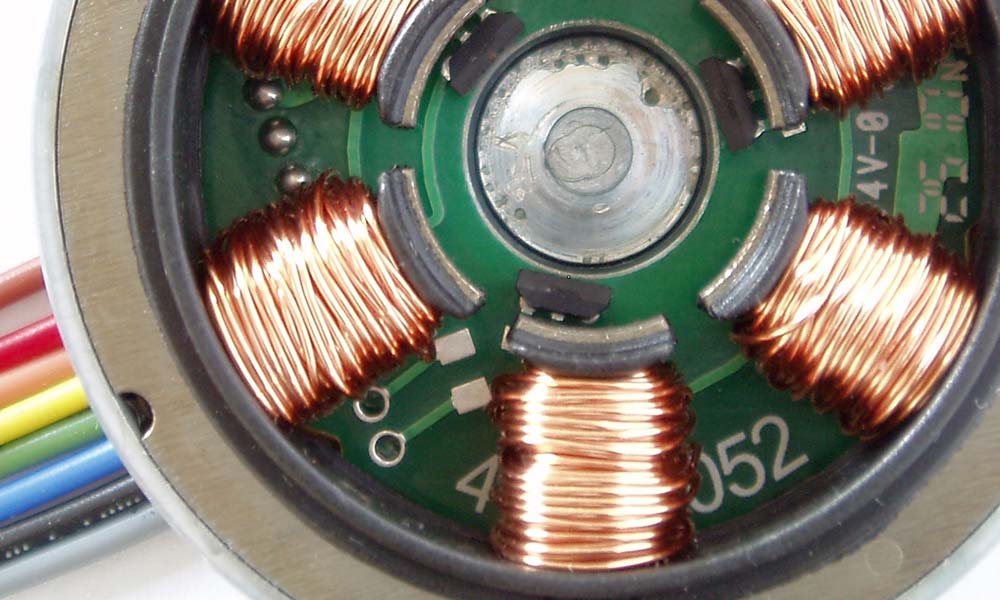
Stator
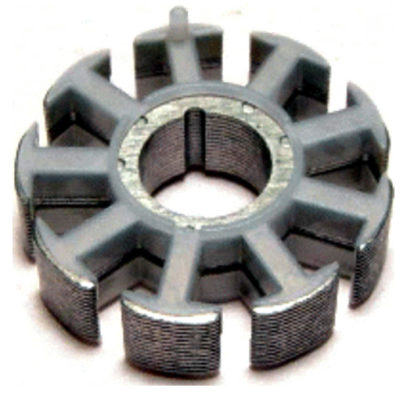
The stator is a stationary component of the motor. The stator does not spin and is permanently bound to the body of the motor. The copper windings are wrapped around the iron stator inducing a magnetic field when a current is passed through the coil.
Rotor
The rotor spins around the stator and windings. The rotor contains permanent magnets which are usually rear earth magnets. These are extremely powerful magnets and care should be taken when handling them. If they come to lose and are brought together without the care they can crack and are then useless for this purpose. It is also easy for them to bit into loose skin such as the webbing between forefinger and thumb.
Bearings
Generally, the motor is fitted with two bearings. One is fitted the top of the stator and at the base of the motor. Bearings should be removed carefully and set aside. Damage may occur if these are tapped out incorrectly. If a bearing must be removed then it is imperative that the outmost portion of the bearing is pressed out. Pressing out the inner section will deform the bearing and render it useless. When compared to a bush, bearings improve efficiency and serviceable life has given less resistance and the chance for foreign particles to enter the bearing surface.
Windings

Windings or Magnet wire is essentially an enamelled wire. Copper wire is coated with a very thin layer of insulation. The insulation allows the wire to be wound around the stator without shorting on other stators and of course to ensure the electrons pass through each wrap. Motors are not the only device to use enamelled wire as it is commonly found and used in the construction transformers, inductors, speakers, hard disk head actuators, electromagnets, and other applications that require tight coils of insulated wire. The wire itself is most often fully annealed and this makes the metal quite malleable. Copper does work harden quickly so care should be taken not to stress the copper by winding and unwinding.
Magnets
Neodymium is a metal which is ferromagnetic, meaning that like iron it can be magnetized to become a magnet, Neodymium magnets have replaced Alnico and ferrite magnets in many of the myriad applications in modern technology where strong permanent magnets are required because their greater strength allows the use of smaller, lighter magnets for a given application. Neodymium magnets when larger are very dangerous and quite capable of crushing a hand. Spoiler alert. A cadaver hand is used in this video but you get the idea.
Getting Started
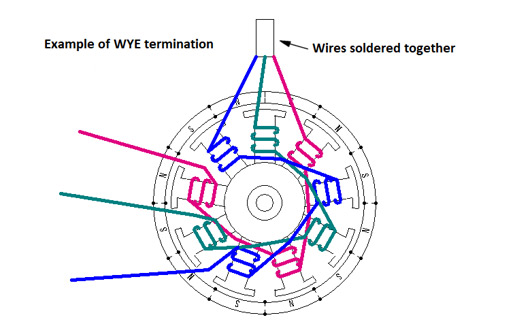
I highly recommend that you reinsulate the stator a short can easily destroy your speed control. There is a slim chance that whilst you're wrapping the wire around the stator the copper could be exposed causing a short. This is easy to protect against and is a good insurance policy. You could apply liquid paper to the inner parts of the stator where the wire is wrapped or you could also wrap dental floss around the stator. Whilst stators are generally already insulated there is the chance that it could be damaged whilst being removed or during the incident that caused the motor to require a rewind in the first place. Whilst you are disassembling the motor carefully note what type of termination is used. Below are the two termination types that you will encounter.
Delta
Example of Delta Termination

Winding Types
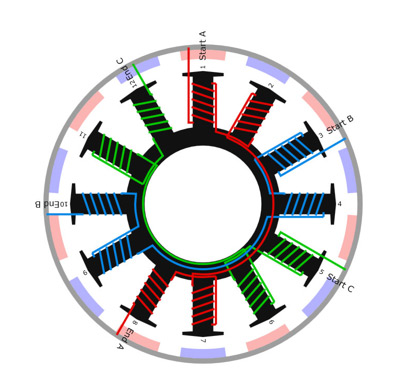
There are generally two types of windings that you may come across. These are described as dLRK and dLRK Evolution. dLRK [12N10P & 12N14P] dLRK is the most common winding scheme found in the majority of model Outrunner motors on the market. As with all motor rewinds carefully note the direction of the winds as this is critically important for the motor to operate properly. Connect (Start A - End C) (Start B - End A) (Start C - End B)
dLRK Evolution [12N10P & 12N14P] Another variation on the dLRK scheme is the Evolution. You need only join the wires together where they exit making termination very easy. This is probably the most popular winding for 12N14P motors used by hobbyists today. Connect Together (End of 12 - Start of 1) (End of 4 - Start of 5) (End of 8 - Start of 9).

Winding The Stator
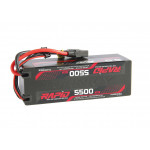
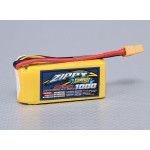
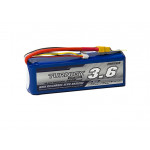
If you were able to carefully unwind the copper and count the turns you will be able to rewind the motor with the same number of turns. Alternatively, you could choose to add more turns or use a thicker wire(s) and add fewer winds which will result in lower kV (slower RPM) but more torque. This means the motor could swing a parker prop or use a bigger spur gear. If the motor previously used 8 turns and you liked the performance you could try again. You may find that when you wind the motor by hand you can use thicker wire and this is because you can manually push the copper together and in doing so can increase the performance significantly. This was my experience after many rewinds. Begin by coating the outside the stator with liquid paper and allowing to dry. Using permanent markers colour each section so the referring back to the winding schema is easier to follow. Using the felt tip pen you can write the pole number on each stator. Start winding the copper wire around the stator but note the direction and number of turns. If you are using multiple strands of copper you treat this as a single wire and wind around the stator the correct number of times. Once you have finished winding the first phase you should remove the varnish from the copper wires and tin with solder. Using a multimeter check continuity at the ends of both wires. Temporarily join the wires together and place one end of the multimeter on the wire and the other on the stator. You need to check that the copper is not shorting on the stator. If continuity is detected you will need to remove the copper winding and reseal the stator and try again. If no issues are detected you can move onto the next phase and repeat the process. The phases can be joined together and the motor loosely assembled for testing. Normally we would use a LIPO battery with an ESC and motor, however, in this case, we would try and use a power source that is not capable of outputting a massive amount of current. A 12v 1amp power supply is perfect. The reason that we use a low current power supply is to avoid damaging the ESC in the event the motor was wound incorrectly. Using a LIPO will result in an instant failure of the ESC and generally the motor too. If the motor spun correctly you can try a larger current power source like NIMH or AA batteries to power the ESC and motor. If on the other hand, the motor did not spin correctly you should look at the windings and double-check the direction of each winding phase. If you find an incorrect phase it must be unwound and wound again, however, the copper must be discarded. Do not attempt to use the copper again as the varnish may well be damaged. So that is motor rewinding. Not as difficult as it might seem. Best of luck and happy landing.