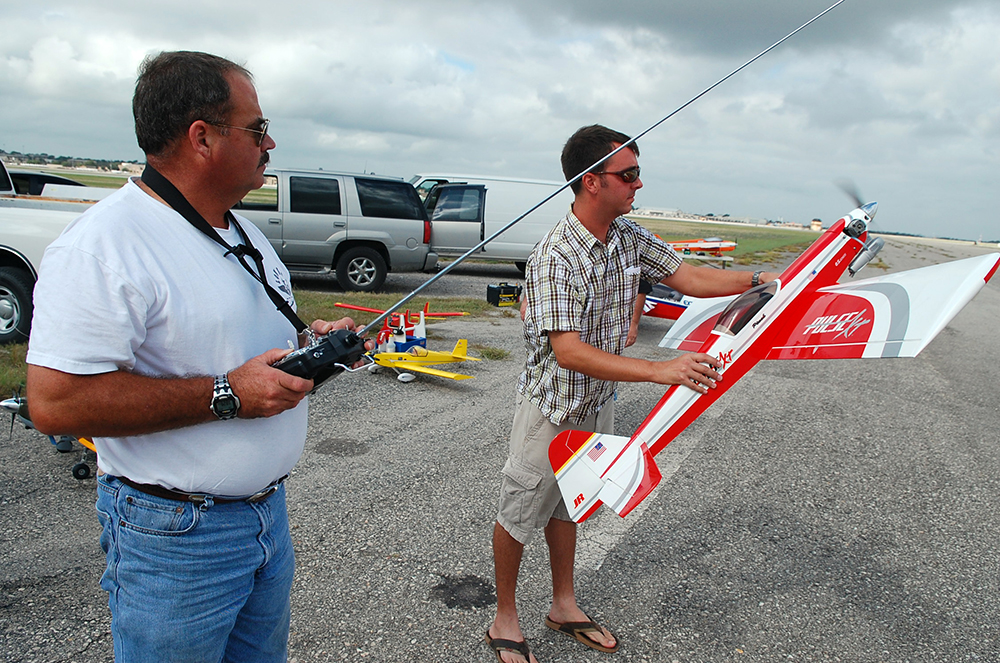
People have been flying model aircraft for almost as long as the first successful flight of the Wright Brothers.
As technology became available, a smart chap strapped a noisy little internal combustion engine to the model and enjoyed and the trend caught on. Fast forward a few decades and land has become more scarce as the urban sprawl continued into rural areas. Homes encroaching on the lands surrounding our model flying fields and I can guarantee you that they won’t appreciate aircraft noise as much as we do. It’s one thing to come down and fly for a few hours and head home but those new neighbors live there and the novelty of model airplanes will wear off. This is the point where you start having trouble with neighbors, councils, and courts.
Where Do You Start?
Flying model aircraft provides enjoyment for many but let’s face it, there is nothing appealing about the buzzing of a 2 stroke glow engine or a bloke that could not be bothered to balance his prop. I could imagine those sounds grating on the nerve of neighbors if not addressed you can expect to see complaints start to roll in. I guarantee that once you get a complaint they are contagious and people that never had an issue with the sound previously, all of a sudden feel that it is pertinent to make a complaint. The key is to be proactive so that complaints don’t start rolling in. Once that happens it's generally very hard to roll it back as local councils are always going to side with a resident over a movable land user. So with that in mind, the absolute last thing we want to do is upset anyone. The list below is designed as a guide to assist clubs and members reduce noise and put in place strategies to reduce noise.
1. Sound Policy
The first step is to implement a sound policy at the club level. The committee may need to include this in the club rules and ratify this into the constitution or statement of rules. Each country will have different laws that cover clubs and associations so be sure to get it right and right and add it to an official place where it can be enforced. At the same time ensure the rules allow you to take action against members who break the rules and ensure the rules are enforced. If you lease the property from a local council or government agency talk with your lease contract and determine what their thoughts on noise are. This relationship will come in handy if you get a complaint because you can demonstrate you have worked with the council to develop a policy and you have enforcement policies in place. Think of how handy it would be if you were to be confronted with a complaint, to know and be able to state that your flying site is within the noise prescribed limits. 80-90db is fairly common and totally achievable for all-electric & EDF models. Nitro and gas models may well fall under the noise limits but may require the fitting of a genuine muffler. A genuine muffler muffles sound, but unfortunately, way too many manufacturers fail to understand what a muffler is meant to do and treat it more like a device to export exhaust gasses and lubricant oils.
2. Sound Meter & Testing
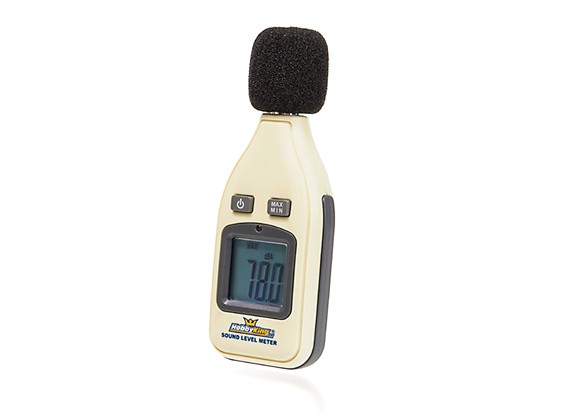 If you don’t already have a sound meter, buy one and start examining aircraft with a view to assist members in reducing noise. Test everything on the flight line and keep records of the assessment date with either a pass or fail. Set a date for compliance 6 months from the ratification of the policies into the constitution. Send out reminders to members that sound testing is now in effect and the compliance date is looming. Include suggestions from members and testing to take place prior to the compliance cut-off. A great example of a good device to use to test the sound is HobbyKing's Digital Sound Level Meter. Once the date rolls around you will need to be vigilant as there will be members who believe they are special and above any rule or legislation. Be prepared to deal with those members are they will fight authority. Don’t budge and be prepared to enforce the disciplinary measures should the person continue to fly. You will most likely lose one or two members and this is normal. It is not ideal but it signals to members that they are free to leave if they wish. Remember that this must always be positioned in the best interests of all members and the security of the club facility. ALL reasonable people will understand this.
3. Self-Policing Culture
You cannot be there all the time so encourage a self-policing culture where members will test one another’s aircraft and record them. Encourage members to report fraudulent activities or non-compliance. The general way to deal with offending members is a warning, followed by a 1-month suspension and eventual termination. The example will be sufficient for the rest of the membership to understand there are consequences should the new rules not be followed. At the one-year mark, it will seem normal and people will have embraced the new rules. You will find members become interested in reducing noise and almost treat the activity as something to aspire to. Even a badge of honor or bragging rights when they record a very low sound level. For many models, they sound much better when props are balanced properly and any unnecessary vibration has been illuminated from the model. There are many sources of noise but we should start with the obvious culprit's fist. If you start with the engine, exhaust and prop should isolate much of the noise but we can dive deeper if required. Most issues can be addressed through these three components. In the early days, model engines ran without any form of silencing, and this leads to unnecessary noise complaints. Mufflers were eventually adopted but there is still a great deal of improvement that can be made to reduce noise.
4. Propeller Noise
The good news is learning how to balance a propeller is a fairly simple process. It's a skill worth mastering because you’ll continually need to balance your props into the future. Nothing sounds worse than an unbalanced prop, however, reducing vibration in your plane is highly desirable because vibrations may weaken the structure, fatigue parts, and cause failures over time. A well-balanced propeller sounds great in the air and you can hear the difference. Purchase a decent prop balancer. They range from around $1.50 to $30.00 and I’ve included links to a few balancing tools that I have used. Purchase a good one as they last forever and you’ll never have to buy another one. I’ve included the cheaper finger balances because they are really handy to have in the flight box. If you break a prop at the field a finger prop is perfect to get you going again. 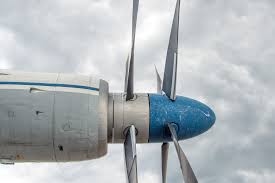 The first step is to check the balance shaft is running true. Remove the spindle shaft from the prop balancer and run it across the glass. Ensure that it runs true and smooth and that the shaft is not bowed or rolling rough. If it is not running smoothly check the shaft for debris or swarf and try again. If the spindle shaft is bowed, don’t use it as you’ll never, ever achieve the outcome you’re looking for. Check the distance from the inside of the prop adapter hole to the tip of each blade. The distances should be equal. If there's a discrepancy between the two measurements (if there is, it shouldn't be much), carefully sand back the longer blade until both sides measure the same. Retain the original shape of the tip. Check that the prop is rotating evenly on the motor shaft/prop adapter. If there's a noticeable wobble, it's possible that the hole in the propeller is not perfectly perpendicular to the hub. This may be easier to see side-on. If a prop gets very badly damaged, never try a repair job. Always replace the prop.
5. Balancing Procedure
The aim of the exercise is to be able to spin the prop within the balancer and have it stop without a bias. Fit the prop to be balanced into the balancing tool (as per the instructions) and stand the tool somewhere where the prop can hang freely, a vice is an excellent spot to work from. You will need to keep the area free from air movement so if required use a door snake or towel to stop any likely draft into your work area. Gently spin the prop and let it come to a natural stop without interference, when you spin the prop you’re aiming for no more than a couple of rotations at most. Do this a few times too and take note of the heavy blade. Rotate the blade on the balance spindle 180deg. We are simply trying to observe if the bias is maintained or if it shifts. If it shifts, the spindle may be out of you have not tightened it properly. If the prop is observed to return to the same position after rotating 180deg you can proceed to the next step. Do not proceed if you’re not getting repeatable results because you must locate the fault prior to proceeding.
6. Correcting Imbalance
The heavier blade will hang lower than the lighter one so the objective is to even up the imbalance. Always add material rather than remove it and it's best to add material to the outermost part of the blade. Start by lightly sanding the backside of the lighter blade. You are not trying to move material from the blade but rather remove oil and grime to give the CA glue an excellent surface to adhere to. Start by adding a drop of CA and using a Q-tip to move the glue around. Spray once with the accelerator and allow hardening. Try spinning the prop again, to determine how successful the addition of CA was. A correctly balanced prop will come to rest, at any position, without tipping one way or the other. Don't look for just a 3 o'clock - 9 o'clock position.
7. Hub Weight
Sometimes the hub of a prop can be heavier on one side than the other. This is generally the case when a prop prefers to rest horizontally and when rotated 180 deg returns to the original position. We can address this by adding weight to the hub and an excellent starting point is the addition of tape. I use duct tape or fiber tape for this and you simply trying to ascertain how much weight is required to balance the prop. After adding the tape, rotate the prop 180deg and try again. If you are lucky, the prop may have recesses in the back of the prop where you can add weight. This would be the preferred option because drilling a hole into a prop may weaken the structure. Propeller tip speed has to be kept to 350mph or below. Apart from being hard to achieve, this testing was done with traditionally shaped propellers (i.e.flat tips) that make lots of noise, do little work, and are inefficient. The new rounder and thinner tips like APC use are a lot quieter and so the maximum limit can be raised to around 400mph. Every additional reduction of around 50mph extra tip speed reduces the noise by approx. 2dB, so lowering the tip speed by 75mph means roughly reducing the noise level by half! In order to keep the noise down the tip speed must be reduced. The way to do that is to use a higher loading propeller. e.g. a 60 size engine using an 11″x7″ prop turns at 13,500rpm and has a tip velocity of 442mph. Change the prop to a 12″x8″ and the rpm will drop to around 11,000rpm with a corresponding reduction of tip speed to around 393mph, around 50mph reduction in tip speed, and therefore a reduction of around 2dB – not brilliant but a good reduction in noise levels.
8. What prop should I use?
If your 2 blade prop has been balanced and you are still unable to reduce noise then consider using a 3 bladed prop. If we can keep the propeller tip speed at 350mph or below we can significantly reduce noise and this chance alone can reduce the noise by around 2db or about half as loud as it was previously. Round tips are much quieter than flat-tipped props so consider trying a number of different props to get the outcome you’re after. Choose a propeller that allows the engine to achieve an rpm just above maximum torque/power, for most engines up to 1.00cu in this is approx. 10,000rpm. This allows the use of a larger and more efficient propeller. A large propeller spinning slower can produce as much thrust as a tiny prop revving away. Did you know that a “real Spitfire prop turns at 1,250rpm flat out, and just look at that performance! A larger loading prop is almost always quieter on the same engine because it is turning slower and this equates to lower prop tip speed.
9. Vibration
Any hollow space will act as an amplifier for sound and a wooden hollow air-frame is perfect. If you were setting out to create an amplifier for the noise it would look a lot like an airframe. Take a look at a drum, bongos, or other tribal instruments and many are hollowed-out objects. To stop your airframe from turning into a flying bongo drum we need to isolate the vibration from the engine making its way into the frame and we can achieve this by damping the vibration. It is up to you how you achieve the damping but you could expect a 2-3 dB reduction if done properly. You could try your luck with shock isolation mounts between the engine mount and the firewall. There are quite a few manufacturers on the market all with similar offerings. Best to take a look and see what best suits your needs because there is no one size fits all. Things like engine size, position, and orientation meant that you have to get a little creative when you install the damping. You may also like to install a rubber o-ring between the engine mount and the firewall. Any of the positive changes will add up to reducing vibration. If you find your aircraft vibrates worse at different throttle settings you can guarantee that something is not running true. It will most likely be the prop or prop shaft and you can either balance the prop or replace the shaft or adapter if required.
10. Induction Noise
I think many of us would overlook intake noise and focus on the noisy part of the engine, the exhaust. Don’t be fooled, the carburetor sucking in the air is quite capable of adding to the overall noise of the aircraft. Fitting an air filter eliminates this and it also has the added benefit of protecting the engine from ingesting dirt and other particulate matter. You will find that you can use the air filter from an RC car, or you can make something if you wish. Just be sure that you’re not restricting the intake. Something as simple as foam pushed into a hose could be sufficient to reduce noise. Pretty much all 2-4 stroke engines can be fitted with an air filter to reduce noise levels and protect the engine at the same time. Although I’ve not been able to confirm for myself, some have suggested that reducing the nitro content of the fuel you use may reduce noise because it is less volatile and does not detonate as violently at lower concentrations. Remember that you still need some nitro as it not only increases the performance but it also helps at idle. If you go for zero nitro mix you’re just going to have a poorly running engine that unreliable and that’s something you don’t want on a plane.
Conclusion
There is no one size fits all and you’re going to have to try many different options to get your aircraft running quieter. Be prepared to run through all of the suggestions as they will have a cumulative effect. If you do get your aircraft under the sound level quickly, consider the rest of the options anyhow as vibration has a negative effect on all the parts in the model. Choose your exhaust system carefully and look for more than just an exhaust port extension. Genuine mufflers are a little pricier but they make a world of difference. Try one, you’ll be very surprised. If you place your finger on the exhaust of the muffler you see how quiet a motor could be. Use rounded tip propellers and avoid flat-tipped props because they are inefficient and noisy. There are some great props on the market to buy a few a see what gives the best results. Select the correct propeller and void tip speeds above 350-400mph. Mount your engine so that it has some damping a this can significantly reduce noise. Try a fuel with a lower nitro content. You may find that you notice no difference in performance and have just been paying more for the privilege all these years.
Hear it First: Join our Mailing List
Sign up to receive new product updates, exclusive discounts, news, and more!